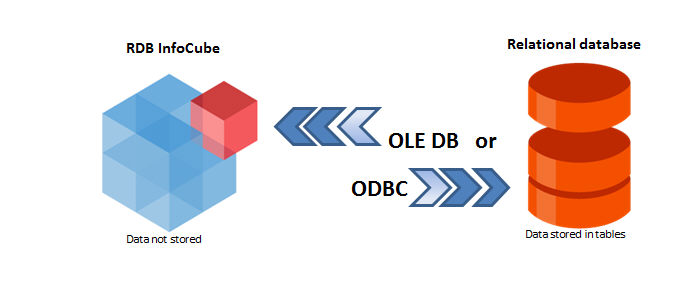
An RDB InfoCube is an InfoCube for which data (the InfoCube cells) is physically stored in a table of a relational database and not into the Board multidimensional database. The RDB InfoCube definition is a protocol that maps fields of a relational table to the dimensions and the measure (in most cases a value filed) of the InfoCube.
Whenever a user views the InfoCube in a report, an ODBC or an OLE DB connection to the external relational database is established and data is retrieved from the relational table through a SQL statement.
An RDB InfoCube accesses data from a relational database on the fly.
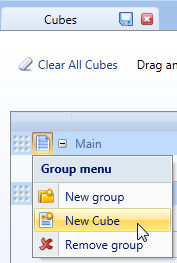
To create a RDB Cube, open the cube transaction, click on the actions icon and select New Cube
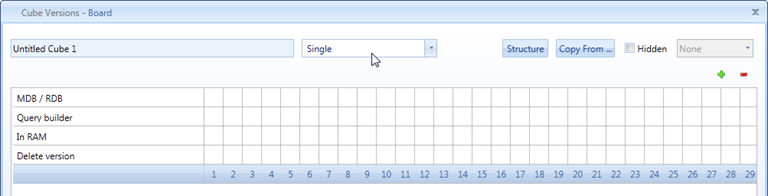
• then type the name of the ROLAP Cube and select the data type,
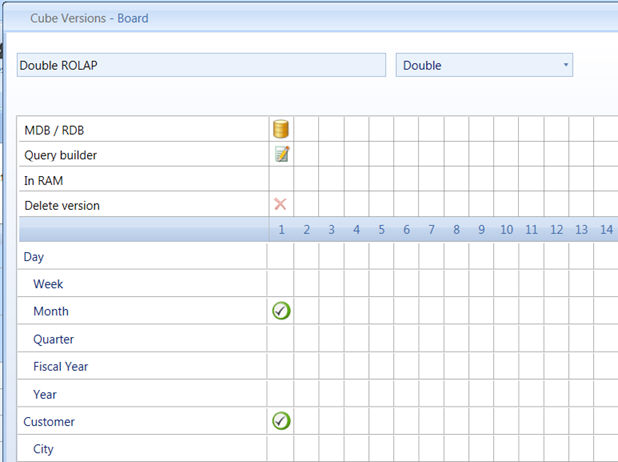
• Click the Structure button and select the InfoCube’s dimensions. The structure selection window shows all stand-alone entities and entities at the base of hierarchies.
• Define physical versions choosing details level, in the first column. To add entities to a version click the version-entity intersection cell. For example to define a version by Month-Customer-Product, click as illustrated.
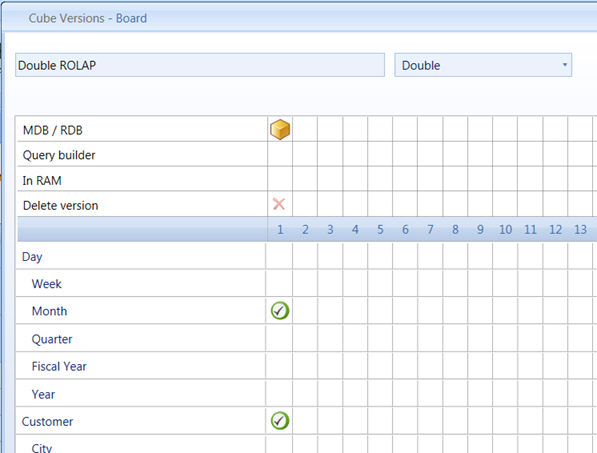
• Change cube type by clicking on cube icon
• As per definition, ROLAP cube has just only dense entity. If sparsity has been defined, will be replaced from dense ones.
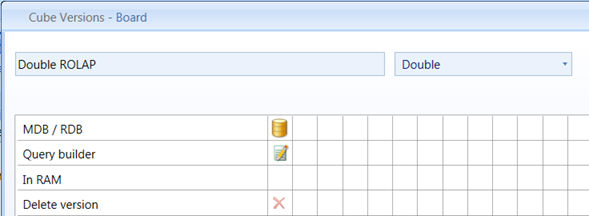
To configure RDB click on Query Builder icon
The protocol definition window shows the InfoCube's dimensions and measure that must be mapped to the relational table.
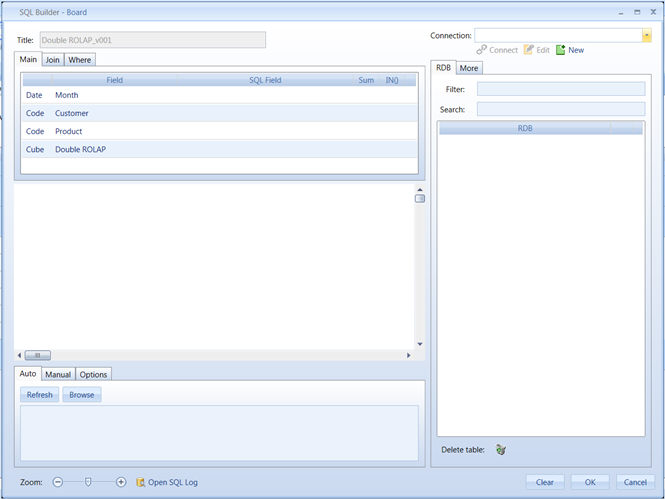
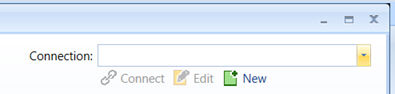
First of all is necessary create a connection to DB, it can be done through ODBC connection or OLE-DB. On the right top of the windows, there is a set of commands dedicated. Select the ODBC or OLE DB connection from the RDB drop-down list. The “Connection” drop-down list only shows the recently used ODBC and OLE DB connections. To select an existing ODBC connection which is not listed in the RDB list, or to create a new OLE DB connection, click the connection “New” icon
For details on how to create and configure a ODBC or OLE DB connections refer to paragraph Defining an OLE DB or an ODBC connection.
To create new board connection, select the RDBMS type from the RDBMS drop-down list. If the relation database you are connecting to is not listed, set the type to General.
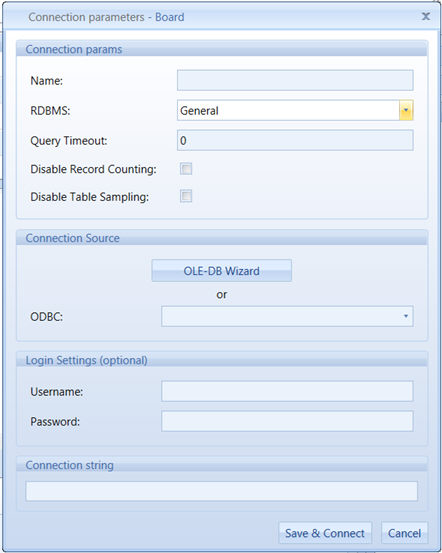
Query Timeout: Set of waiting seconds. When you're using an ODBC database, such as eg: Microsoft SQL Server, there may be delays because of network traffic or heavy use of the ODBC server. Rather than waiting indefinitely, you can specify how long to wait before the database engine produces an error. This setting may not be long enough to allow some queries to run against ODBC data sources.
Disable record Counting: Enable/disable counting of affected rows in a query.
Disable table sampling: Enable/disable sampling
According to your source connector, select OLE-DB or ODBC and add login settings if needed.
Click the Save & Connect button.
After connecting to the data source name, the tables and views of the relational data source are listed in the RDB panel.
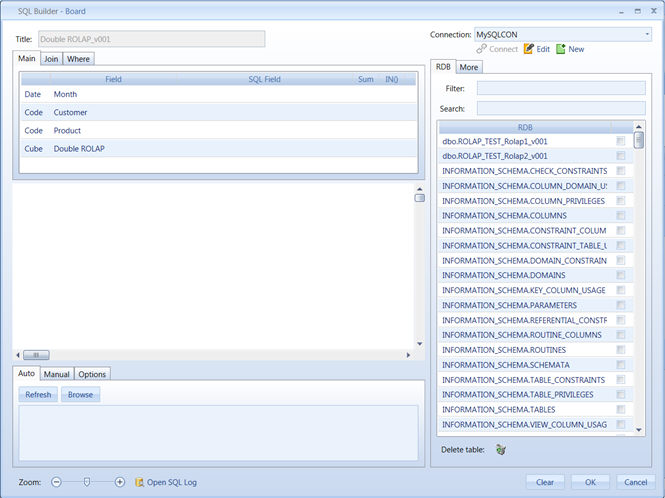
After connection you may now do one of the following
1. Select one of the existing tables from the list and map it to the InfoCube dimensions and measure refer to Linking an existing table of a relational database to an RDB InfoCube
2. Create a new table in the relational database for storing the InfoCube data.
Select the tables you wish to connect data from by ticking the check-box, the selected table are added to the main area. To speed up searching process, search function can be used.
Keeping the mouse button pressed, drag and drop the cursor in the cell next to the entity or InfoCube you want to feed.
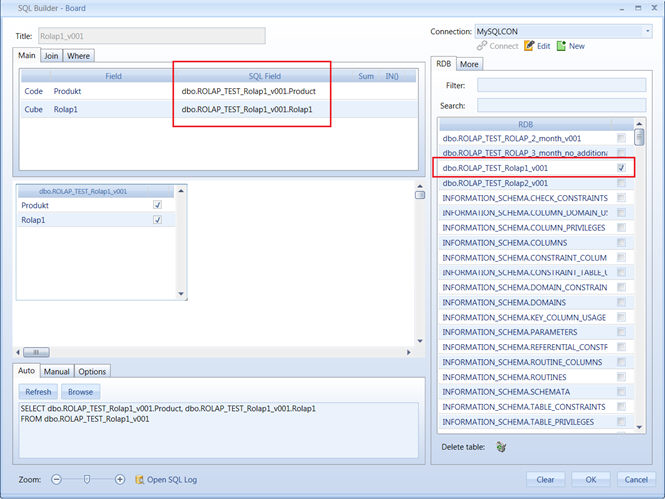
On the bottom of the screen, Board generates an automatic query according to mapped fields. It just adds converting functions based on configuration settings (third tab introduced in next paragraph FUNCTIONS & PARAMETERS). When Board query ROLAP cube, it sends the SQL statement to the ODBC or OLE DB provider and waits for the results. Note that the SQL statement is entirely executed by the ODBC or OLE DB provider therefore the commands and syntax which can be used in the SQL statement entirely depend on the ODBC or OLE DB provider used.
Besides if it has been selected more than one table, join conditions can be set by dragging and dropping the fields. The Join window shows the defined conditions. The join statement generated, is an equal join (natural join).
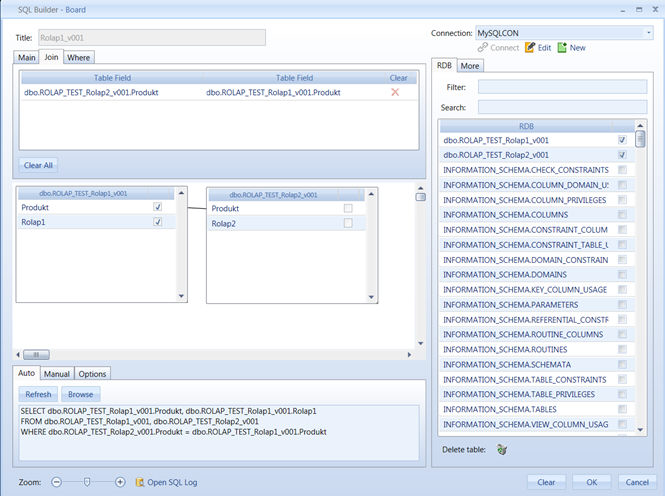
If you need to define a different type of join, for example an outer join or a left join, you may edit the SQL statement in Manual tab (discussed below).
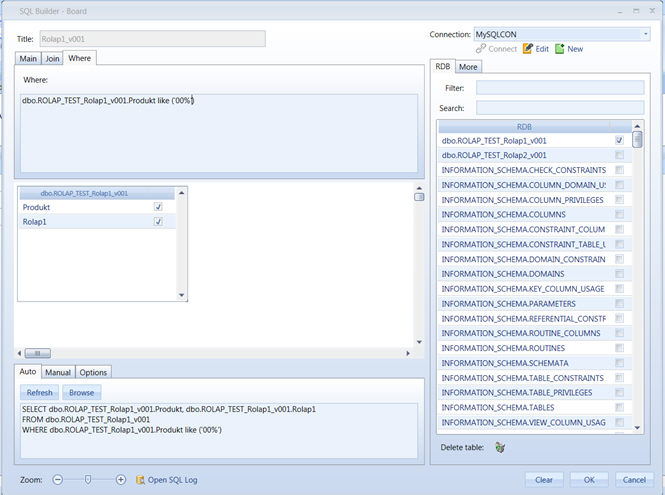
To define a Where condition click the Where tab and type the desired condition. Note that you may drag & drop a field from the selected table onto the text area to avoid retyping.
NOTE:
Commands and syntax which can be used in the SQL statement entirely depend on the ODBC or OLE DB provider used.
You may define Manual query, instead of Board’s auto query generator. It can be accessed by clicking on second tab:
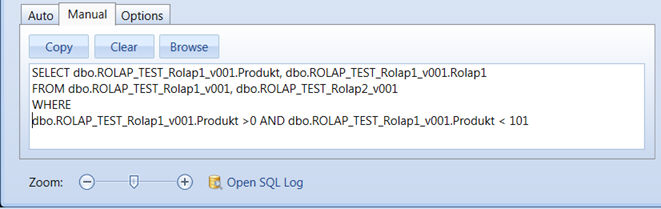
Note that Board is not meant to be a sophisticated SQL query generator, if complex queries are needed it is recommended to use an ad-hoc query tool or that to create a view in the relational database which performs the desired query, then use this view in the Board protocol.
As mentioned before, SQL statement is run on the OLE DB provider therefore the commands and syntax which are supported depend on the OLE DB provider you connect to.
It is recommended you test the SQL statement using the Browse function: from the protocol definition window, click the Edit button, then click the Browse button.

The query is executed on the first 200 rows and the result data is displayed in spreadsheet format.
To create a new table into RDBMS engine direct from Board, you can use Crate Table button located on More tab:
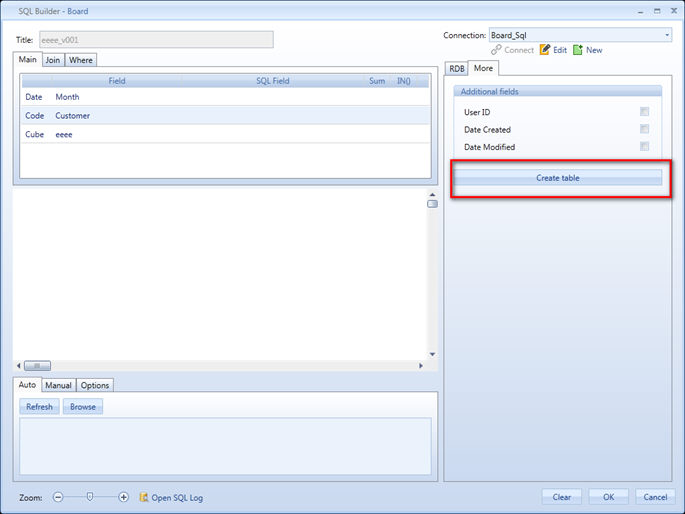
To allow Board creating a table in the source relational database system, is mandatory to configure ODBC’s or OLE DB’s user, with sufficient privileges to do so. A new table having all dimension fields of the InfoCube and a value field is created. The primary key of the table is the combination of all dimension fields and one index is created on each dimension field of the table.
Optionally, and only if the RDB InfoCube will be utilized for data-entry or for DataFlow calculations, you may add up to three additional fields as follows:
User_ID Writes the user ID of the Board user that has created or modified the table record.
Date_Created Writes the date and time (time stamp) of when the record is created.
Date_Modified Writes the date and time (time stamp) of when the last record update.
Note that these additional fields are not part of the InfoCube dimensions and are primarily meant for auditing and monitoring purposes.
In addition to general settings, board offers a list of additional commands and configurations. They can be found in highlighted spots below
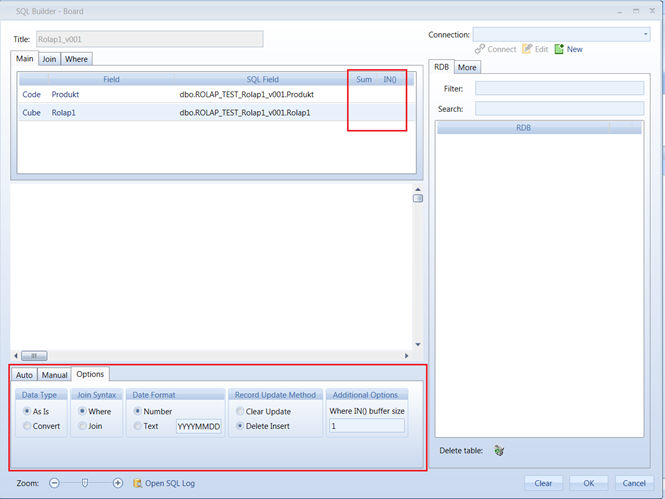
All of them will influence SQL query generated during RDBMS data reading process.
Summarizing records
If the relational table contains data at a more detailed level than the InfoCube, it is advisable to let the RDBMS summarize the records up to the same aggregation level of the InfoCube structure. Generally this will improve response times on the RDB InfoCube since part of the aggregation work is performed by the relational database engine.
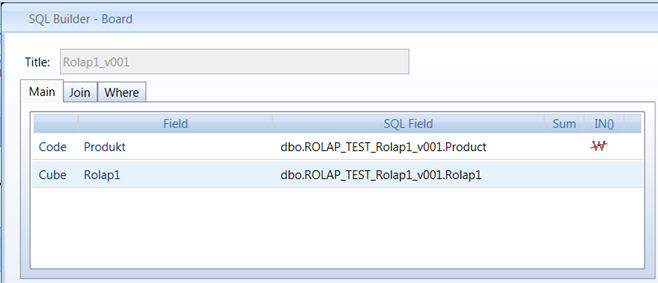
To do so, enable the Sum option by clicking on check box found on the row corresponding to the InfoCube value field as in the following illustration.
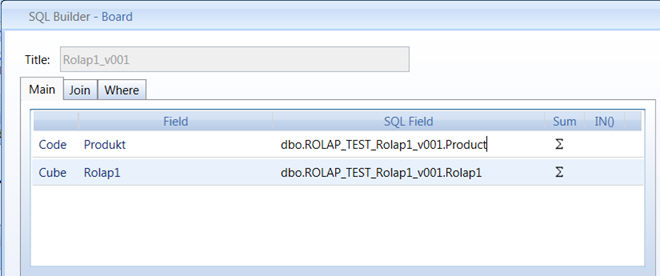
By enabling this option, Board will change the SQL statement adding a SUM operator on the value field and a GROUP BY clause the dimension fields as in the following example:
SELECT dbo.ROLAP_TEST_Rolap1_v001.Product,Sum(dbo.ROLAP_TEST_Rolap1_v001.Rolap1)
FROM dbo.ROLAP_TEST_Rolap1_v001
GROUP BY dbo.ROLAP_TEST_Rolap1_v001.Product
SQL general options
To set the SQL options, click the Options tab located in the lower part of the screen.
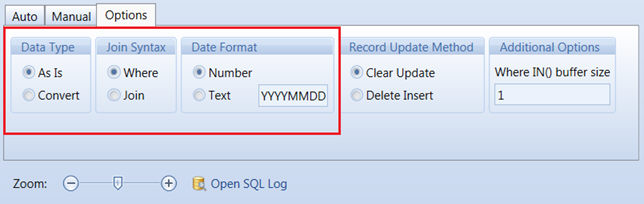
Join Syntax. Sets the syntax used for Join conditions. The "Where" option defines the join conditions using the WHERE clause, the "Join" option uses the INNER JOIN clause. Note that the result of the query is the same, regardless of the syntax used however if you need to define an OUTER JOIN (or other type) it is recommended using the Join option and then changing the INNER JOIN clause only (click the Manual tab to edit the SQL statement) instead of completely rewriting the statement generated by Board.
Data type. By setting this option to Convert the system will automatically apply a transformation formula whenever the data type and format of the source table fields differs from data type and format expected by the Board. This option is applicable only if the RDBMS field of the ODBC or OLE DB connection, which indicated what is the relational database you are connecting to, has been set to one of the available options other than General.
Date Format. This option applies to certain RDBMS types only, it specifies the physical format of a date field. This option is automatically enabled when applicable.
Set it to:
• Number, when date fields of the relational database are in the format of a serial number (dates are conventionally stored in numerical fields where the integer part represents the year, month and day and the fractional part the time).
• Text, when date fields of the relational database are in text format.
Optimizing the SQL statement: setting the WHERE conditions rules
When an ROLAP InfoCube is used in a report, in order to retrieve data from the relational table Board generates an SQL statement with a WHERE condition that limits the table records accordingly to the selected entity members. For example if the user makes a selection on the entity Month, then a WHERE condition on the field corresponding to the date dimension is dynamically added to the SQL statement. The way the WHERE conditions are written affects the response time of the SQL queries. There are two parameters that allow to tune the efficiency of the SQL queries generated by Board.
In some cases the selection made on entity members may determine a WHERE condition with a very high number of items. Suppose the user sets a selection on an entity located in the upper levels of a hierarchy, for example Region=North America, then this selection will propagate down to the CustomerID entity and embrace a very large number of customers, for example several thousands. An SQL statement with a WHERE condition that looks up thousands of codes can be inefficient and may easily exceed the maximum command length supported by the ODBC or OLE DB provider driver you are using.
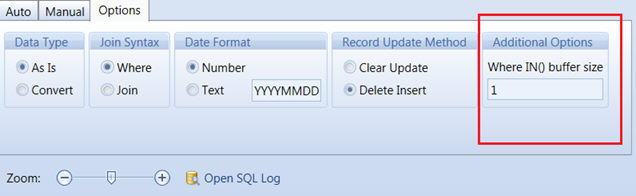
Where IN( ) Buffer size
The parameter Where IN( ) Buffer size defines the maximum number of items that are added to a WHERE condition of a single SQL command. When this threshold is exceeded, instead of running a single SQL command with a very large WHERE clause, Board runs multiple SQL commands each with subset of conditions; the results of the SQL queries are then merged by the BoardServer engine and aggregated to the required view.
IN() parameter
The IN( ) option allows to completely disable the feature that dynamically adds the WHERE conditions to the SQL statements. This option should be enabled only on the entities that have a small number of occurrences or entities on which the number of selected members is always high in percentage (for example if 70% or more of the total number occurrences are always embraced by the user's selection).
ROLAP InfoCube write-back : choosing the Record Update Method
The data of an RDB InfoCube is stored in a table of a relational database therefore if a user enters data into an RDB InfoCube Board updates the table linked to the RDB InfoCube. There are two different methodologies for updating the table.
Delete/Insert
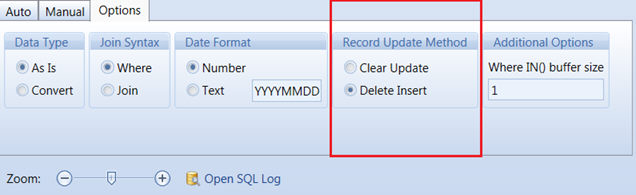
This option is to be preferred when the relational table exactly matches the structure of the RDB InfoCube: each field of the relational table is mapped to a dimension of the InfoCube or to the InfoCube measure, and the table primary key is the set of fields which are mapped to the InfoCube dimensions.
When this option is chosen,
when data is saved to a cell of the InfoCube corresponding to an existing record then the record is updated through an UPDATE.
when data is saved to a cell of the InfoCube which does not correspond to any existing record then a new record is added to the table through an INSERT command.
when an existing cell of the InfoCube is cleared (or set to zero), the corresponding record is deleted from the table.
Clear/Update
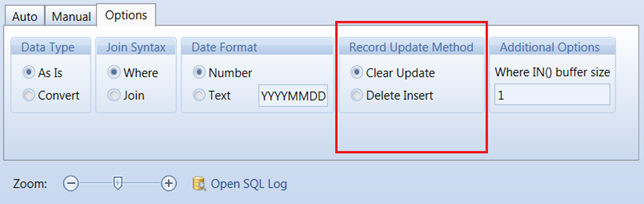
This option is suitable when the relational table contains other fields than those which are mapped to the dimensions and the measure of the RDB InfoCube.
When this option is chosen,
when data is saved to a cell of the InfoCube corresponding to an existing record then the record is updated through an UPDATE.
when data is saved to a cell of the InfoCube which does not correspond to any existing record then a new record is added to the table through an INSERT command.
when an existing cell of the InfoCube is cleared (or set to zero), the corresponding record is updated by setting the value field to zero.
Note that using this method, Board either adds new records or alters existing ones, it never removes records from the relational table, therefore preserving the status of other fields.
To set the Record Update Method, click the Options tab then select the desired option.