
Large Company may have several hundreds of users. The Enterprise Security Management provides an easier and faster way to handle so many user, that may result challenging with the traditional approach, moreover this functionality enables security management to be delegated to key users, making it possible to decentralize the security model and to adapt it to the organizational structure.
NOTE
This is an advanced feature that extends the existing security model and can be used only on really large projects. This feature requires an Unlimited license.
As usual, the security management can be separated into three logical units
the user accounts
the user profiles
the database security profiles
Usually we handle user accounts into the first tab of the security management, user profiles in the second tab and database security profiles into the third tab.
~Security.hbmp will help in handling user accounts and user profiles, ~DBname.hbmp will help in handling database securities.
~Security.hbmp and ~DBname.hbmp are not included in BOARD server installation; these two databases must be asked to BOARD International Support and put into the Board\Database folder when service is not running.
WARNING
Always use the official ~Security and ~DBName database provided by BOARD. Creating your own databases can lead to unexpected and unsupported behavior.
Let’s see in detail how this database works, its structure and how to manipulate it.
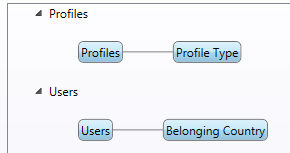
~Security.hbmp contains 3 entities:
Users
Profiles
Languages
Every entity is populated at service start.
Every user defined in Security Manager first tab will be found inside this entity as a member, the entity is populated at Service start, every time a user is added into the Security Management tab a member will be added to this entity.
NOTE
Adding a member to this entity won’t create a new user, deleting a member won’t delete the user itself, thus never add or delete members into this entity.
Every Profile defined in Security Manager first tab will be found inside this entity as a member, the entity is populated at Service start, every time a Profile is added into the Security Management tab a member will be added to this entity.
NOTE
Adding a member to this entity won’t create a new profile, deleting a member won’t delete the profile itself, thus never add or delete members into this entity.
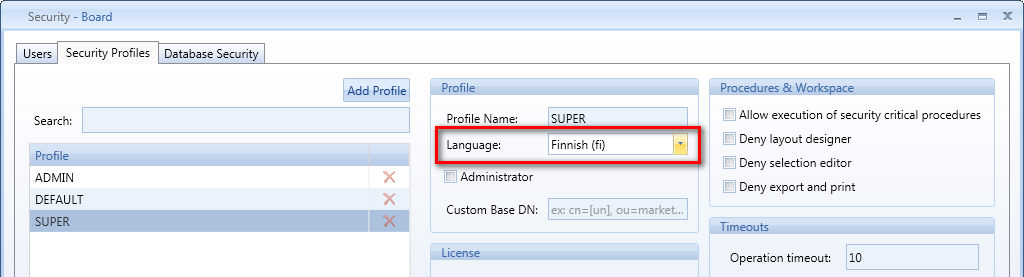
Populated at service start, it contains the list of Windows languages, the same list of languages can be found into the Security Management in the security profile tab (language drop-down list).
NOTE
Adding a member to this entity won’t create a new language, deleting a member won’t delete the language itself, thus never add or delete members into this entity.
We have three default cubes inside this database:
Users Profile
Users Language
Users Disabled
Entities: 1 (Users)
Type: Text
This text cube assigns a Profile to each user, if there’s no profile assigned to the user, the user will take its profile from the security management tab.
Example:
Let’s consider a server with the following set of users:
Before performing any data entry on the Users Profile cube, User 1 and User2 will both have DEFAULT Security Profile.
Now, let’s create a DataView on ~Security, selecting Users Profile as data block and Users as entity by row, enabling DataEntry.

TIP
Use suggested values function on the data entry block, set up suggested values on the entity Profiles to pop-up all the available profiles when performing Data Entry.
We input SUPER as string in User 1; from now on, when User 1 will login, his profile will be SUPER, but we will still see DEFAULT in the Security Management tab. In few words, this cube overrides the Security Management tab, to check one user’s profile first check this cube, if it’s empty for that user check the usual security tab.
Entities: 1 (Users)
Type: Text
This text cube assigns a language to each user; if there’s no language assigned to the user the user will take its language from its profile.
Example:
We continue the example with our User 1. This user is now profiled with the security profile SUPER. Profile SUPER is set on Finnish (fi), thus the user will be assigned Finnish language.
Now let’s perform a data entry on the Users Language cube:
TIP
Use suggested values function on the data entry block, set up suggested values on the entity languages to pop-up all the available languages when performing Data Entry.
We input it (Italian); from now on User 1 will have Italian language.
Entities: 1 (Users)
Type: Integer
This cube allows disabling Users; if the value for a user is different by 0 for a particular user, that user won’t be able to login.
Example:
User 1 won’t be able to login anymore.
As shown above, in order to manipulate securities through this database, it’s necessary to create capsule to retrieve and update data into the cubes. Feel free to create any capsule on this database. You can also create other cubes and entities to facilitate security manipulation. Add new entities, cubes, create procedures and data-readers but NEVER edit the default cubes and entities.
Example:
New entities:
New Cubes:

In order to install this database, stop the service, put it in the database folder, and rename it as tilde character (~) followed by the database on which you want to customize securities. So if your database is named Sample.hbmp, the security database must be named ~Sample.hbmp (case sensitive).
We will continue to refer to this db as ~DBname.hbmp and we’ll call the db on which we want to implement securities DBname.hbmp
~DBname.hbmp contains 3 entities:
Users
Entities
Cubes
Every entity is populated when DBname.hbmp is loaded.
Every user defined in Security Manager first tab will be found inside this entity as a member, the entity is populated when DBname.hbmp is loaded, every time a user is added into the Security Management tab a member will be added to this entity but only if this database is already in memory.
NOTE
Adding a member to this entity won’t create a new user, deleting a member won’t delete the user itself, thus never add or delete members into this entity.
Every entity defined in DBname.hbmp will be a member of this entity.
Every cube in DBname.hbmp will be a member of this entity.
We have three default cubes inside this database:
Entity Members
Cubes ReadOnly
Cubes Exclude
Entities: 2 (Users, Entities)
Type: Text
This text cube is used to define filters for every user. It will be merged with the filter of its own database profile.
NOTE
Database Profile must be set up in order to make this database work.
Example:
We continue with User 1 example. We assigned security profile SUPER to User 1, so we check his database profile:
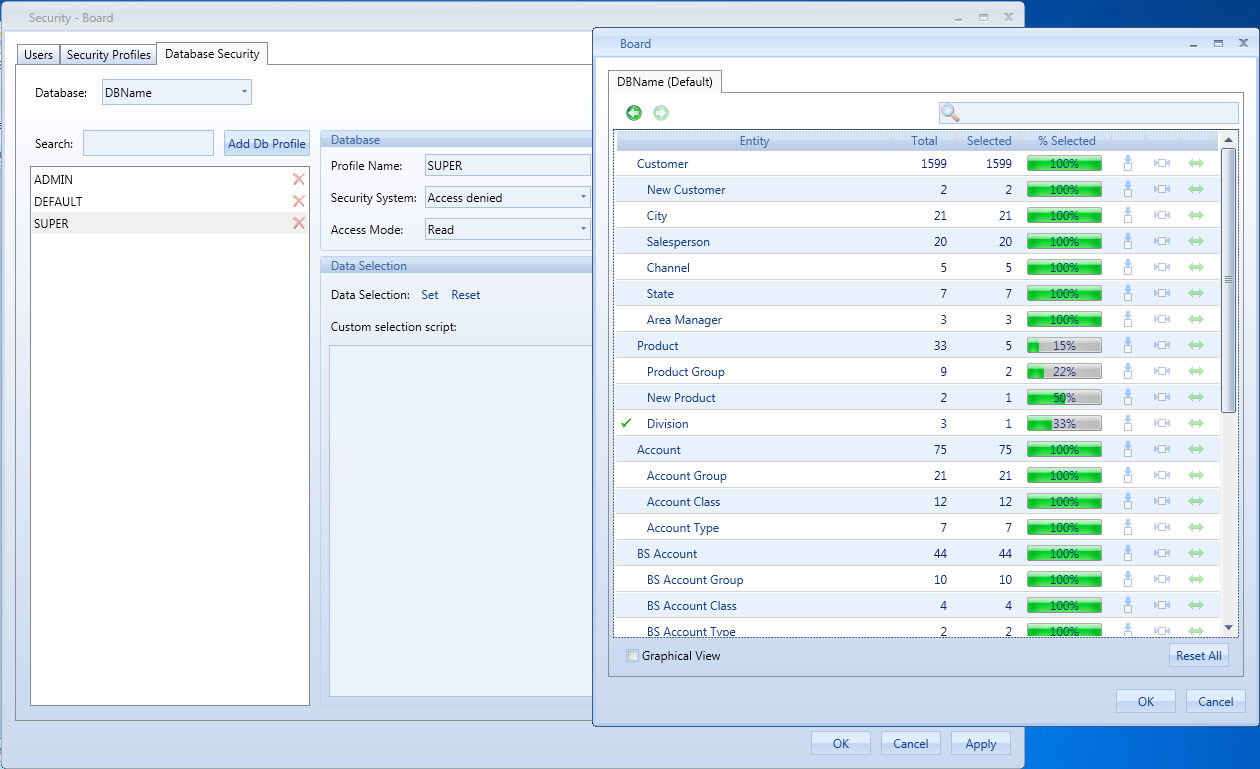
We notice that the SUPER profile has a filter on Division and no filter on City.
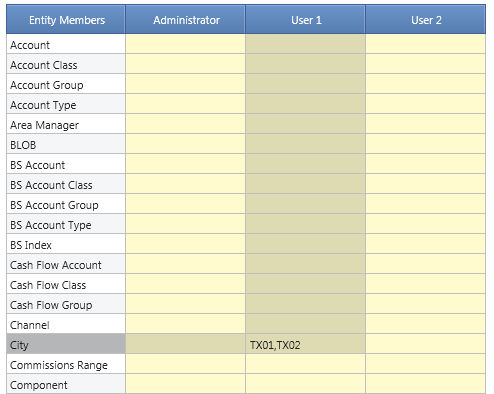
We create a DataView on ~DBname on the cube Entity Members.
In the screenshot below we put user by column and entities by row, we entered the comma separated list of City codes on which the user should have access to.
Now, if User 1 logs in, he will see this selection on DBname.hbmp
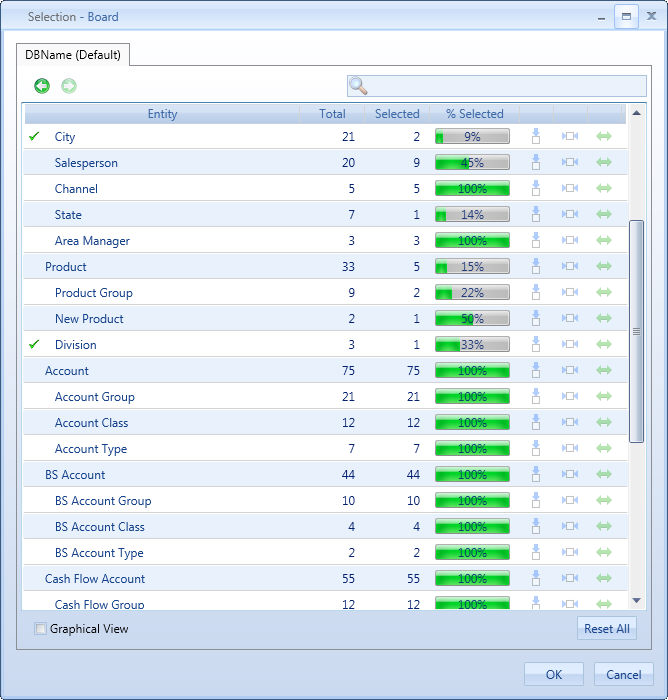
As you can see both filters (Division from Database Securities and City from ~DBname) have been applied.
Entities: 2 (Users and Cubes)
Type: Integer
Those two cubes will override the database security setting on cubes read only and exclude, when ~DBname is active cube exclusion and read only setting will be ignored, only these two cubes will be considered.
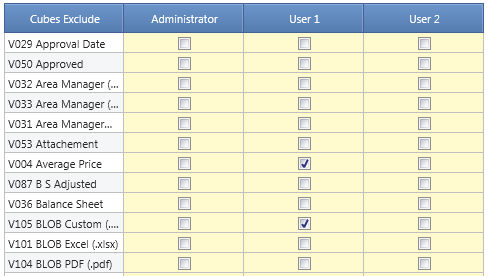
Example:
As usual we create dataviews to exclude cubes and put them in read only mode for a certain user:
As shown above, in order to manipulate securities through this database, it’s necessary to create capsule to retrieve and update data into the cubes. Feel free to create any capsule on this database. You can also create other cubes and entities to facilitate security manipulation. Add new entities, cubes but NEVER edit the default cubes and entities.