Applies to: All Board Cloud subscriptions
This article covers the Board SCIM API service, how it can help and how to get started.
The Board SCIM API service is the Board implementation of the System for Cross-domain Identity Management (SCIM) standard. SCIM is an HTTP-based protocol that makes managing identities in multi-domain and multi-system scenarios easier to support through a standardized service.
The SCIM API allows you to automatically manage users and groups in Board by synchronizing them with an external identity provider.
This API package is integrated into Board's Subscription Hub portal.
The SCIM API relies on Client APIs for authentication and on metadata and permission groups to correctly map and assign user data. Read about Client APIs and the SCIM API endpoints for more information.
Learn more about Board APIs.
Board SCIM benefits
SCIM allows Admins to automatically sync user accounts and permissions across multiple applications, ensuring that this information is always up to date and correct. An important benefit of the Board SCIM API service is standardization: with it, we offer accessibility and full operability with other identity management systems, solving many identity maintenance challenges such as record tracking and on- and off-boarding. The Board SCIM API service facilitates secure identity data management and control.
With Board’s SCIM Service APIs, you can:
Build integrations with supported identity management tools
Automate the management of your users
Board SCIM implementation does not support the management of Client API users created in the Subscription Hub. Board’s implementation uses version 2.0 of the SCIM standard.
Getting started with SCIM API
When using Board SCIM APIs you should first configure all of the necessary metadata that correspond to the user and group attributes used in the APIs requests. Data synchronized is stored within Board and can also be manually updated in the Subscription Hub.
For example, you may choose to synchronize a User's familyName, givenName and userName (email login) but not synchronize activeFlag. Alternatively, you may choose to store and synchronize all of that data in your internal systems.
In either case, be aware that changes made in the Subscription Hub will change the data stored in Board.
Depending on how you integrate with the SCIM APIs, you may create unexpected conditions. For example, if someone gets married and you change the familyName (Last Name) in the Board Subscription Hub but not in your system of record, depending on how your integration logic is written, that change could be set back to the original familyName.
SCIM Configuration on Board's Subscription Hub
Before users can make requests with the SCIM APIs, the following conditions must be met:
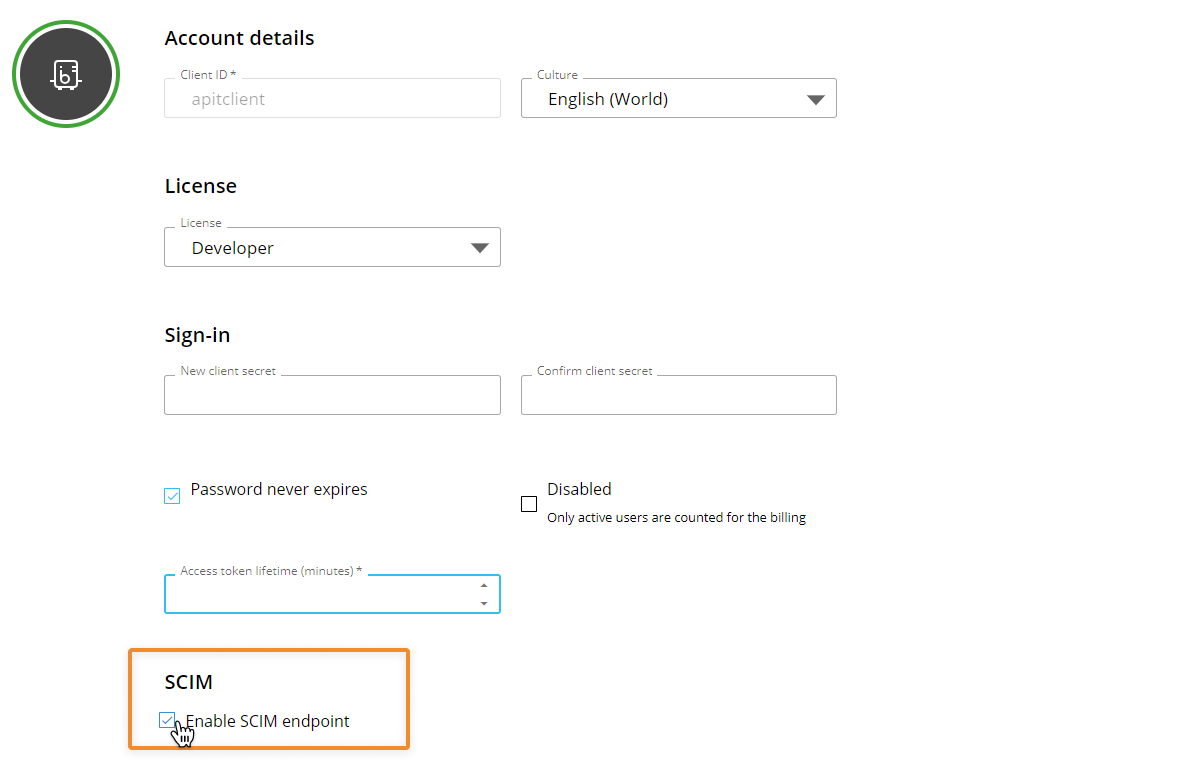
A Client API user must exist and it must have the new "Enable SCIM endpoint" option turned on. The Client API is required for authentication in the API requests. See the Authentication paragraph below for more information
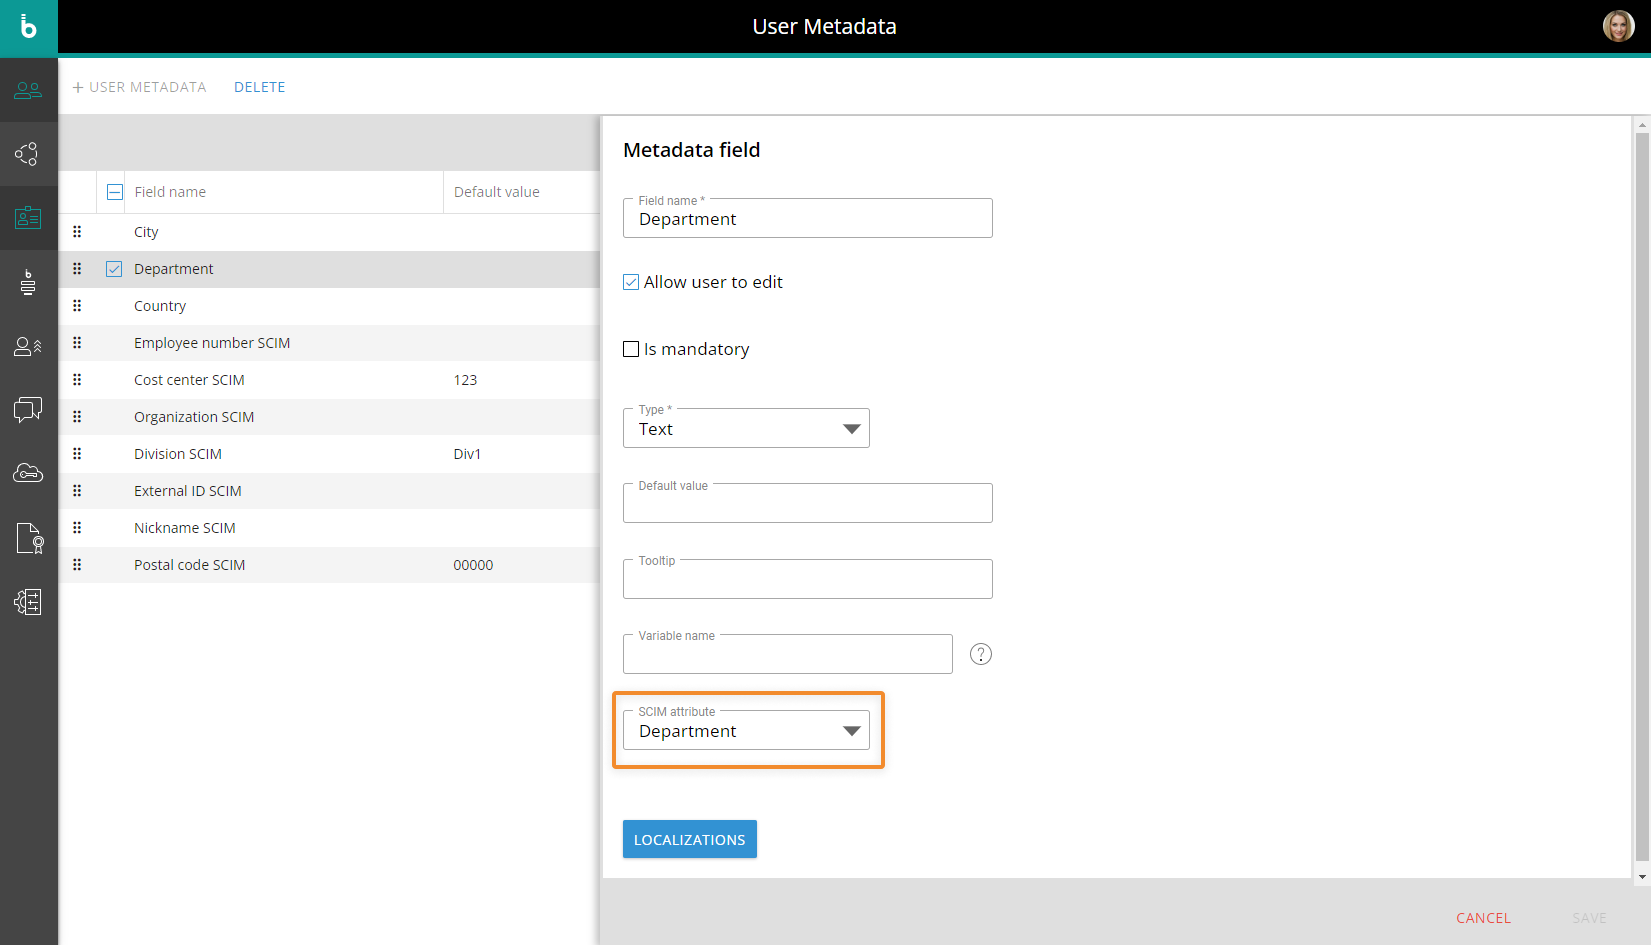
All metadata corresponding to the user and group attributes used in the APIs requests must already be created. This is done in the User Metadata section of the Subscription Hub: map the metadata fields to the corresponding SCIM attributes with the new "SCIM attribute" drop-down list.
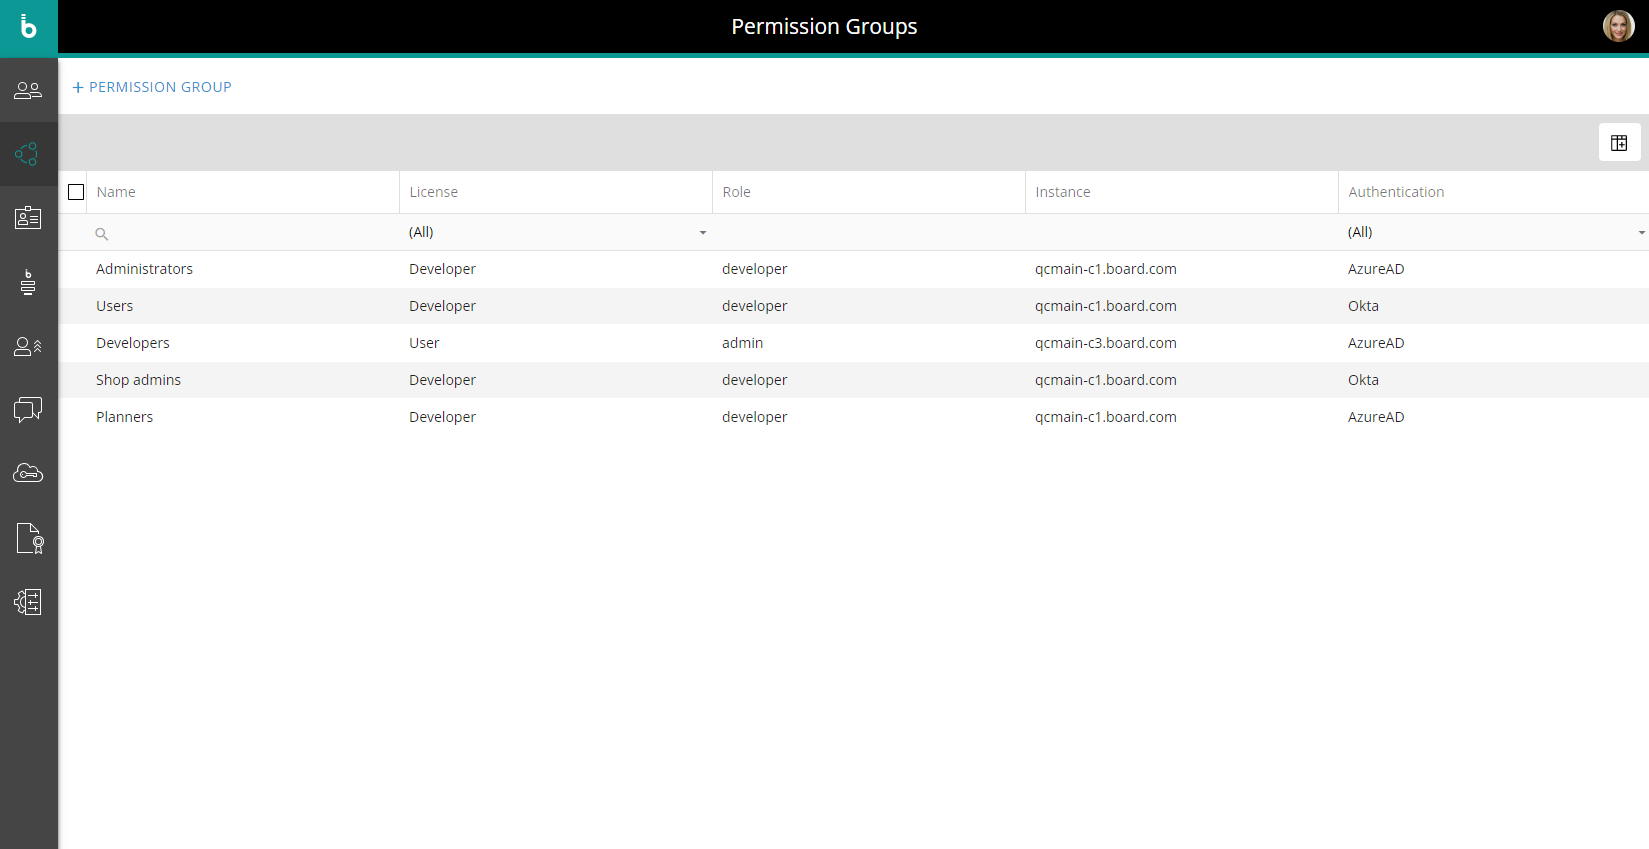
All needed Permission Groups that will be referenced in the APIs must have been created. This is done in the "Permission Groups" section of the Subscription Hub.
Permission Group configuration
The configuration of each Permission Group is similar to the configuration of a single user in the Subscription Hub: in the Group configuration panel, you can assign roles and access permissions in a granular way for each Board Platform, as well as assign Subscription Hub administrative authorizations and define specific metadata values.
All these configurations will be automatically applied to users added to the Group.
Set a default Permission Group
You can also set a default Permission Group: in this case, the configurations and properties defined in that Permission Group will be automatically applied to all new users created in the Subscription Hub from that point on.
To set a Permission Group as default, select it in the table and click the "SET AS DEFAULT" button that appears on top of the table: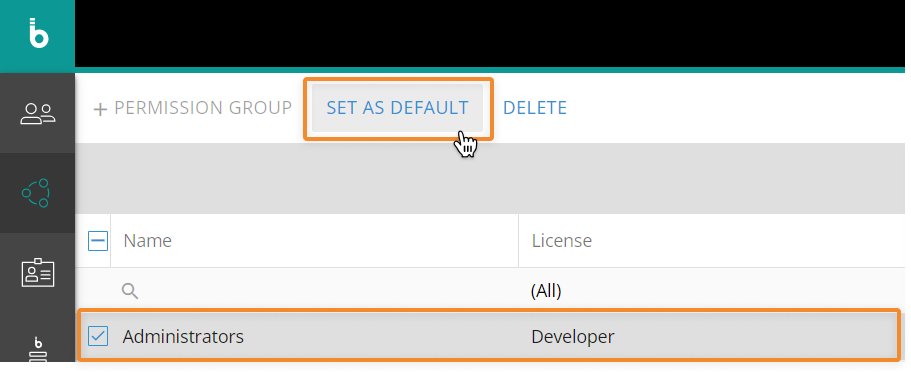
Remove a default Permission Group
To remove a Permission Group as default, select it in the table and click the "REMOVE DEFAULT" button that appears on top of the table, or define a new default Permission Group.
There can be only one Permission Group set as default. If a user is created via a SCIM request and no default Permission Group is set in the Subscription Hub (or the default Permission Group is disabled), the account will be created with the "Board authentication" authentication type, but the email needed to verify the associated email address and set a password will not be sent automatically (as is the case for manually created users).
The email needed to verify the associated email address and set a password is sent automatically when:
Users are added to a Permission Group which is not disabled and has the authentication type set to "Board authentication". This is also the case for default Permission Groups
The authentication type of a user or a non-empty Permission Group is changed from any setting to "Board authentication".
Authentication
To obtain an authentication token, you have to send a request which must be compliant with OAuth2 client credentials flow specifications.
To obtain the necessary authentication token:
Create a Client API user. The Client API user must have the new "Enable SCIM endpoint" option switched on.
(Optional) Define the token expiration time for the Client API.
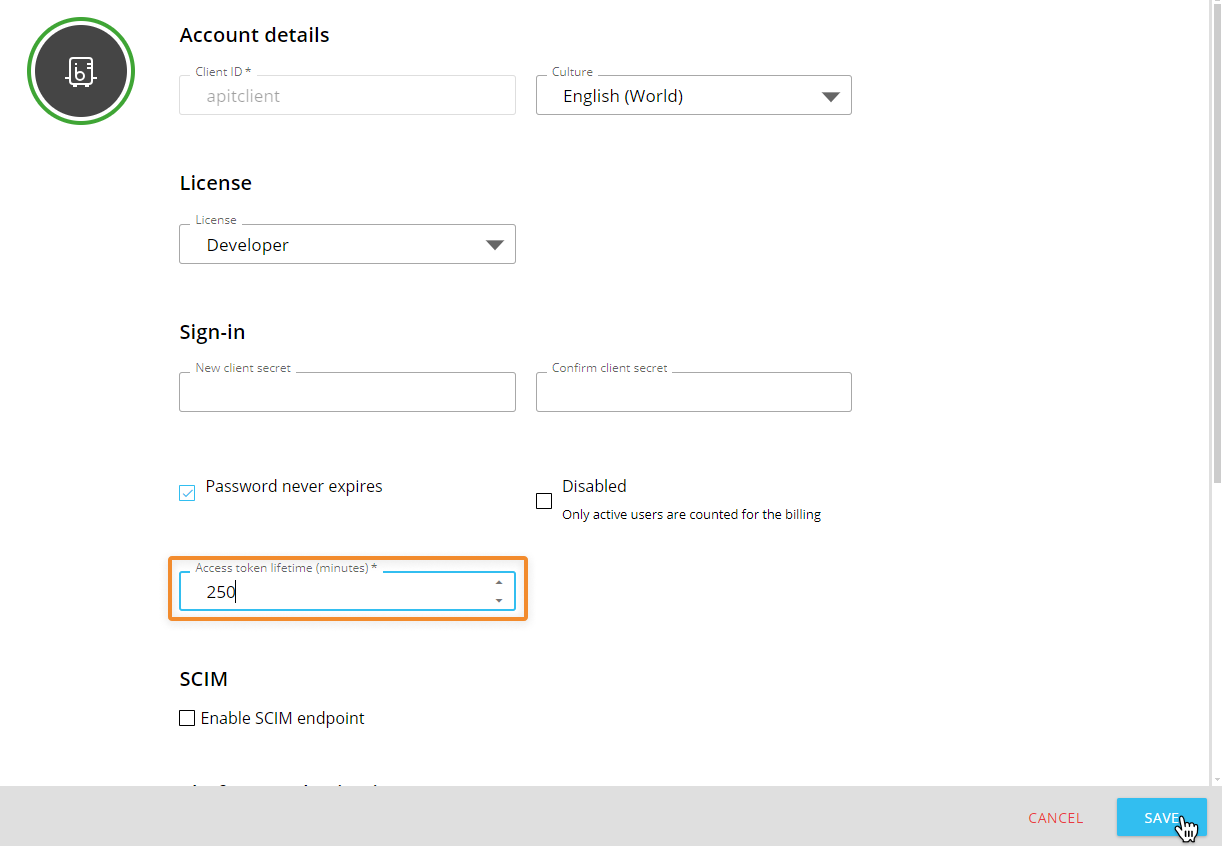
The limit is 259,200 minutes (180 days) and must be defined by minutes.
Once you have created the necessary Client API user, an authorization token must be generated before making any request. The token returned from this request must be used to manage the authentication in the API requests.
The authentication must comply with OAuth2 client credentials flow specifications.To obtain the authorization token, you need to set the following additional parameters:
Grant Type: "Client Credentials"
Access Token URL: https://your-subscription-hub-url/connect/token
Scope: "board-scim"
Client Authentication: "Send client credentials in body"
Pass the token to the SCIM API through a request as shown below.
Example
GET https://your-subscription-hub-url/scim/Users/<user id here>Request header
Header | Details |
|---|---|
| In the Authorization header value, place the prefix |
Request parameters
none
Curl example
curl -X GET -H 'Authorization: Bearer <id token here>'
https://your-subscription-hub-url/scim/Users/<user id here>
Response body
If your Authentication passes, you'll receive the response for the API you called.