💡This article contains version changes.
Spot the light bulb icon? That means you’ll find helpful details about what’s changed across versions. Read more about version changes here.
This article is all about Capsules in Play Mode. Any user can access Play Mode, while only specific users can access both Play and Design Modes.
Only users with a Developer or Power User license can access the Design Mode. See more in the Licenses section.
Open a Capsule in Play Mode by clicking on the Capsule tile in the Capsule browser to view and interact with it. While in Play Mode, the workspace provides a simple environment with fewer icons providing basic functionality for navigating the Capsule. All those icons are located in the Top Menu and the Sliding menu.
You can apply a Select to the entire Screen and save its settings as a Bookmark.
Top Menu in Play Mode
This is the Top Menu in Play Mode:

From the Top Menu, you can:
 Go to the Home Screen. Navigate to the Home Screen.
 Apply a Select to the entire Screen. Add a Screen Select.
If "Deny selection editor" option is active, only a Select Bookmark of the selections made from a Selector Object can be made from this option.
 Adjust your Screen to fit your viewing area. The icon changes depending on the currently chosen fit. You can choose one of the following three fit options:
 Fit to width. The Screen width fits the web browser window size width. The Screen area is stretched horizontally and a vertical scrollbar may appear.
 Fit to single page. The Screen is readjusted so that it is entirely visible in your web browser window size without any scrollbar.
- Actual size. The Screen is displayed at its actual pixel size. Vertical and horizontal scrollbars may appear if the Screen area exceeds your web browser window size.
 Extend to full screen. Extends the Capsule Screen into full screen. To exit full screen, press the "Esc" button.
 Access the Sliding menu. Click on the burger icon to access the Sliding menu optionsdescribed below.
.png) Board AI Agent chat. Open the chat panel to interact with the Board AI Agent linked to your Screen.
Board AI Agent chat. Open the chat panel to interact with the Board AI Agent linked to your Screen.💡
 My Views. Save up to 5 personal views of your Screen configuration. Views can be restored at any time. Views includes filters, Layout configurations, Pager definitions, Freeze Panes settings, Numbers scaling status, Column visibility, Grand total row set to top configurations, Docked Charts for Flex Grid, and any other customizations made to the Screen, except for Selections and Drill downs. To save Selections, use the Select Bookmark feature in the Sliding Menu.
Watch the Board Academy microlearning video on when to use My View vs. Bookmarks.Introduced in 15.1 and onwards, My View has changed to My Views, giving users the ability to save 5 My Views, and is located in the top menu instead of the sliding menu. Earlier versions continue to have “My View” located in the Sliding Menu.
Up to 5 My Views can be saved and stored. You can replace old views with new ones.
One My View can be labeled as “Default” for better visibility in the My View window that opens after clicking on “My View”. From this window, you can also edit and delete any My View.
Selections, Drill anywhere configurations, and changes in a Drill down Layout made to a Screen are not saved in a My View.
 Feed. Access the feed, if permissions allow.
 Discussion. Access the discussions, if permissions allow.
 Chat. Access the chat feature, if permissions allow.
Sliding menu in Play Mode
Click the burger icon in the Top Menu to reveal the following menu:
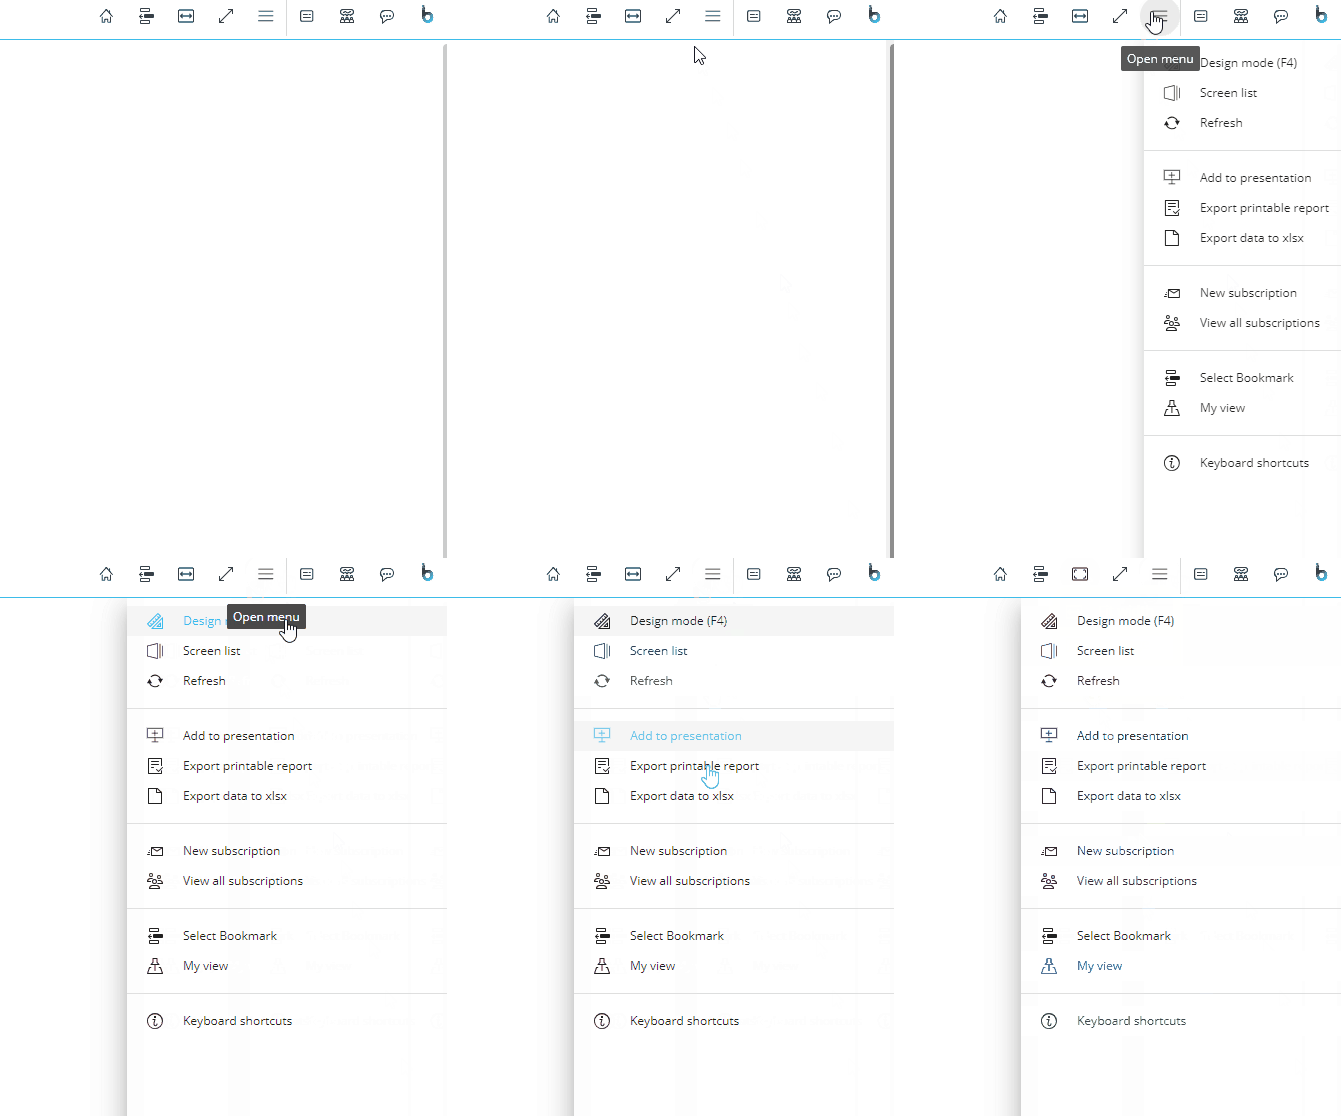
Any changes made to a Screen in Play Mode are lost when you leave it. To save a modified Screen, add it to a Presentation or use the My Screen View feature described below ("Save the Screen's current state as a personal view").
Click the appropriate icon to:
 Switch to Design Mode. Exits Play Mode and enters into Design Mode, if the user permissions allow it.
 Screen list. Show the Screen and folder list. The list will appear in a sliding panel on the right of the Screen.
 Refresh all Screen Objects. This will re-execute all Layouts associated with Screen Objects.
 Add a Screen to a Presentation. Add this Screen to a new or already existing Presentation.
 Export a printable report. This will export the current Screen as a PDF file, a Microsoft Word document, a Microsoft PowerPoint presentation, or as a screenshot (.png). Read more about exporting data from a Capsule.
- Export data to xlsx. This will export all Screen Object defined by a Layout as a Microsoft Excel Workbook or a Microsoft Excel Workbook supporting Board Excel Add-in functions such as change Select filters, drill-down, refresh, custom selections, or change data. Read more about exporting data from a Capsule.
 New Subscription. Set up a new subscription or see all existing subscriptions. By setting up a subscription, Board will send the current Screen to selected email addresses as an attachment (PDF, Excel, Word, or PowerPoint file) at a given time, with a custom frequency and recurrence, starting from a specified date. You can also customize the email message as you prefer.
 View all subscriptions. This will take you to the Subscriptions page where you can view all the subscriptions made. You can also create, edit, and delete Subscriptions from this page.
- Select Bookmark. This feature allows users to create their own library of different Selects that can be saved and reused in Screens of the same Capsule. Users can set selections through selectors and/or Screen Selections and then save their personal configuration which is called a "Bookmark". Each Select Bookmark is available only to the user who created it.
Bookmarks are saved at the user level, i.e. they're available only to the user who created them. Every time a Screen is opened in Play Mode, all Bookmarks the user has previously saved in that Capsule will be available.
If a Bookmark is created through a Selector Object in a Screen where the "Deny selection editor" option is active, only the selections made from that Selector Object are saved.
💡
 My View. My View is now My Views and located in the Top Menu in 15.1 and onward. In earlier versions, My View is still available here.
Save the Screen's current state as a personal view that can be restored at any time. The view includes filters, Layout configurations, Pager definitions, Freeze Panes settings, Numbers scaling status, Column visibility, Grand total row set to top configurations, Docked Charts for Flex Grid, and any other customizations made to the Screen, except for Selections. To save Selections, use the Select Bookmark feature explained above.
Selections, Drill anywhere configurations, and changes in a Drill down Layout made to a Screen are not saved in a My View.
 Keyboard shortcuts. View the keyboard shortcuts that are supported by Board. The following menu will appear at the bottom of your screen:
 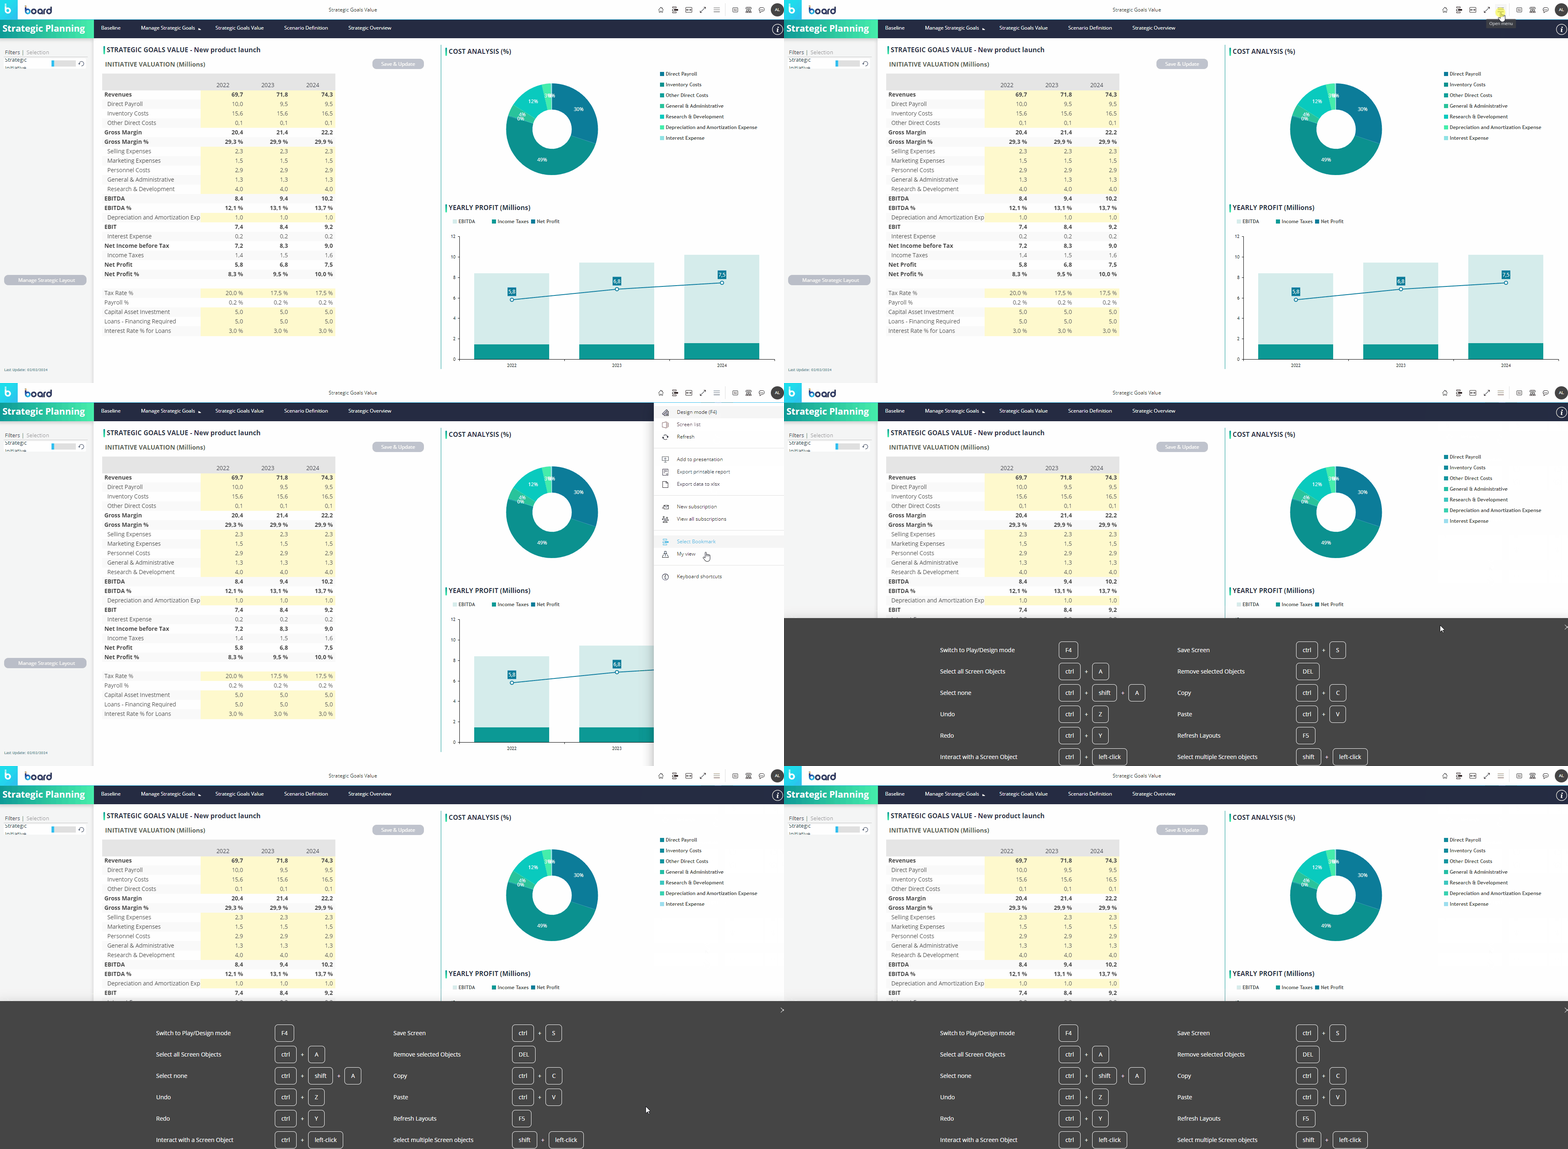 Many are similar to typical keyboard shortcuts, though two of them should be noted for their specificity to Board:
Switch to Play/Design Mode. F4 automatically toggles between Play/Design Modes.
Read about Design Mode tracking when you switch between modes.Refresh the Screen. F5 refreshes the Layout queries in the Screen.
Interact with a Screen Object. When you want to interact with a Screen Object both in Play or Design Modes, you can double-click or Ctrl + click on the Object to reveal the Object toolbar icon in the top left corner of the Object. However, if the Object is nested inside another Object or multiple Objects, you must double-click as many times as the Object is nested. To reduce the amounts of clicks, you can Ctrl + click over the nested Object to immediately have access to the Object toolbar for interaction.
Escape. You can also use the "Esc" key to close popup windows such as the Drill configuration window.
By clicking on a single Screen Object, you'll have access to all multidimensional navigation features such as filtering, sorting, drill-down, and so on. These features are different for each Screen Object and are covered in the Objects section of this manual.
While in Play Mode, it's possible to navigate through Screens but you won't be able to change their default configuration or create a new Screen. To do that, you will need to switch to Design Mode (F4 key).
Create a Subscription
Subscriptions are created from the Capsules and Presentations areas, not from the Subscriptions interface in System Administration.
This approach ensures that each Subscription is tightly linked to the specific view or Presentation it is based on, allowing users to manage distribution settings in context.
The following sections describe how to create a Subscription from a Capsule.
Create a Subscription from a Capsule
To create a Subscription from a Screen Capsule, follow these steps:
Access the Capsules area in the Board Platform and open the desired Screen Capsule.
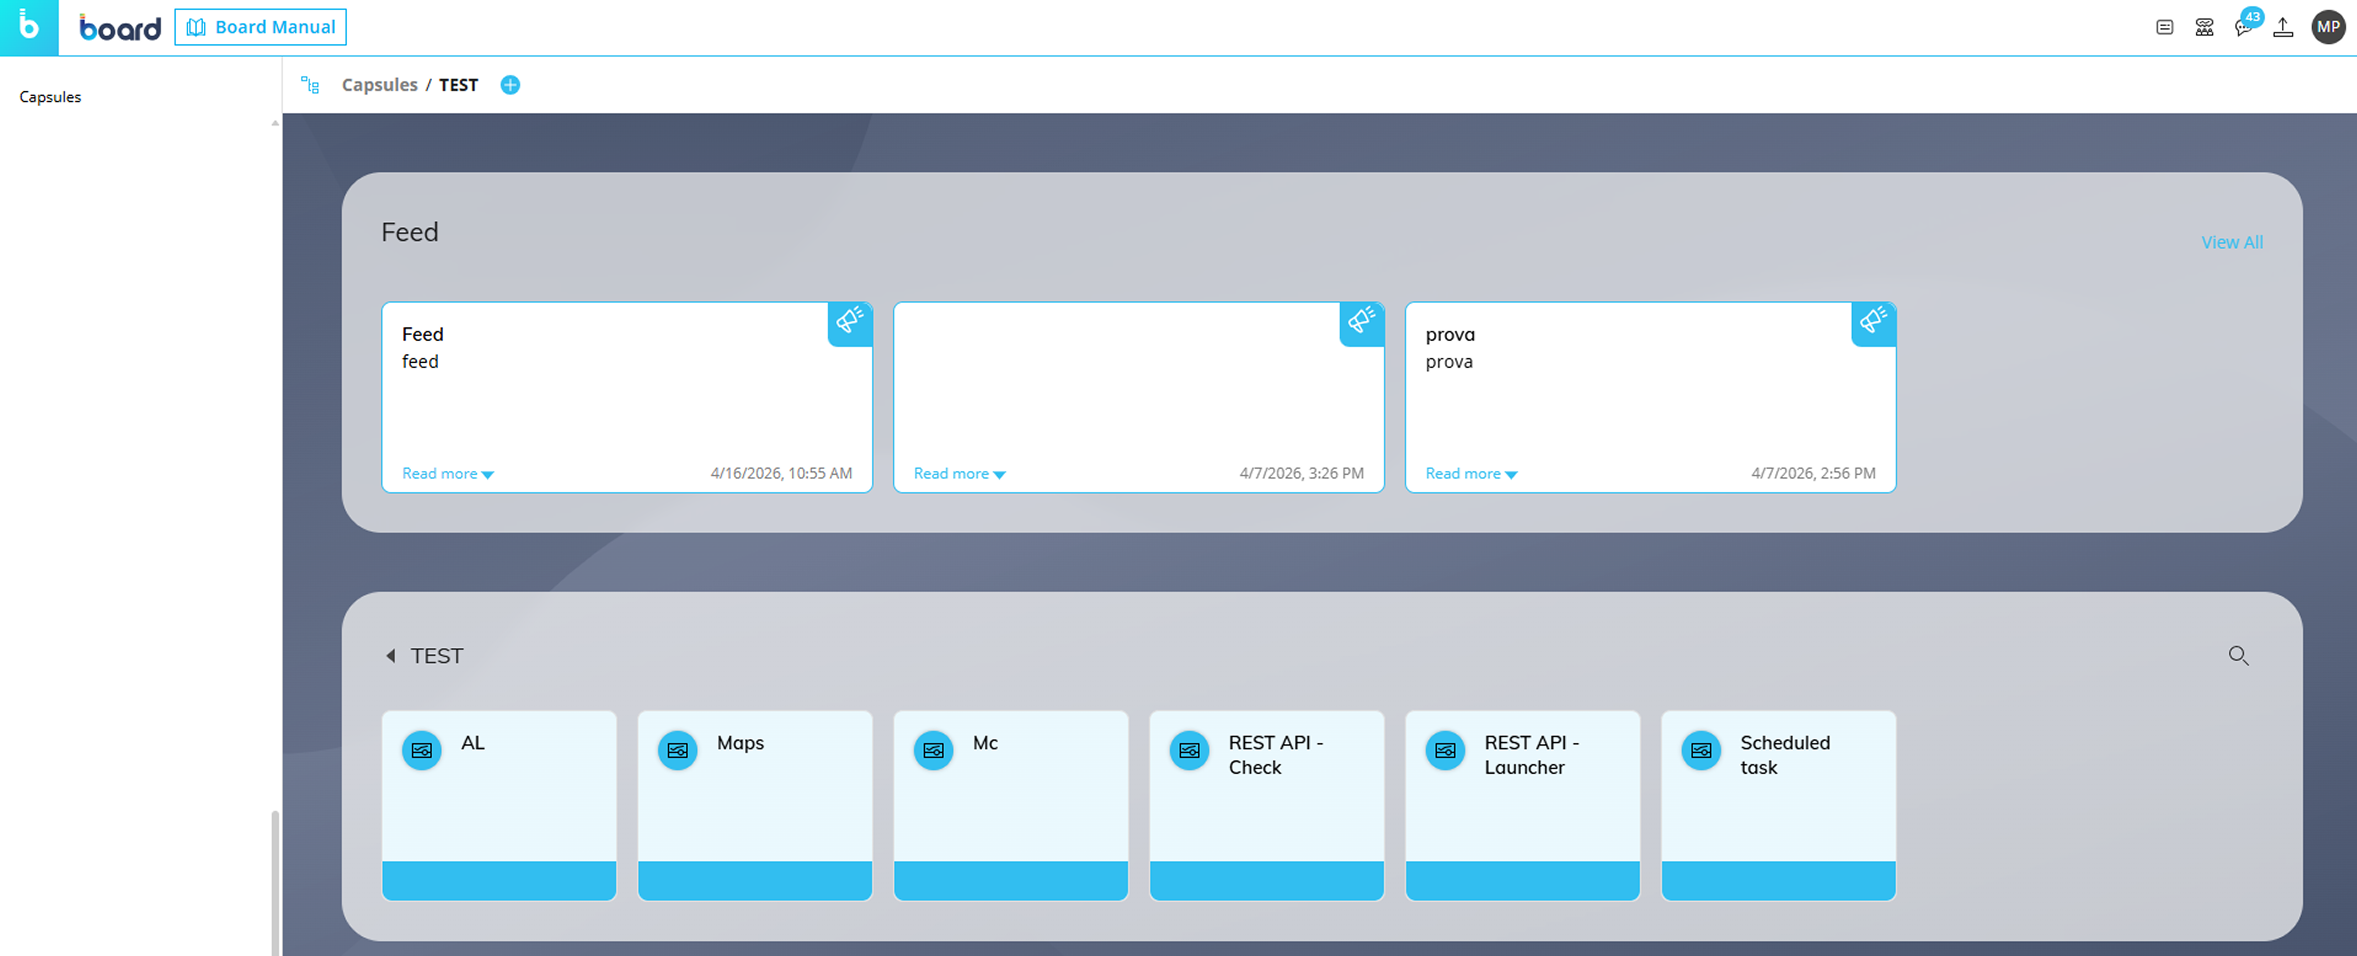
When in Play Mode, open the burger icon in the top right corner of the page.
The burger icon cannot be opened when the user is in Design Mode.
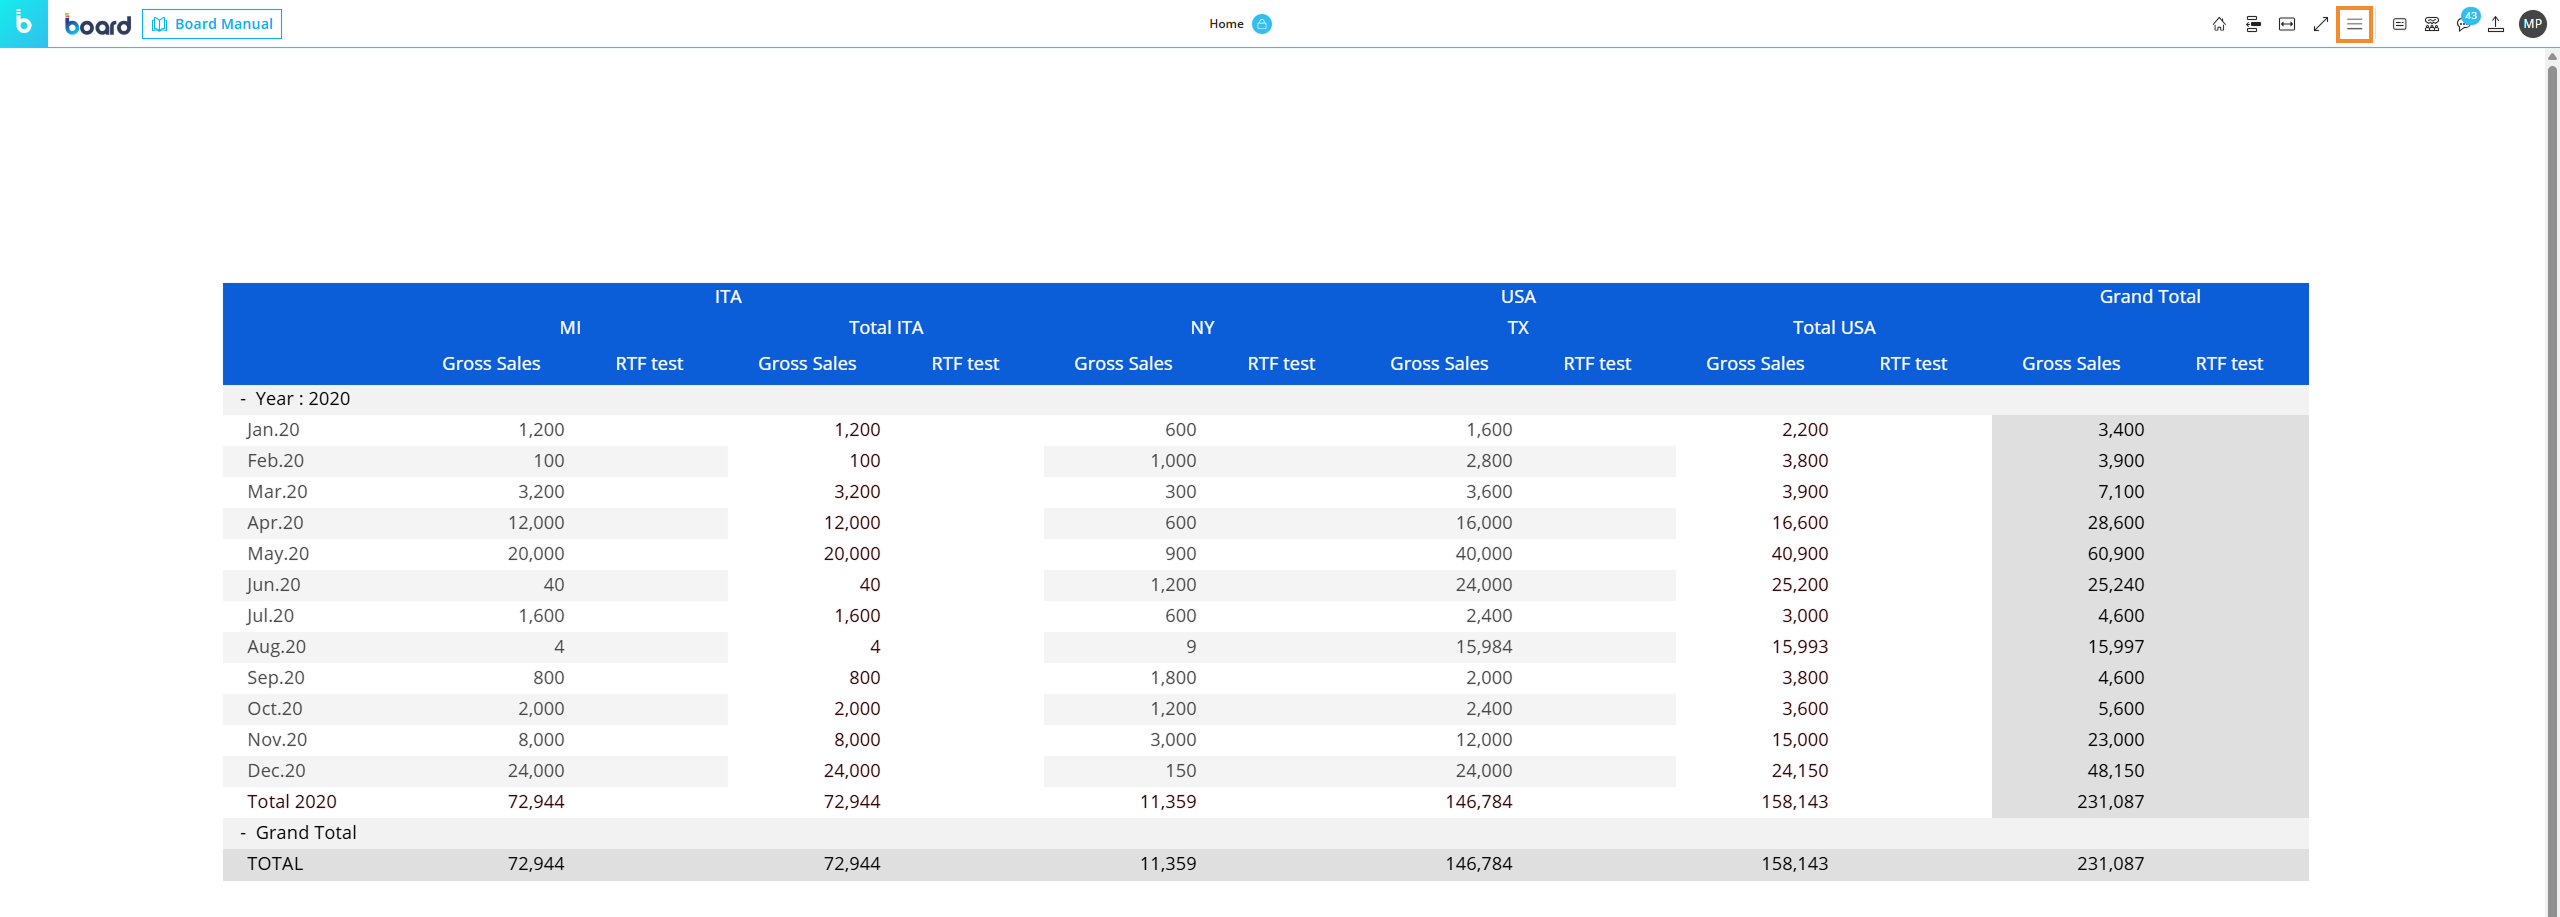
Users can create a new Subscription in two ways.
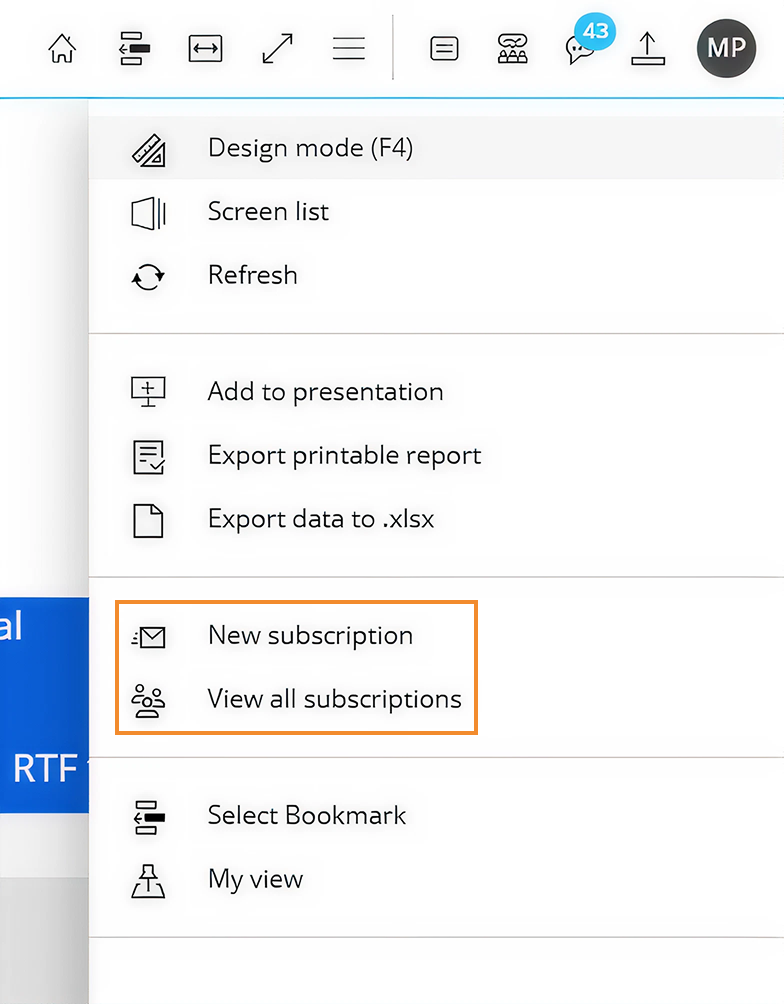
Click "New subscription".
Click "View all subscriptions", then click the "+" icon to create a new Subscription.

A pop-up window appears, where users must enter a name for the new Subscription.
Click "Cancel" to close the window without creating the Subscription, or click "Next" to continue.
.png)
The "New Subscription" window opens, where users can configure the new Subscription. The available settings are described in Edit a Subscription.
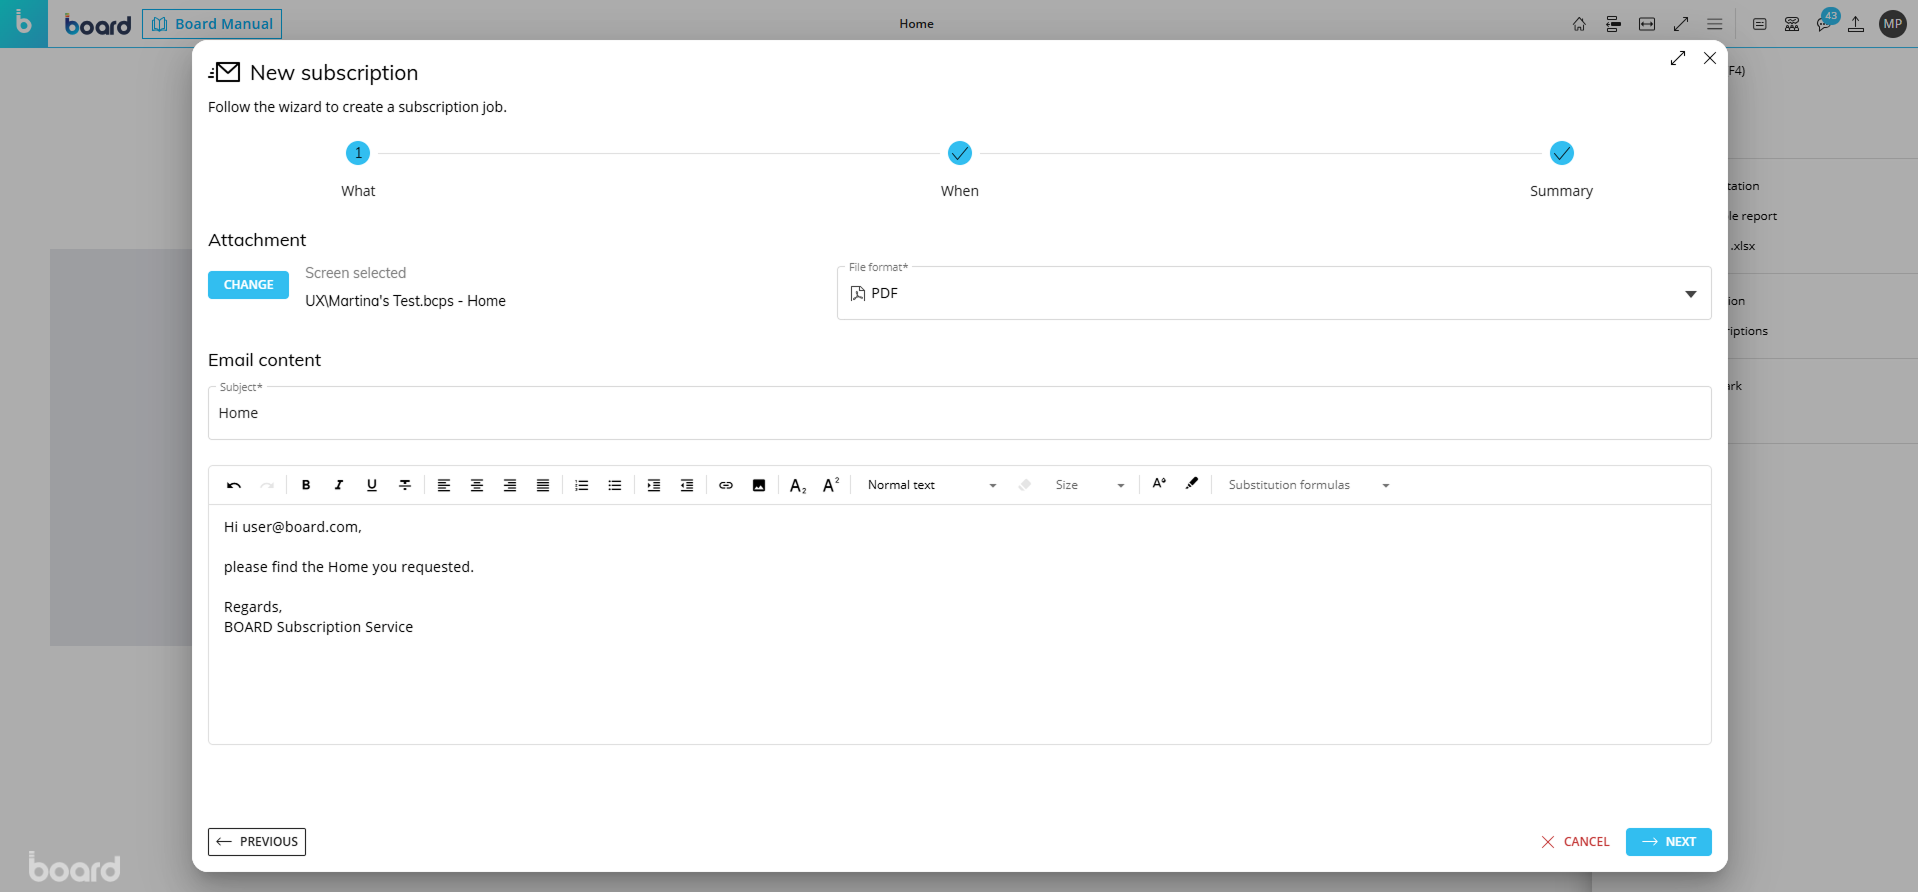
After all configurations are applied, the Subscription is created and it appears in the Subscriptions interface in System Administration.
Edit a Subscription from a Capsule
When accessing a Subscription from a Presentation or a Capsule, Edit Mode opens with the Subscription details and editable settings. From this page, users can modify the selected Subscription. See Subscriptions for more details on how to view and edit a Subscription.