This topic describes how to add a new Selector Object to a Screen or a Container and its specific properties.
To create a new Selector Object, open a Screen in Design Mode.
From the Screen editing page, locate the Selector Object from the Screen Objects list in the left panel, then drag and drop it onto the Screen or Container.

The Selector Object, just like every other Object, can be moved, resized, duplicated via copy/paste, and easily aligned with other Objects on the Screen.
See Configure Screen Objects for more details.
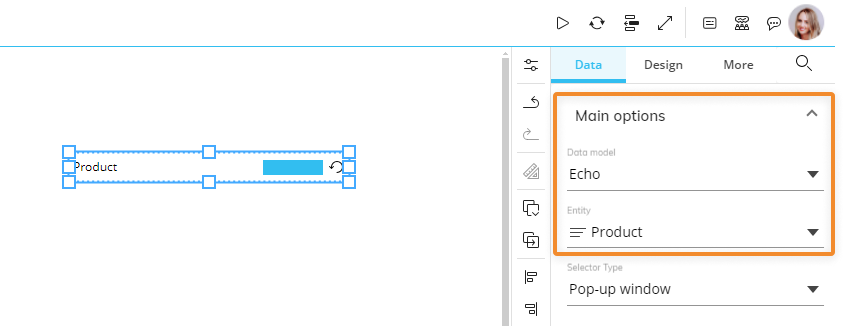
A new Selector Object is initially empty. The next step is to associate it with an Entity.
To do so, click on the Object or select the Object and click the "Configure Layout" icon  located in the Properties Toolbar located vertically alongside the Properties panel to the right of the Screen.
If the Multiple Data Models mode is enabled on the Screen, an additional dropdown menu will allow you to select the Data Model containing the Entity to be associated with the Selector.
Once associated with an Entity, the Selector becomes immediately operational and can be used to apply selections right away.
See Selector properties and settings for more customization options.
Resetting a selection made on a Selector only affects the Entity associated with it and the less aggregated Entities on the same Relationship tree. Selections made on other Entities are retained.
Resetting a selection made on a Selector returns the Entity associated with it to the state defined by the Screen selection.
If you apply a selection using a Selector in Design Mode and save the Screen, that selection will be the default selection applied to the Screen in Play Mode when the Planner opens it. See Selection application sequence (Select at runtime) to know more about the order in which Board executes selections on each Screen. We highly recommend not to use the Selector Object and the Pager Object on the same Screen when they are associated with Entities on the same Relationship tree.
Selector properties and settings
Selector properties are available from the Object Properties panel on the right of the Screen editing page once the Object is selected.
The Object supports all options common to all Screen Objects.
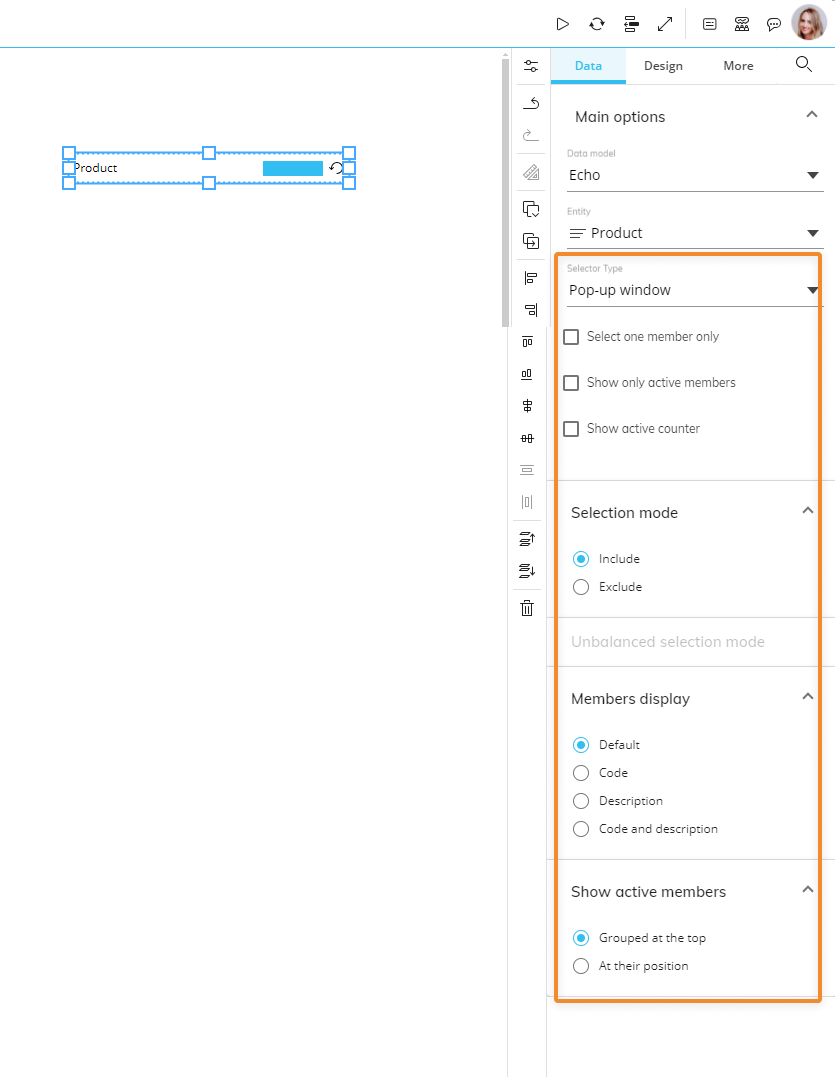
Properties specific to the Selector Object are highlighted in the following image and explained below:
Data Object properties
Under the Data tab of the Object Properties, the following options are available:
Selector type. Select one type of Selector from the following options:
Pop-up window. Click on the Selector to reveal a popup window where the user can make the desired selection.
Vertical list. Displays a vertical list of all Entity members and allows the user to immediately make a selection with a few clicks. The row height automatically adapts to the font size applied to the member list.
Horizontal list. Displays a horizontal list of all Entity members and allows the user to immediately make a selection with a few clicks. Selected members are highlighted with a blue underline (unless configured otherwise).
The width of each item in the list is automatically defined depending on the member with the longest code or description.
Depending on the Selection Mode setting for both Pop-up window and Vertical list, selected members can be highlighted with a blue tick for selecting members or with a red "X" to exclude members.
Default tree depth (Vertical list only). For Unbalanced Entities only, the Default tree depth allows you to configure at which depth the unbalanced hierarchy tree is opened to by default. In the example below, you can see as the number increases, so does the depth view of the unbalanced hierarchy:
Select one member only. Enable this option to allow only one member to be selected. If enabled, you won't be able to select multiple members.
Show only active members. If you have made a selection, enable this option so that only members included in the selection available in Play mode. This option is available only if the Selection mode is set to "Include".
Show active counter. Shows/hides the active members counter on the "Vertical list" Selector. Example: 7/9.
Show active percentage. Shows/hides the active members percentage bar on the "Pop-up window" Selector.
Selection mode. If you select "Include", only highlighted members will be included in the selection. If you select "Exclude", only non-highlighted members will be included in the selection.
Members display. Defines which information about Entity members should be displayed: default (as configured in the Entity settings menu in the Data model), code, description, or both.
Show active members. Defines how active members (i.e. members included in the selection) should be displayed, grouped at the top or in their position in the list. The "Grouped at the top" option set on the "Horizontal list" Selector type will show active members "at the top" by placing them on the left side of the horizontal list.
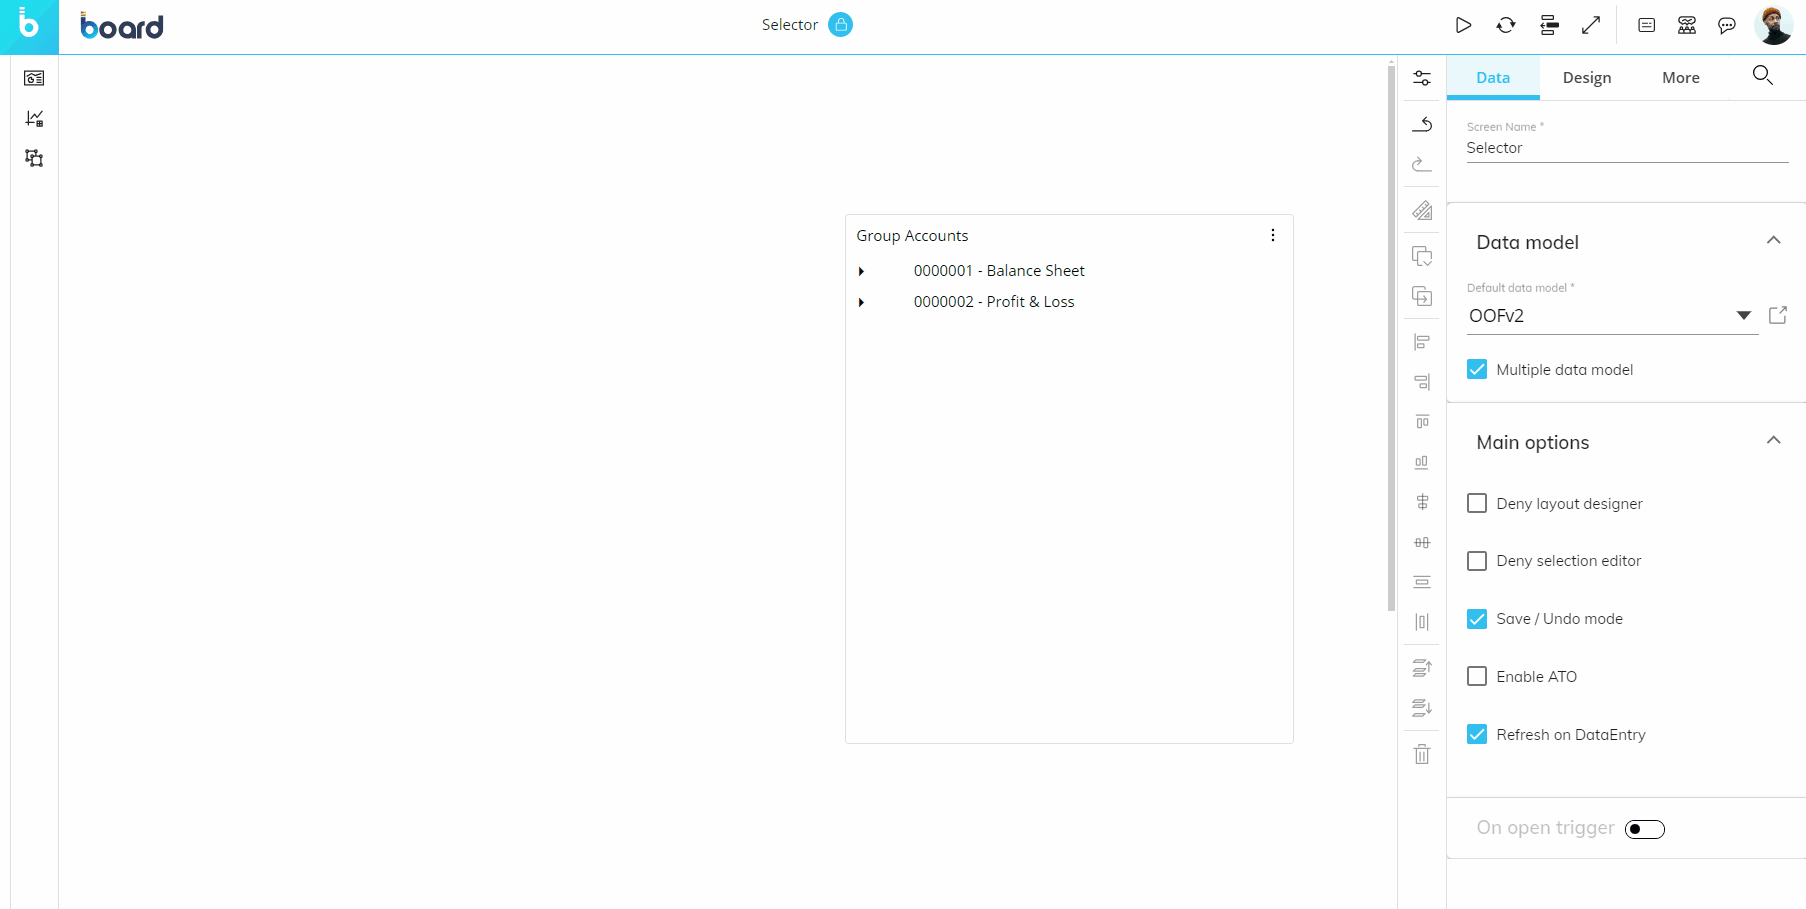
Selectors and Unbalanced Entities
Selectors are compatible with Entities of an Unbalanced hierarchy.
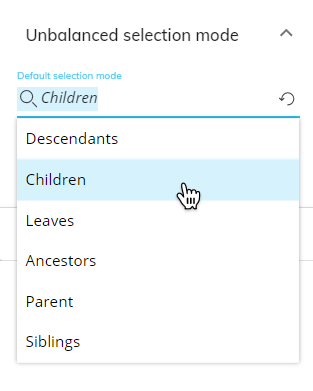
When an Unbalanced Entity is associated to a Selector, a new section appears in the Object Properties Panel under "Data" called "Unbalanced Selection mode". Developers can choose a default hierarchy selection based on the hierarchy of the members chosen by a Planner in Play Mode. These options are similar to the Select options for unbalanced hierarchies.
To configure a default hierarchy selection mode on a specified hierarchy for Planners in Play Mode, proceed as follows:
Click on the Selector Object in Design Mode so that it is selected.
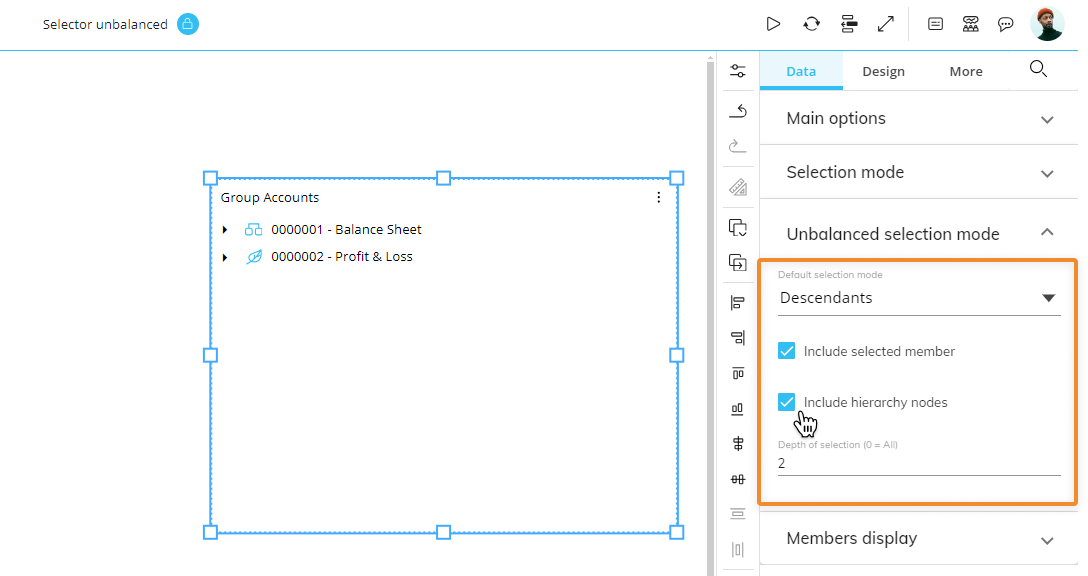
Go to the "Unbalanced selection mode" submenu from the Object Properties panel under the Data tab.
Select the hierarchy group you would like to choose as the default selection from the "Default selection mode" dropdown menu. The 6 options are:
Descendants. Selects all descendants (children) of the selected member. This option adds a few more options:
Include hierarchy nodes. Defines whether or not to include the levels between the selected member and the member at the maximum depth of the selection.
Depth of selection. Defines the depth of the selection:
ALL. All descendants on any level will be selected.
1. All descendants that are 1 level away from the selected member will be selected.
2. All descendants that are 2 levels away from the selected member will be selected, etc.
Children. Selects direct descendants (children) of the selected member only. Descendants of the selected member’s descendants won’t be selected.
Leaves. Selects leaf members that are descendants of the selected member. Nodes are excluded from the selection.
Ancestors. Selects all parent members of the selected member, up to the root member. This option adds a few more options:
Include hierarchy nodes. Defines whether or not to include the levels between the selected member and the member at the maximum depth of the selection.
Depth of selection. Defines the depth of the selection:
ALL. All ancestors on any level will be selected.
1. All ancestors that are 1 level away from the selected member will be selected.
2. All ancestors that are 2 levels away from the selected member will be selected, etc.
Parent. Selects the direct parent member of the selected member.
Siblings. Selects all siblings of the selected member.
The "Include selected member" checkbox defines whether or not to include the selected member in the selection.
Planners can also apply their own hierarchy select in Play Mode that overrides the default selection directly from the Selector Object itself.
Interacting with the Selector Object in Design Mode
In Design Mode, the Selector Object provides the same interactive features available in Play Mode.
The Popup window Selector offers the same options as the Select configuration window.
See Configure Screen Objects for more details.
Be aware that if you apply a selection using a Selector in Design Mode and save the Screen, that Selection will be applied by default to the Screen in Play Mode when the Planner opens it. See Selection application sequence (Select at runtime) to know more about the order in which Board executes selections on each Screen.