It is possible to allow users to drill down from one Data View to another Screen within the same Capsule with a selection on the row header selected by the end user (Entity member by row). To do so, proceed as follows:
Select a cell and click on the Drill Anywhere icon
 .
.From the popup window, click on the "CONFIGURE" button in the top right corner of the window to enter the "Drill anywhere configuration" window, and click on the "Screen" subpage.
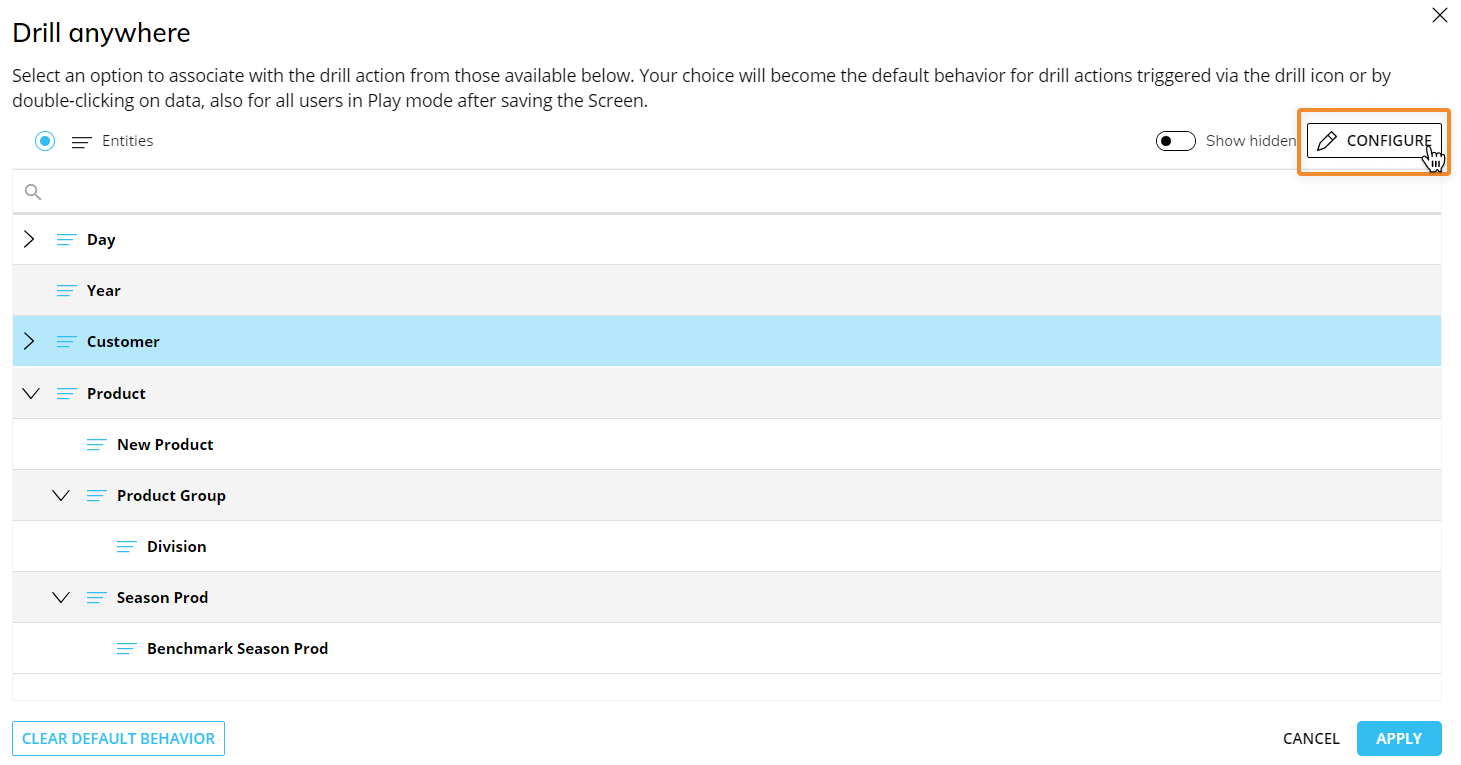
If "Screen" is not yet configured as a drill option for Planners from the Drill Anywhere configuration window, you will not see a Screen tab in the Drill Anywhere window.
You can make a default Drill-to-Screen without enabling Drill-to-Screens for the end user. To do so, enable the "Show hidden" toggle in the top right corner of the window to see all the possible drills.

If the drill headers are not configured for the Planners, they have a "hidden" tag next to their heading. If the elements within the tab are hidden, they will have a closed eye icon next to them.
Enable the toggle next to the Screen subpage title and select all the Screens you would like to allow the Planners to drill to.
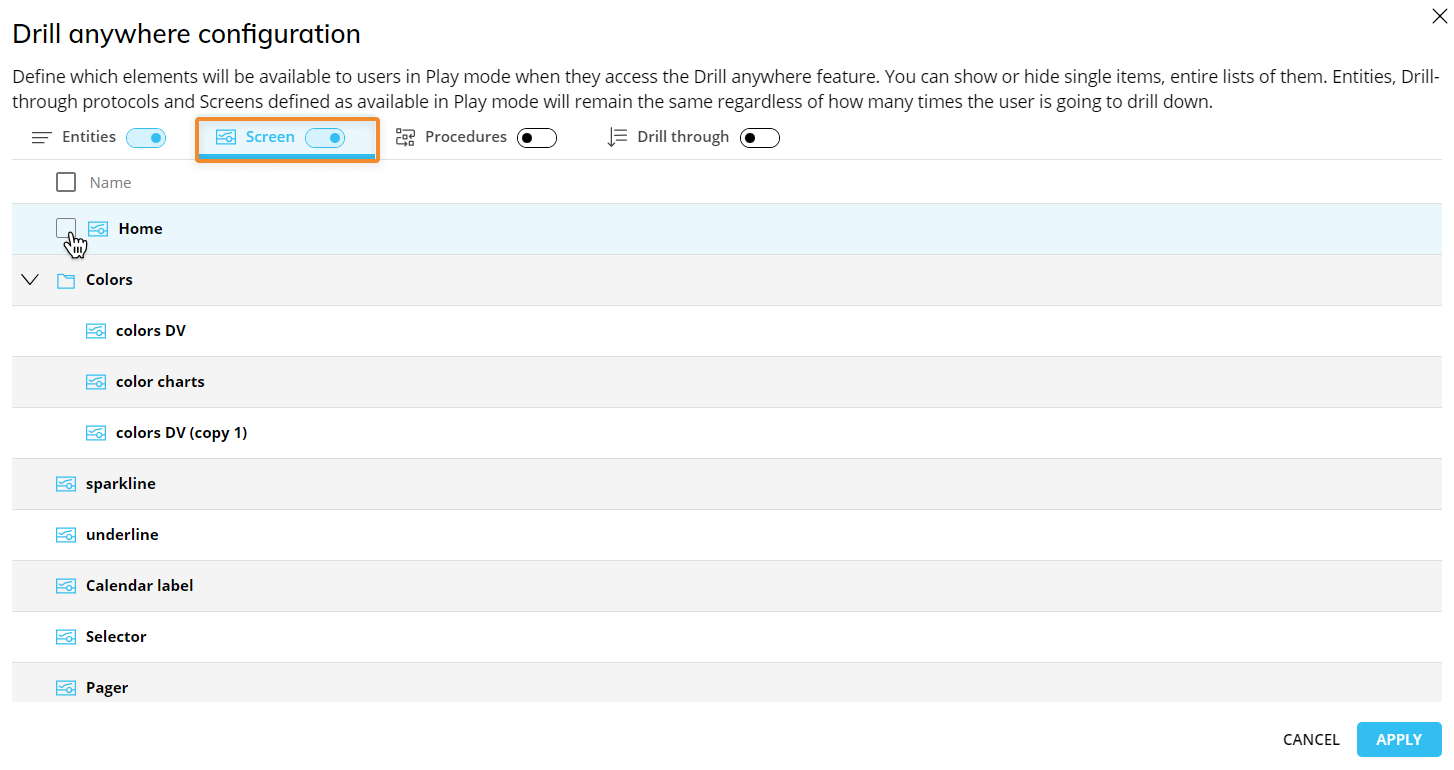
These Screens will be the only ones available when conducting a Drill-to-Screen for both Design Mode and Play Mode, but in Design Mode you can see any hidden Screens from the Drill Anywhere window when you enable the "Show hidden" toggle in the top right corner of the window (which also shows you the hidden drills).
Click "APPLY" to close the configuration window.
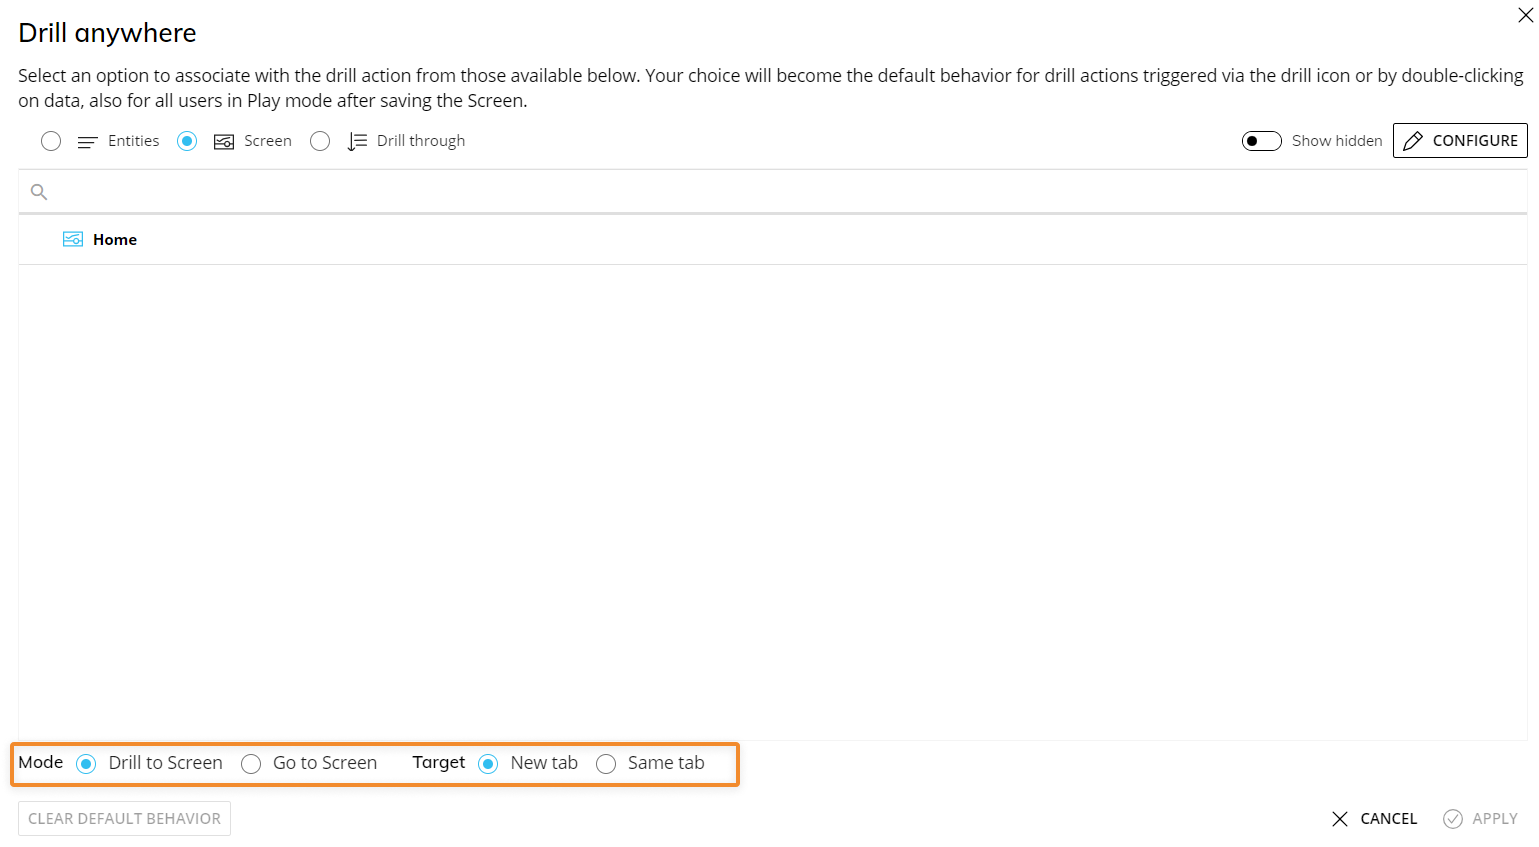
From the Drill Anywhere window, you can now further configure your Drill-to-Screen with the following options:
Select the "Same tab" checkbox to open the destination Screen in the same browser tab.
Select the "New tab" to open in a new tab.
The Drill-to-Screen mode, if enabled, will open the destination Screen with a selection on the row header (a member of the Entity set By Row) when the user double-clicks on it or selects it and clicks on the Drill Down icon
 .
.Screen selections and selections made by the user using Selector Objects (if any) also apply to data in the target Screen.
The Go to Screen mode, if enabled, will open the destination Screen when the user double-clicks on a row header (a member of the Entity set By Row) or selects it and clicks on the Drill Down icon
 . The destination Screen won't inherit any selection from the Data View.
The Dynamic Screen option allow to select a Block (an algorithm) to dynamically change the Screen navigation based on another Block values (a text cube containing Screen names).
Click "APPLY" to save the configuration.
Default Drill-to-Screen
To create a default Drill-to-Screen configuration, proceed as follows:
Select a cell and click on the Drill Anywhere icon
 .
.Select the Screen tab. If "Screen" is not yet configured for visibility to the end user in Play Mode, enable the "Show hidden" toggle in the top right corner of the window.
If "Screen" is not yet configured as a drill option for end users from the Drill anywhere configuration window, you will not see a Screen tab in the Drill Anywhere window.
You can make a default Drill-to-Screen without enabling Drill-to-Screens for the Planners. To do so, enable the "Show hidden" toggle in the top right corner of the window to see all the possible drills.
If the drill headers are not configured for the Plannersr, they have a "hidden" tag next to their heading. If the elements within the tab are hidden, they will have a closed eye icon next to them.
Make a Screen selection and click "APPLY" or double click a Screen to save the Drill-to-Screen default configuration and close the window.
The Drill-to-Screen configuration process can also be started by double-clicking on a cell or a row header (a member of the Entity set By Row) if a configuration isn't already set.
Default Drill-to-Screen with a selection filter
You can also configure a Drill-to-Screen with a selection filter applied based on the row (Entity member by row) from the Layout editor.
This feature allows you to nest your analysis in a more powerful way than the standard drill-down, which only changes the level of granularity of a report. In a Drill-to-Screen navigation, the data represented (values, indexes) and types of Objects (Charts, Dashboards, Data Views) may vary as the user drills from a top level view to another Screen at a more detailed level.
To configure a Drill-to-Screen with a selection filter applied based on the row:
Select the Data View and open the Layout editor.
Go to Object settings.
Go to the Column appearance menu. You can also change the cell appearance by selecting one of the options listed in the dropdown menu. Click on the "CONFIGURE DRILL" button to configure a Drill-to-Screen on one or more Data Blocks.
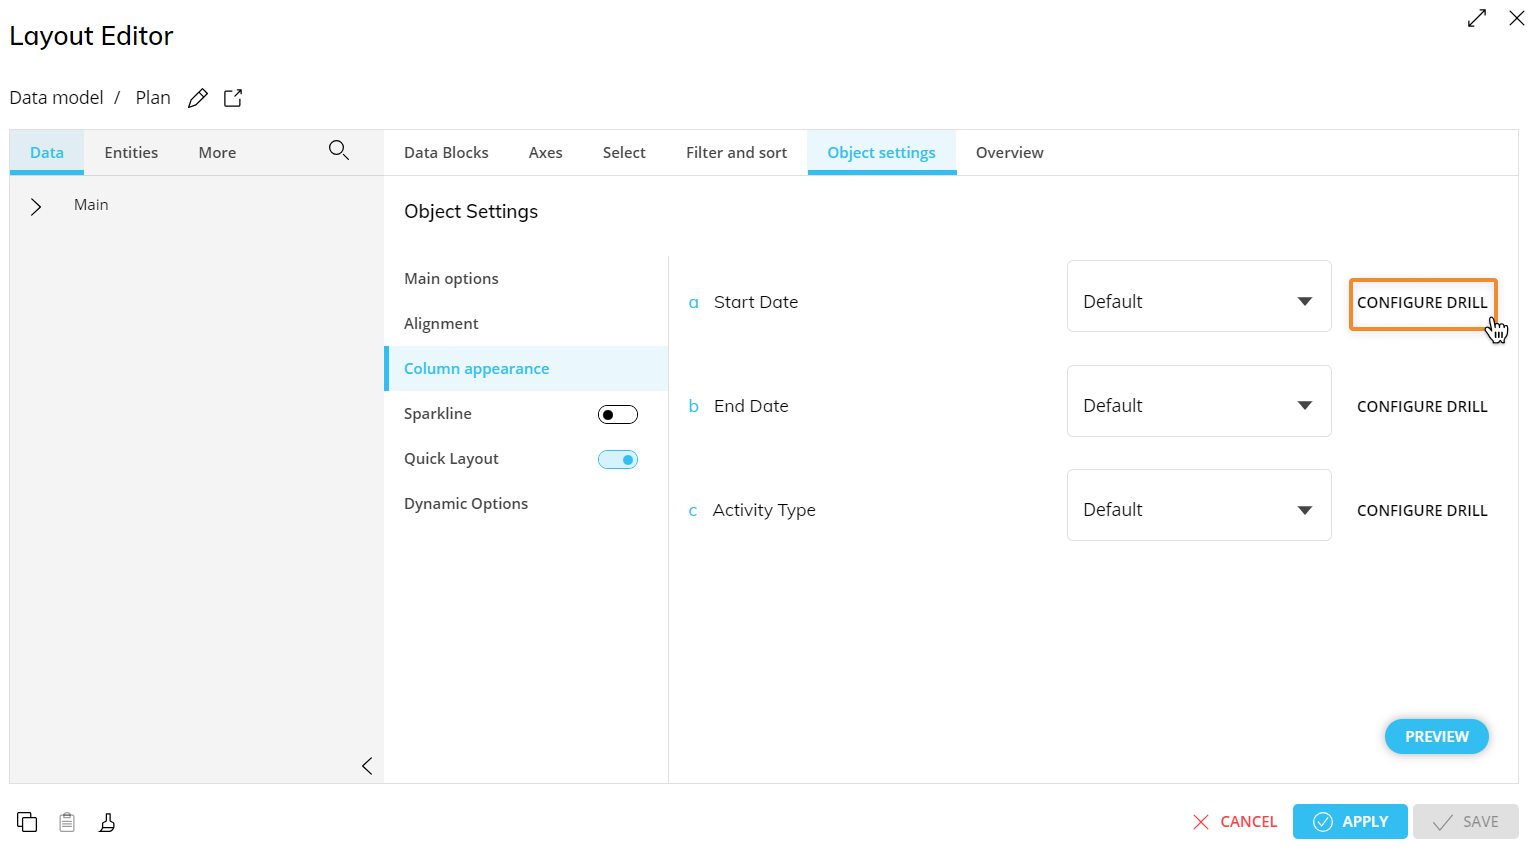
The Drill configuration window will appear. Click on the "Screen" subpage.
Check the "Same tab" checkbox to open the destination Screen in the same browser tab, and "New tab" to open in a new tab.The Drill-to-Screen mode, if enabled, will open the destination Screen with a selection based on the on the row header (a member of the Entity set By Row) corresponding to the cell selected or double-clicked by the user in the Data View.
Screen selections and selections made by the user using Selector Objects (if any) also apply to data in the target Screen.
The Go to Screen mode, if enabled, will open the destination Screen when the user double-clicks on a cell of a configured Block or selects it and clicks on the Drill Down icon (
 ). The destination Screen won't inherit any selection from the Data View.
The Dynamic Screen option allows you to select a Block (an algorithm) to dynamically change the Screen navigation based on another Block values (a text cube containing Screen names).
Save the Layout.
Screen selections and Selections made by the user using Selector Objects (if any) also apply to data in the target Screen.
Read more about: