The Smart Import Object offers an Excel-like user experience both in Design Mode and in Play Mode, providing the following interactive features:
Data Entry
To perform Data Entry, you can select a cell or a range of cells and paste data in the selection. You can also enter data manually, either by double-clicking on a cell and typing the desired value or by selecting a single cell and typing data.
Currently, Data Entry actions made via the Smart Import Object are not logged into the DataEntry log file.
Formulas and functions
The Object also supports formulas and functions to make complex and useful calculations before loading the data Cubes/Entities: formulas and functions always begin with the equal sign "=" and are built using the same syntax and operators used in Microsoft Excel.
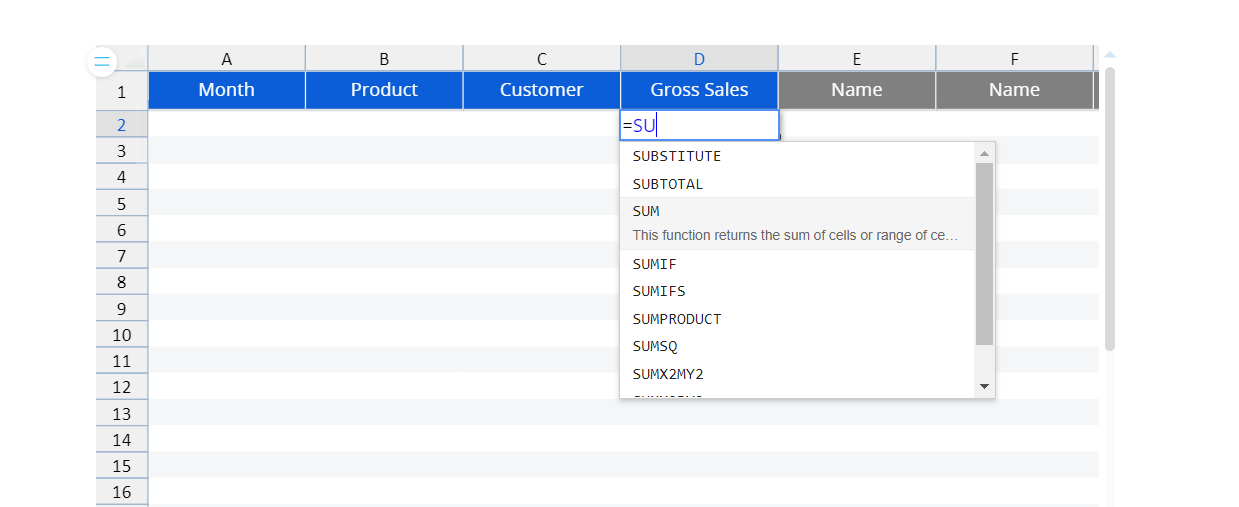
To enter a formula that contains a function, type the equal sign and then enter a function, for example "=SUM". After the function, type an open parenthesis, enter/select a range of cells, and type a closed parenthesis. For example, the function "=SUM(A1:A12)" will return the total obtained by adding all values in the selected cell range.
After you have entered the desired values and formulas, click "  Save" in the Object toolbar to actually save the values in the Cube.
If global validation rules and/or custom validation rules are not met, the data loading process stops and an error dialog box and/or the error column will display the necessary explanatory messages.
If global validation rules and/or custom validation rules are met, the external data is saved in the target Data model as per the defined mapping and the table is cleared.
Empty rows and columns are not considered during the data loading process.
File upload
The file upload feature allows you to quickly load data in bulk by uploading an .xlsx file. This is particularly useful when your dataset exceeds the maximum value of rows (10,000) and columns (200) available in the Object itself, as the feature allows you to upload an .xlsx file with no limitations on rows and columns. You can also download an empty Excel template file from the Object by clicking on the download template icon (  ), and then enter the desired data and upload it back into Board.
To upload an .xlsx data file, click on the file upload icon (  ) from the Object toolbar and drag/choose the desired file from your machine.
If global validation rules and/or custom validation rules are not met, the data loading process stops and an error dialog box will display the necessary explanatory messages.
If global validation rules and/or custom validation rules are met, the loaded data is saved in the target Data Model as per the defined mapping.
Empty rows and columns are not considered during the data loading process.
Only the active tab of the uploaded worksheet is considered during the data loading process.
The Object toolbar
When you hover over the Smart Import Object, the Object toolbar icon (  ) appears in the top left corner. Click on it to reveal the Object toolbar which you can disable or pin to the top of Objects. You can fully expand it by clicking on the 3 vertical dots to the right (
  ).
).
Save entries
 . Save the Smart Import entries.
Clear content
 . Clear all content.
Download
 . Download the template.