In Design mode, the side panel on the right of the page allows you to access the Screen Properties menu from the Screen Properties panel.
The Screen Properties panel is organized by category: Data, Design, & More.
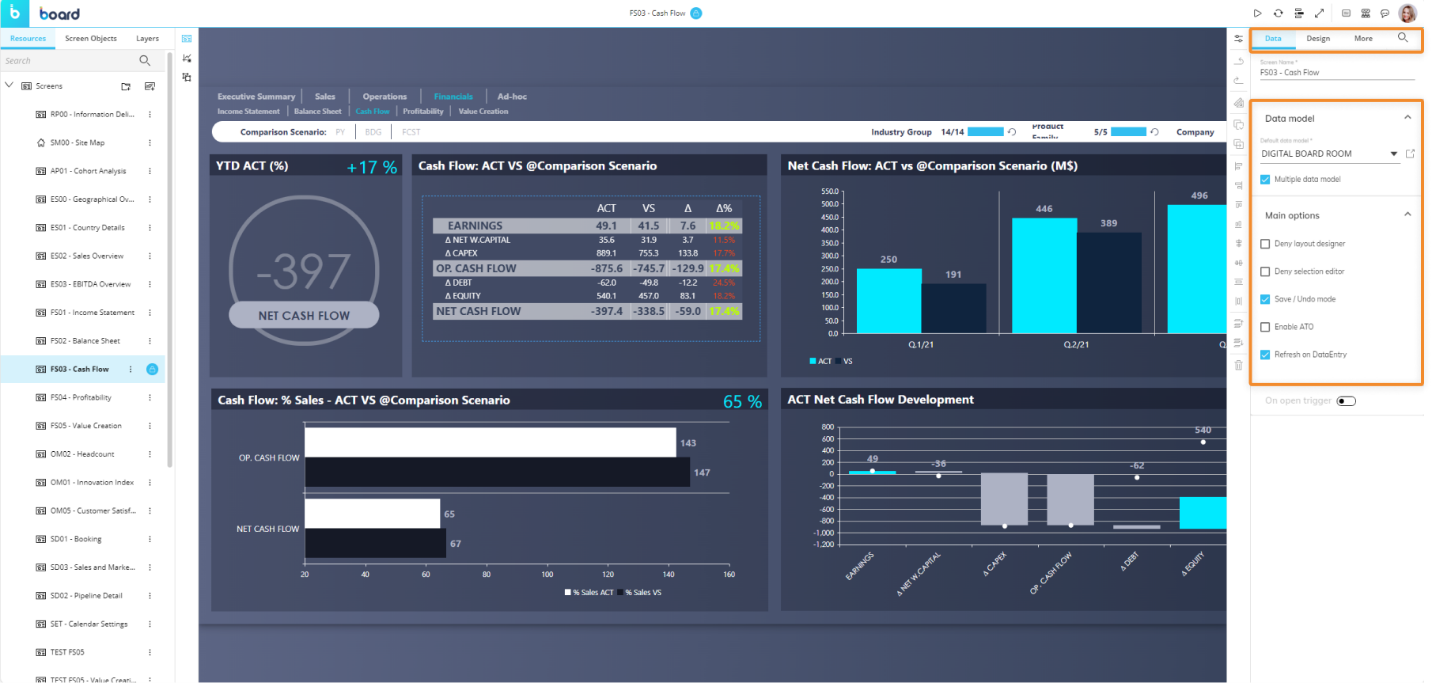
If no Screen Object is selected in the Screen design area, the panel shows the following general Screen options:
The Data Tab
Under "Data", the data Screen properties available are as follows:
Screen name. Change the Screen name.
Data model. Configure details about the Data Model(s) used in the Screen.
Default Data model. Shows the default Data Model linked to the Screen. Choose another default Data Model from the dropdown menu. The open window icon directs you to the chosen Data Model page for configuration.
Multiple Data model. If selected, you can choose which Data Model to link to each Screen Object in the Layout editor. This option is disabled by default and all Objects are linked to a single Board Data Model: the one set as default when creating the Capsule or the one selected when creating the Screen.
Main options.
Deny Layout designer. Prevents entering the layout editor for all Screen Objects.
Deny selection editor. Prevents applying a Select to the Screen. Selects can only be made directly from an Object or with a Selector Object.
You may save a selection made from a Selector Object as a Select Bookmark to use again later.
Save/Undo mode. (Enabled by default) Allows you to make multiple Data Entry actions, save values in bulk or undo them. If disabled, after each data entry the new value is stored and you can not reverse that action.
Enable ATO. Enables Advanced Transaction Object (ATO) management for the Screen. This option is activated automatically as soon as the Object Entity Editor is added to the Screen: the ATO allows users to execute CRUD (Create, Read, Update, Delete) actions on Entities, Entity members, and Relationships.
Refresh on Data entry. (Enabled by default) Refreshes all Screen Objects' Layouts when you save/apply a Data Entry action on a single Screen Object. If disabled, only the Layout of the Screen Object that you save/apply a Data Entry action to is refreshed.
The Design Tab
Under "Design", the design Screen properties available are as follows:
Screen size. Adjusts the Screen size (4:3, 16:9 or Custom).
Fit mode. Define how the Screen should fit your viewing area.
Colors. Select the colors you want for your Screen's appearance.
Background. Displays the Screen's background color. Click on the color tile to configure the following options:
Type. Choose the type of background for your Screen:
Solid. Displays a solid color of your choice.
Background. Choose the color for the solid background.
Gradient. Displays a gradient color of your choice.
From color/To color. Choose the two colors that you want the gradient background to reflect.
Gradient direction. Choose the direction that the gradient color is displayed: from left to right, from top to bottom, or from the center to the outer edges.
Image. Displays an image of your choice.
Capsule image/ External link. Select the corresponding radio button and either choose a Capsule image from the dropdown or type in the external link that contains the image you want to display on the Screen background.
Fill. Choose how the image should fill the background.
None. The image appears as the Screen background according to its dimensions. If its dimensions are smaller than the Screen's, white space appears surrounding the image.
Fill. Fills the Screen with the image. The image is stretched to fit the Screen's dimensions regardless of its dimensions.
Uniform. Expands the images size accordingly with its dimensions until one side fits to the Screen's dimensions. For example, if the Screen size is 16:9 and the image is 2x3, Uniform expands the image to 6x9.
Uniform to fill. Expands the image to fill the Screen without stretching the image. This means that the image could appear cropped. If we use the above example dimensions, the image would expand to 16x18 within a 16:9 Screen size.
Repeat. Repeats the image in the Screen.
Repeat. Repeats the image in all the empty spaces of the Screen.
Repeat horizontally. Repeats the image in horizontally.
Repeat vertically. Repeats the image vertically.
No repeat. Does not repeat the image.
Alignment. Aligns the image accordingly.
Vertical/Horizontal. Align the image vertically from the top, the middle, or the bottom. Align the image horizontally from the left, the middle, or the right.
Screen Mask. Add Masks right from the Capsule. To create or edit Masks, you can do so under Resources in the Left panel.
Mask. Choose a Mask to apply to the Screen from the dropdown menu. This feature disables the Screen size and Colors options.
Environment background toggle. When enabled, shows the space outside of the Screen's design area when zoomed out. You can customize the following options:
Show background grid. When enabled, displays the space outside of the Screen's design area in a grid pattern.
Cover background. Displays the space outside of the Screen's design area in the color and style or image configured.
The More Tab
Under "More", the additional Screen properties available are as follows:
Anchor point. Choose the position of where the anchor is displayed: Top/Left or Center/Center.
On-Screen tips. Toggle on to configure Tooltips
Tip type. Choose the Tooltip type: Dialog or Balloon
Content. Write the content that should display in the Tooltip. Click on the full screen icon to open a window that provides you with advanced formatting options.
On-Screen element. Format the visual element.
Format. Choose the format of the visual
Icon. Customize the icon.
Choose icon. Choose from the available icons.
Text or Number. Customize the Text or Number.
Text or Number. Write in the field.
Background. Choose the background color.
Icon/Text or Number. Choose the element color.
Enable animation. When enabled, the Tooltip pulses.
If a Screen Mask has been applied to the Screen, a link to that Mask is shown in the left panel in the "Resources" tab underneath the list of Screens. A selection of Screen Properties is also available for Screen Masks.