The Select Bookmark feature allows users to create and save custom Selections that can be reused in other Screens across Capsules.
All saved Bookmarks are associated with a specific Data Model. In case the Multiple Data Model mode is enabled on a Screen, existing Bookmarks will affect only Screen Objects associated with the same Data Model.
Users can set selections through Selector Objects and/or Screen Selections and then save their personal configuration in a Bookmark.
Bookmarks are saved at the user level, i.e. they are available only to the user who created them. Every time that a Screen is opened in Play Mode, all Bookmarks that the user has previously saved in that Capsule will be available.
If a Bookmark is created through a Selector Object in a Screen where the "Deny selection editor" option is active, then only the selections made from that Selector Object are saved.
Where to find Select Bookmarks
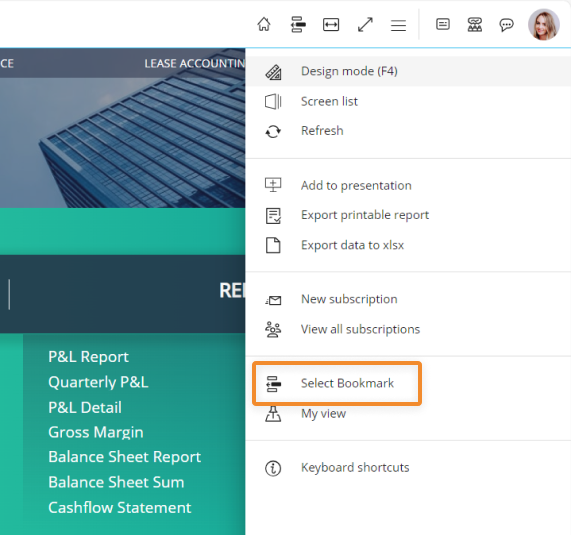
The Select Bookmark feature can be found in:
The Top Menu
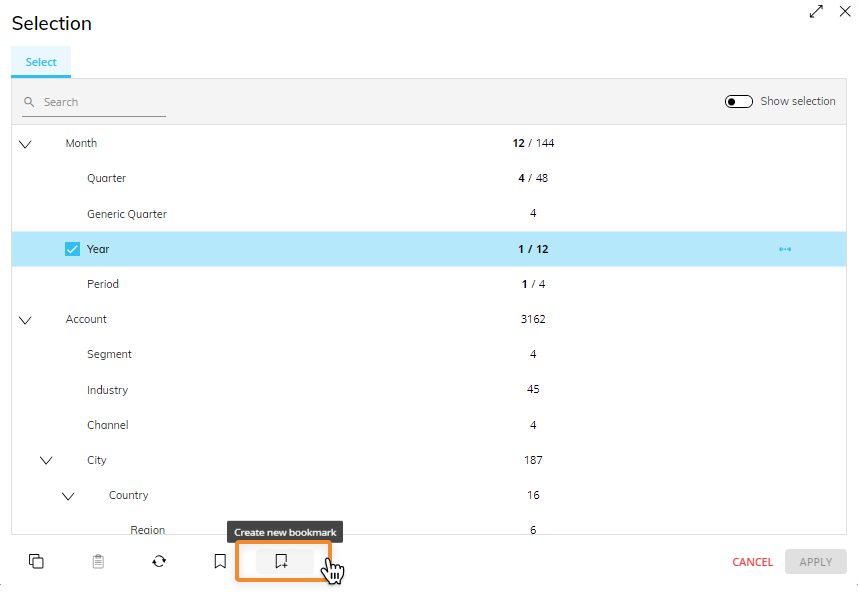
The Select window
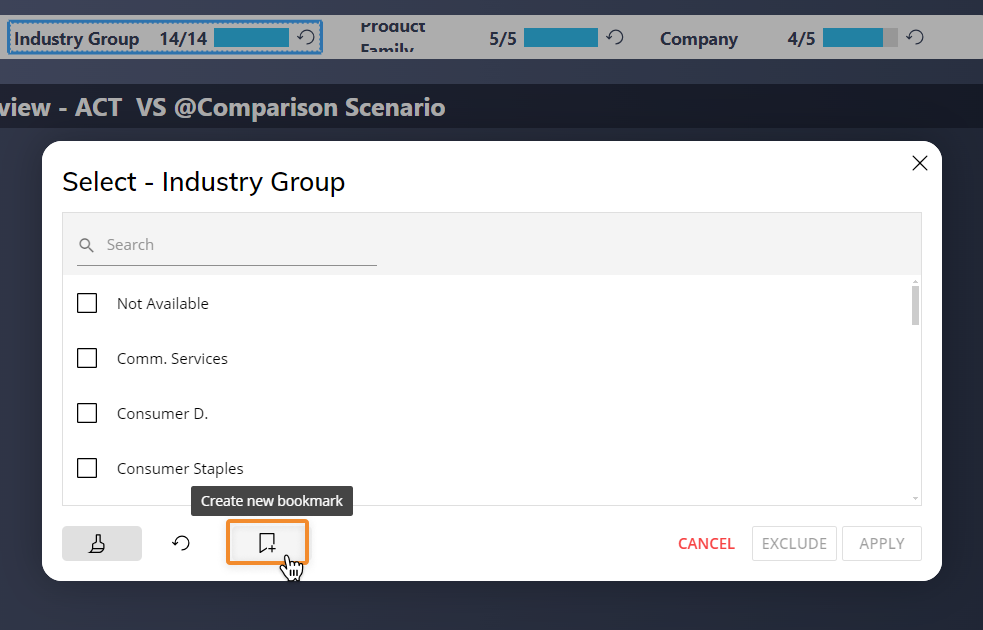
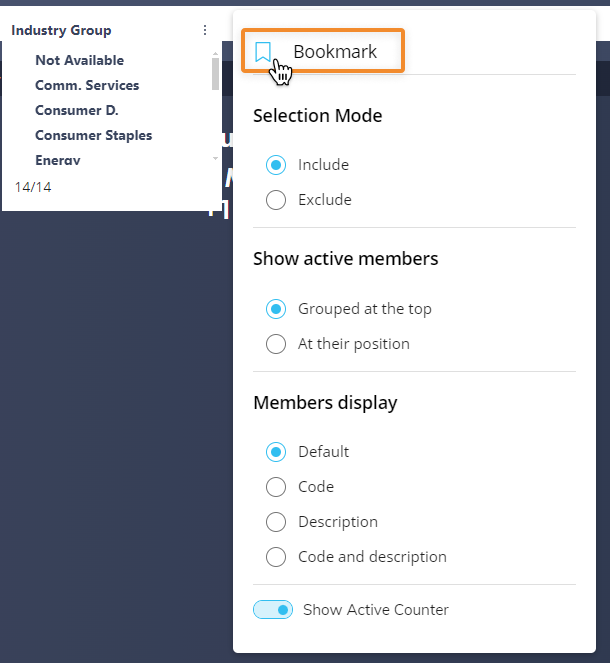
Selector Objects (popup window and vertical list selector types only)
Popup window
Vertical list
Hover over the three dots in the upper right corner of the Selector to reveal the settings menu.
Once you have applied a Selection to the currently open Screen, you can create a new Bookmark.
How to create a new Bookmark
To create a new Bookmark:
Click the "create new bookmark" icon
 at the bottom of the Select window. For the Vertical list selector type, go to step 2.
Give your Bookmark a name (required) and a description (optional).
Click "SAVE". You will be taken to the list of the available Bookmarks showing your newly created Bookmark at the top. Go back to see the Selection window again or click "Cancel" to exit the window.
When you create a Bookmark through a Selector or Calendar, it will include only the selection made on the Entity assigned to that Selector or Calendar.
When the "Deny selection editor" option is enabled, Select Bookmarks save only selections that users make directly in Play Mode through selector Screen Objects.
Select Bookmarks do not save selections applied by a Selection Procedure. This behavior prevents users from saving and restoring selections that are restricted by a Capsule developer.
When the "Deny selection editor" option is disabled, Select Bookmarks save and restore the full active Screen selection.
When you create a Bookmark from the Screen Selection function, it will include all Selections made on the listed Entities in the Select window.
To apply an existing Bookmark to a Screen:
Click the add Bookmark icon in the Select window. For the Vertical list selector type, click the Bookmark menu item shown above.
In the list of available Bookmarks, click on the desired Bookmark.
Click "APPLY". You will be taken the Select window where the Bookmark Selection settings have been appended to any currently active Selection.
Double-click on the Bookmark you want to apply to directly append its Selection settings to the currently active Selection and refresh the Screen.
Click "APPLY" to apply your current Selection and refresh the Screen.
A Bookmark created through a Selector can be applied to Screens where the "Deny selection editor" option is active: in this case, it will only affect Selectors in the Screen.
To edit an existing Bookmark:
Hover over the Bookmark you want to edit in the list of available Bookmarks and click on the pencil icon that appears on the right.
Edit the Bookmark title and/or description.
The title field cannot be empty.
Click the checkmark on the right to save your changes.
You can only edit the title and description of any previously saved Bookmark.
To delete an existing Bookmark:
Hover over the Bookmark that you want to delete in the list of available Bookmarks and click on the trash icon that appears on the right.
A confirmation popup window will appear. Click "YES". The Bookmark that you just deleted disappears from the list of available Bookmarks.