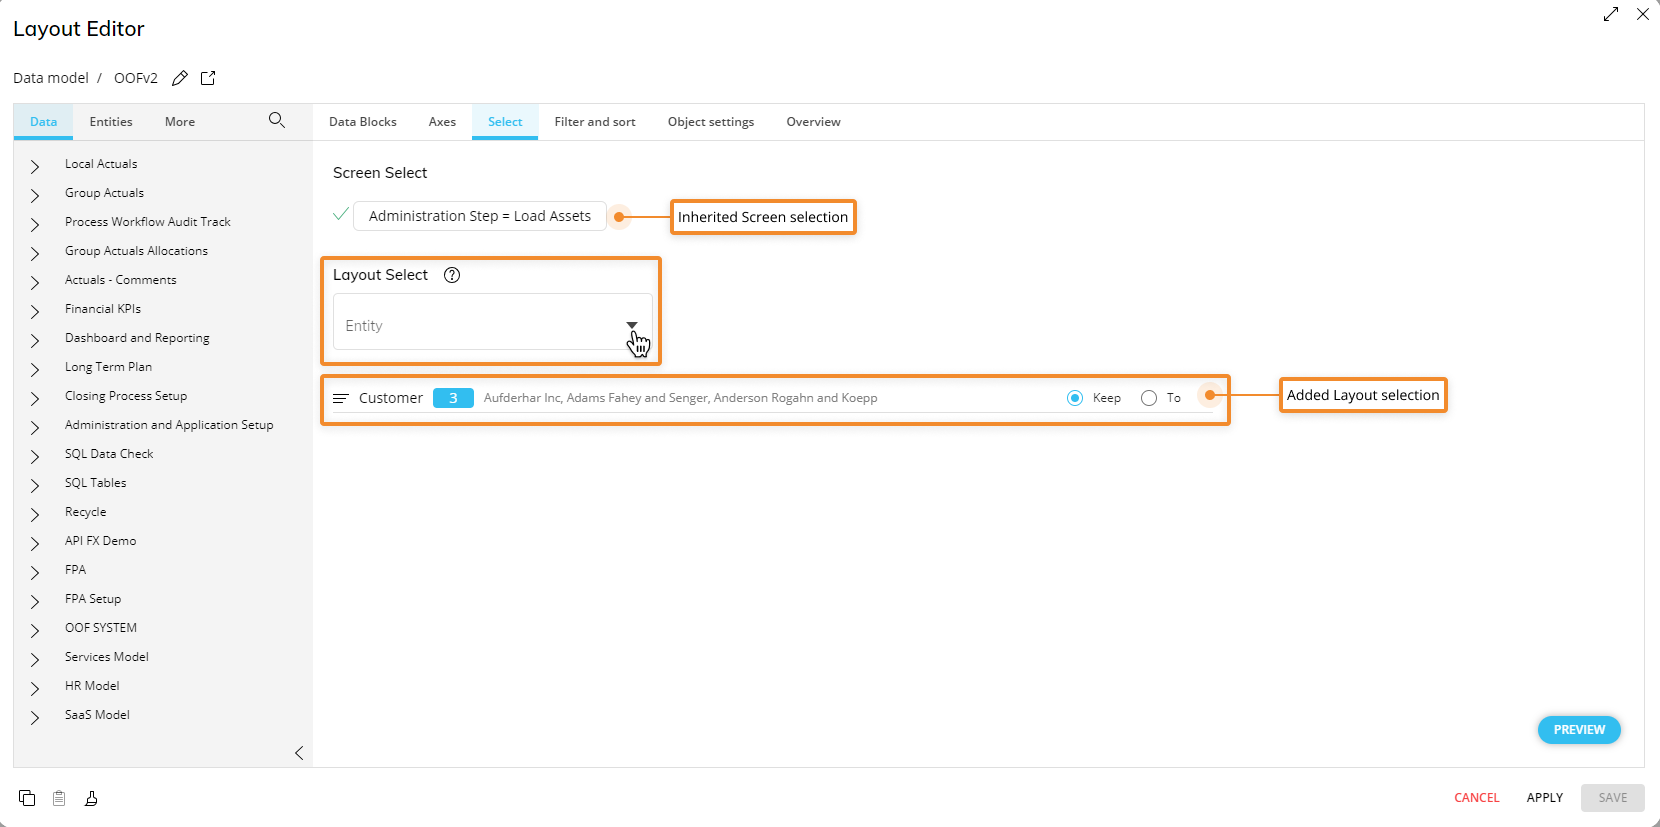
The Select subpage of the Layout editor allows you to apply a custom selection to the currently open Layout only. It also reveals the Selection inherited from the Screen (if any).
If a Selection has been applied on a Screen in Design Mode, then all Layouts in the Screen will automatically inherit it. Its configuration will be displayed in the Layout Select area, listed under the "Screen Select" header. Applying a Layout Selection is optional, but recommended to avoid slowdowns during calculations in the event that you're working with highly granular Cubes that have many dimensions in order.
The Layout Select is configured exactly like the Select function and follows the Selections application sequence (Select at runtime).
There are two data sections in the Select tab of the Layout Editor:
Screen Select. Shows you what selection already exists at the Screen level, if there is one. If no Screen Selection exists, this section will not appear.
Layout Select. Where you make a selection on the Layout.
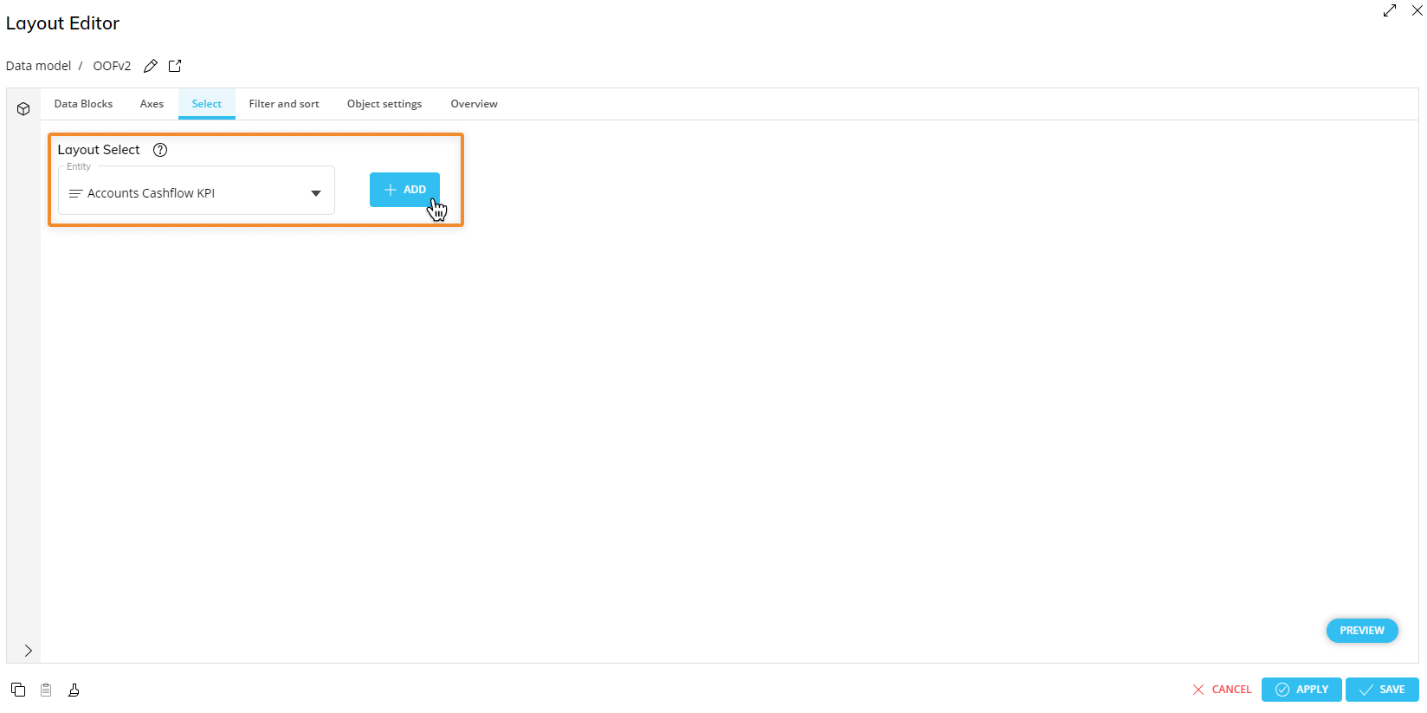
Entity. Select an Entity from the dropdown menu that you want to make a selection from and a popup window appears for choosing which members of that Entity you want.
Selection applied to Layout. Below the dropdown, each Layout select will appear showing the Entity name, the number of selections, and the members selected. There are two radio buttons adjacent to each Layout select that determine how the Layout selection interacts with the Screen Selection:
Keep. Keeps the Screen Selection and intersects the two selections.
If you configure a "Keep" selection on the same Entity as the active Screen Selection, it behaves as the "To" select and overrides the active Screen Selection entirely.
To. Overrides the Screen Selection.

How to create a Layout Select
To create a Layout selection:
Under "Layout Select", choose an Entity from the dropdown menu in which you would like to make a select. Then click "ADD" to open the Select popup window.

Select the desired Entity members, click on the "TO" button to override the current Screen selection on the selected Entity or "KEEP" to keep the Screen selection. This can be changed once the Selection is made from within this submenu of the Layout by clicking on the corresponding radio buttons that appear next to the Selection: "To" or "Keep".
To. Overrides the Screen Selection.
Keep. Keeps the Screen Selection and intersects the two selections.
If you configure a "Keep" selection on the same Entity as the active Screen selection, it behaves as the "To" select and overrides the active Screen Selection entirely.
.png)
Click "APPLY" to apply the Layout selection successively to the Screen Selection on the selected Entity, as per the Selections application sequence (Select at runtime).
For Entities belonging to the same hierarchy, the selection applied to the Layout may be used to limit the selection defined at the Screen level.
For example, if the current Screen selection is "2020" on the Year Entity but you only want to select 3 months in a Layout, you can configure a Layout Select on the Month Entity to consider only the desired months.