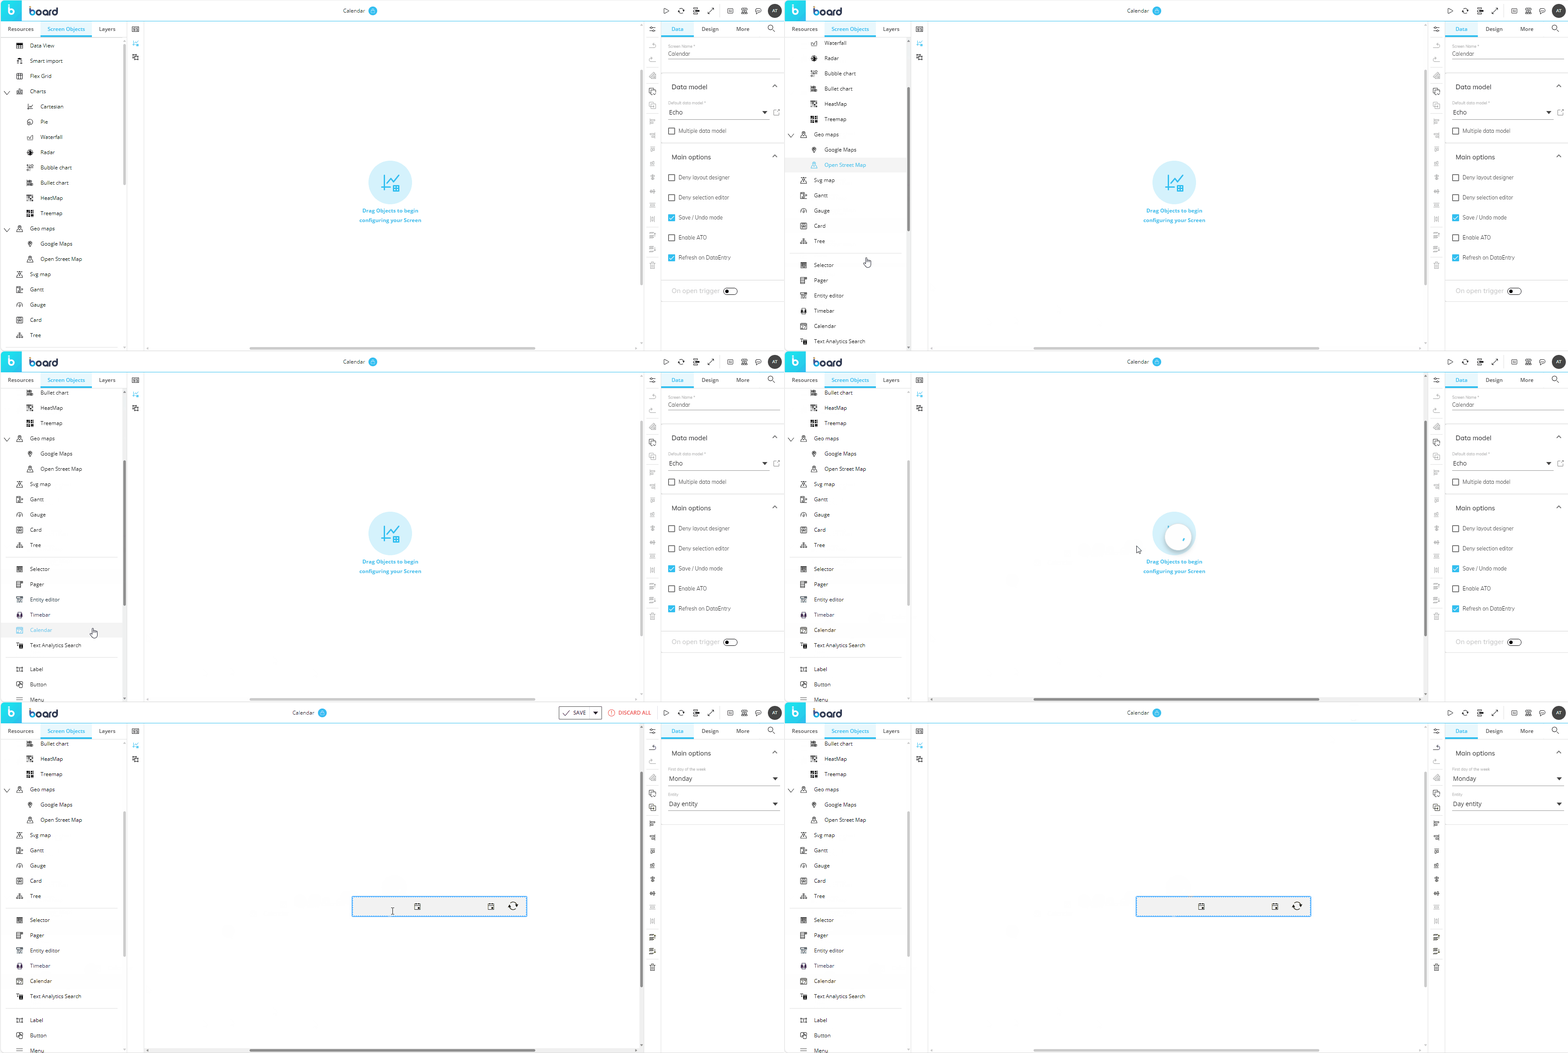
This topic describes how to add a new Calendar Object to a Screen or a Container and its specific properties.
To create a new Calendar Object, you need to open a Screen in Design Mode.
Once you're in the Screen editing page, locate the Calendar Object from the Screen Objects list in the left panel, then drag and drop it onto your Screen or Container.

Once created, the Calendar Object becomes immediately operational and can be used to apply time selections right away.
The Calendar Object can only be associated with the Day or Week Entity. When you create a Calendar Object, it is initially associated with the Day Entity and the First day of the week option is set to Monday. See Calendar properties and settings for more customization options.
If your Screen or Container already has a time selection applied, the Calendar Object will reflect it as soon as it's dropped onto the Screen.
Resetting a selection made on a Calendar returns the Entity associated with it (Day or Week) to the state defined by the Screen selection.
See Selection application sequence (Select at runtime) to know more about the order in which Board executes selections on each Screen.
The Calendar Object can be used in conjunction with one or more Selectors associated with any Time Entity: any selection made on those Selectors will immediately reflect on the Calendar Object and vice-versa.
The Calendar Object, just like every other Object, can be moved, resized, duplicated via copy/paste and easily aligned with other Objects on the Screen.
See Configure Screen Objects for more details.
Calendar properties and settings
Calendar properties are available from the Object Properties panel on the right of the Screen editing page once the Object is selected.
The Object supports all options common to all Screen Objects.
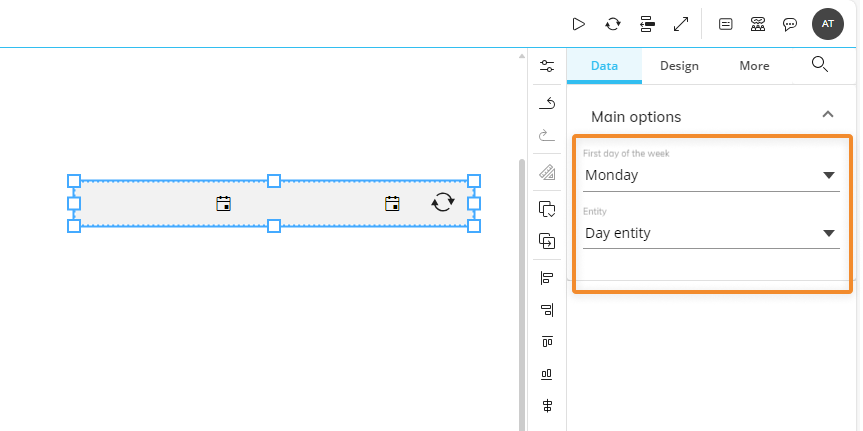
Properties specific to the Calendar Object are highlighted in the following image and explained below:

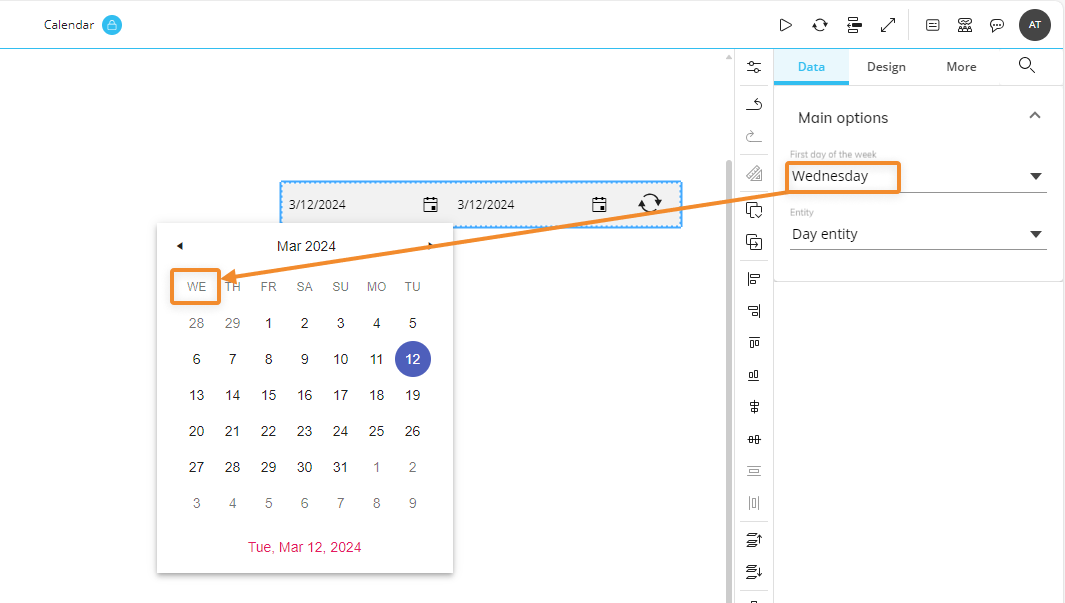
First day of the week. Defines which day should be set as the first day of the week in the popup calendar interface, as shown below. By default, the first day of the week is set to Monday.

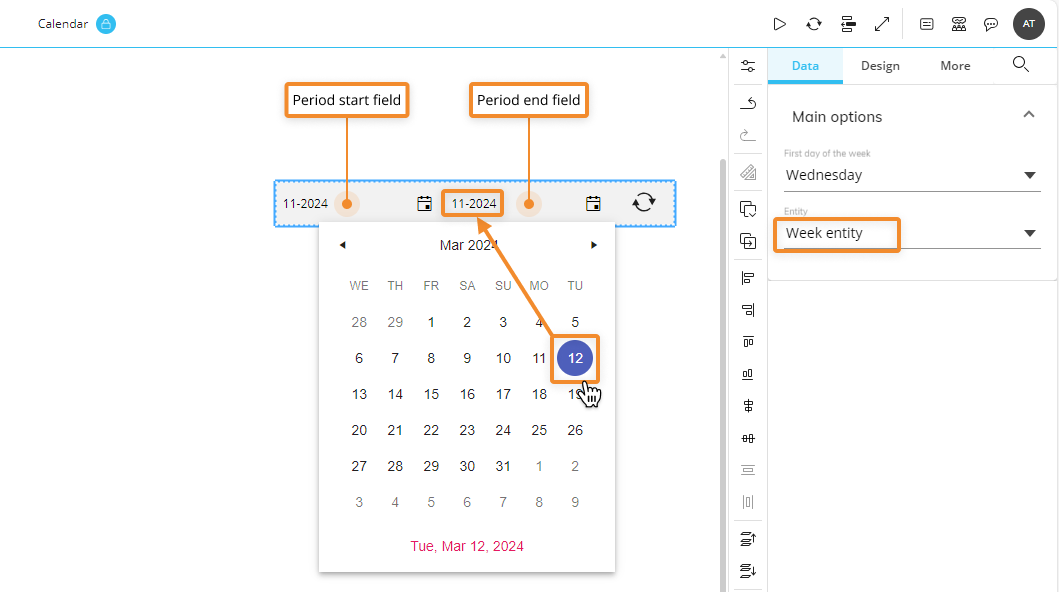
Entity. Defines which of the 2 supported Time Entities (Day or Week) is associated with the Calendar. If you choose the Week Entity, selecting a date will automatically select the entire week and the week number will be displayed in the "Period start" and "Period end" fields.

If the Multiple Data models mode is enabled on the Screen, an additional dropdown menu will allow you to select the Data Model to be associated with the Calendar Object.
Interacting with the Calendar Object in Design Mode
In Design Mode, the Calendar Object provides the same interactive features available in Play Mode.
Be aware that, if you apply a time selection in Design Mode and save the Screen, that selection will be applied to the Screen in Play Mode by default.
The time range displayed when making a selection on a Calendar Object reflects the Time Range as defined on the Data Model associated with the Screen or, if the Multiple Data Models mode is active, the Calendar itself.
The Calendar Object allows you to enter a date either through text input, or by clicking on a date from the popup calendar interface.