This section is about the Board Excel Add-in, its options and settings, and how to use the Board Excel Add-in.
After installing and establishing a connection to Board, you can now successfully use the Board Excel Add-in.
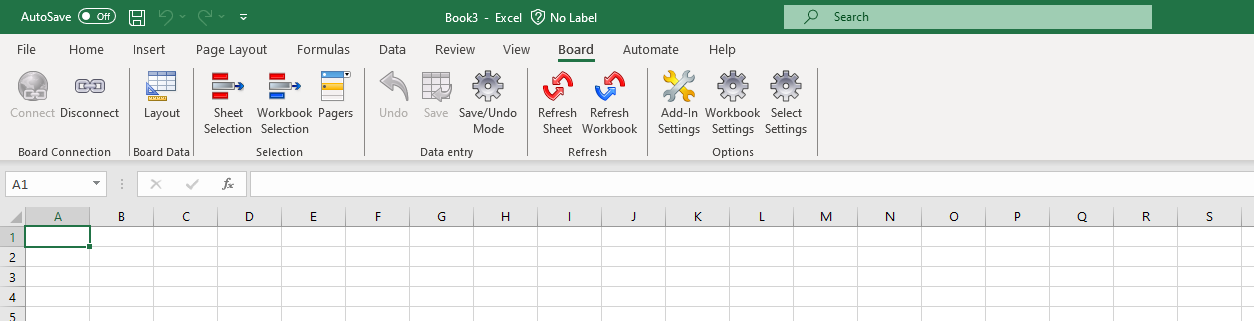
Under the "Board" tab in an Excel Workbook, you will find the following available sections and options in the menu:
Board Connection
Connect/Disconnect. Connect to or disconnect from Board. To configure a connection, follow the instructions in the Board Add-ins installation section.
Board Data
Layout. Here you can configure a Layout which retrieves data from a Board Data Model. Read more about the Board Add-in Layout and how to create a Data View with Board Excel Add-in.
Selection
Sheet Selection. Make a Selection on a Sheet within a Workbook. Read more about the Board Excel Add-in Selection.
Workbook Selection. Make a Selection on a Workbook. Read more about the Board Excel Add-in Selection.
Pagers. Create a Pager for an easy, user-friendly way to make a Selection on data. Read more below.
Data entry
Undo. Undo Data entry. To use, enable Save/Undo Mode.
Save. Save Data entry. To use, enable Save/Undo Mode.
Save/Undo Mode. Enables the options to save or undo Data entry. Data entry made in this mode is highlighted with a green cell background, indicating changes, and will remain green until either the "Save" or "Undo" button is clicked in the toolbar. Data entry/locked cells can be managed via the Layout configuration.
Read more about the Board Office Add-in Layout for details.
Refresh
Refresh Sheet. Refresh the Sheet, which will update data based on its configuration and connection to a Data Model from within Board.
Refresh Workbook. Refresh the Workbook, which will update data based on its configuration and connection to a Data Model from within Board.
Options
Add-in Settings. Access the Board Office Add-in settings. Read about the Add-in settings, which are the same within any of the available Office Add-in applications. Read more below.
Workbook Settings. Enable or disable settings applicable to the Workbook while connected to Board. Read more below.
Select Settings. Restrict the Entities available for a selection to a Lite or User license end user within the Sheet and Workbook. Read more below.
Within the Excel Workbook, the following additional Board Add-in features are available:
Right-click function. Right click on an Object to access Board Layout Options or to Drill Down. Read about the options in detail here.
Overlapping Layout. When pasting a Layout, there must be enough space for it. Read more about this behavior here.
About Workbook Settings
Workbook Settings enable or disable specific features for end users. Workbook Settings are only accessible by Power Users and Developers.
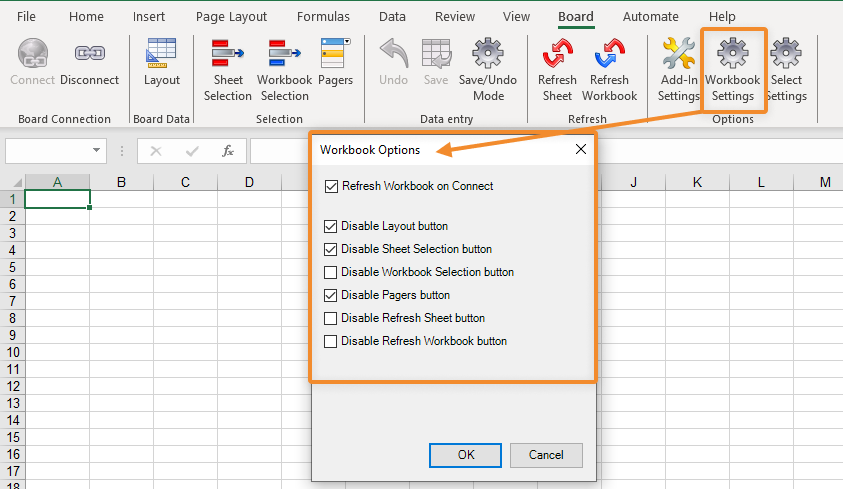
The following Workbook settings are available:
Refresh Workbook on Connect. Enables the ability to automatically refresh the workbook content once a connection is established with Board
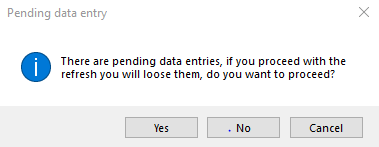
When enabled, if any "offline" pending Data entry is present, and the workbook refreshes, the user will be prompted with an ad-hoc message shown below. Choosing "Yes" will refresh the workbook and any unsaved Data entry made while offline will be lost. Choosing "No" or "Cancel" will not refresh and keep the unsaved Data entries.
Disable Layout button. Disables the Layout button so that Planners cannot change the Layout.
Disable Sheet Selection button. Disables the Sheet Selection button so that Planners cannot choose a selection for the worksheet.
Disable Workbook Selection button. Disables the Workbook Selection button so that Planners cannot choose a selection for the workbook.
Disable Pagers button. Disables the Pagers button so that Planners cannot create a Pager.
Disable Refresh Sheet button. Disables the Refresh Sheet button so that Planners cannot refresh the worksheet whenever they want.
Disable Refresh Workbook button. Disables the Refresh Workbook button so that Planners cannot refresh the workbook whenever they want.
About Select Settings
Select Settings configure the visibility of Entities for Lite and User license users in the Sheet Selection and/or Workbook Selection windows depending on the chosen Data model. Select Settings are only accessible by Power Users and Developers.
The Entities in each list, for Sheet and Workbook, are all unselected by default, and are, therefore, all visible to the Lite and User license users. When a selection of Entities are made by a Power User or Developer, those selected Entities of the chosen Data Model will be the only Entities available to the Lite and User license users to choose from when making a selection on either a sheet or a workbook. These visibility settings are only applied to the Select window if a Lite or User license end user connects to the workbook.
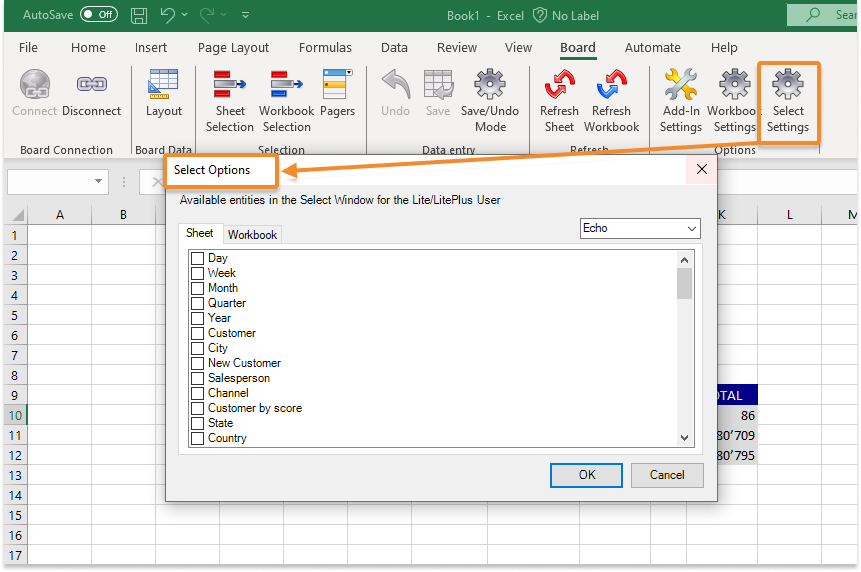
The following Select Settings are available:
Data model dropdown. Selects the Data Model in which to apply the Entity Selection restriction.
Sheet. Selecting Entities here will only restrict Entities available for selection to Lite and User license end users within the sheet currently opened when making the configuration .
Select settings are saved at the "Sheet" level for each Data Model in use.
Workbook. Selecting Entities here will restrict the Entities available for selection to Lite and User license end users within the whole workbook.
If these settings are activated, the dynamic selection options and the "Graphical view" representation are disabled in the Select window for the Planners.
Right-click Board Excel Add-in Options
When you right click in an Excel worksheet, a list of Excel options is displayed. In two specific places, on an Axes cell and a value cell, within a Board Layout, the right-click function displays two Board-specific options: Board Advanced Options and the Drill Down features, respectively.
Row headers and value cell right-click options
Right click on any axes cell of an Object, and at the bottom of the right-click menu, Board specific options are available when connected to Board.
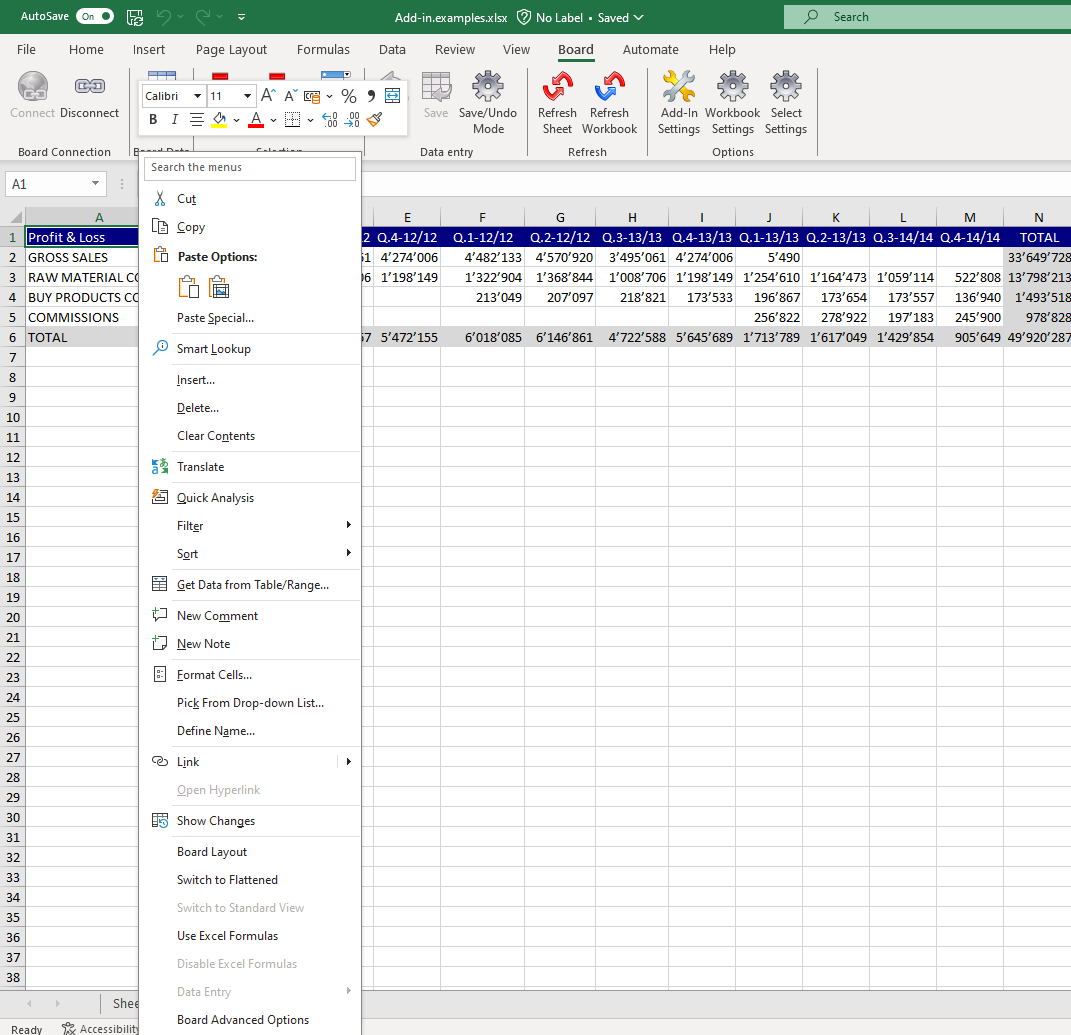
Board Layout. Access the Object Layout window.
Switch to Flattened. Removes the grouping display and formatting, displaying a flat and unformatted table.
Switch to Standard View. Includes formatting. This is enabled by default.
Use Excel Formulas. Click to enable the use of Excel formulas.
Disable Excel Formulas. Click to disable the use of Excel formulas. This is enabled by default.
Data Entry. Save or undo data entry within the table.
Board Advanced Options. Opens a popup window that gives you advanced settings for the three following items:
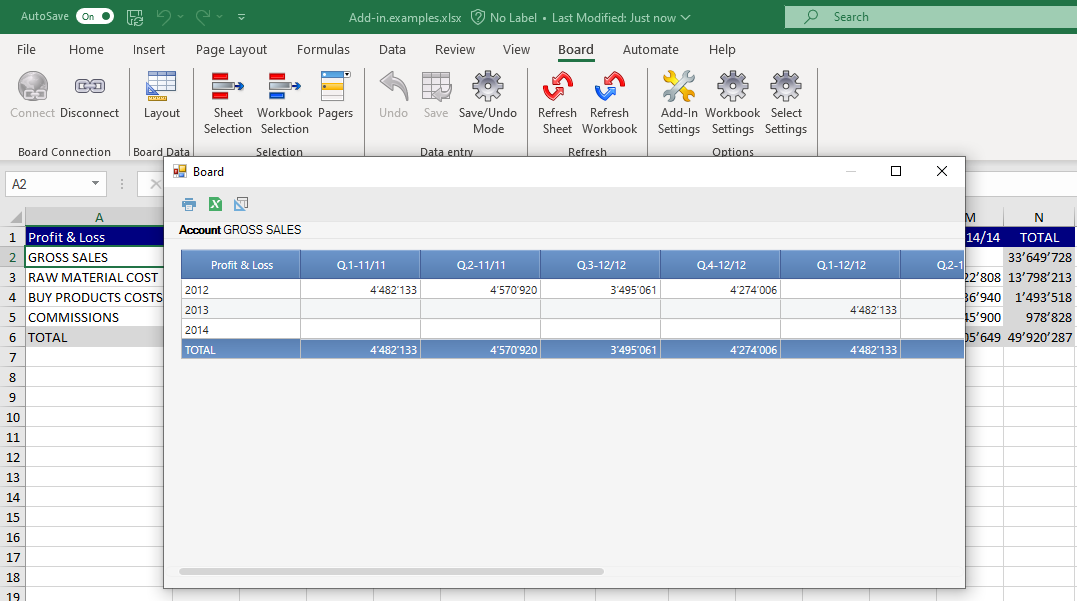
Drill Down. Customize the behavior of the Drill Down.
Embedded. Displays drill down values embedded within the Data View.
Popup. Displays drill down values in a popup window.
Disable. Disables Drill down. When Disable is activated, the right-click option on cell values will not open the Drill Down window.
Format. Customize whether you'd like formatting to be "Automatic" or "Manual".
Automatic. Inherited from Board.
Manual. Define directly in Excel using Excel formatting; however, in this case, the format is "static" because it is cell-based and does not apply if the table varies in size.
Colors. Customizes the color formatting of the Data View, but only if the "Automatic" formatting option is active.
To customize formatting, follow the instructions below:Use the dropdown menu to select the specific area in which you would like to customize the color.
Click "Edit" and a popup window will appear.
Choose the color or define a custom color using the button.
Click "OK" and then "OK" again from the original window. The change is made instantly.
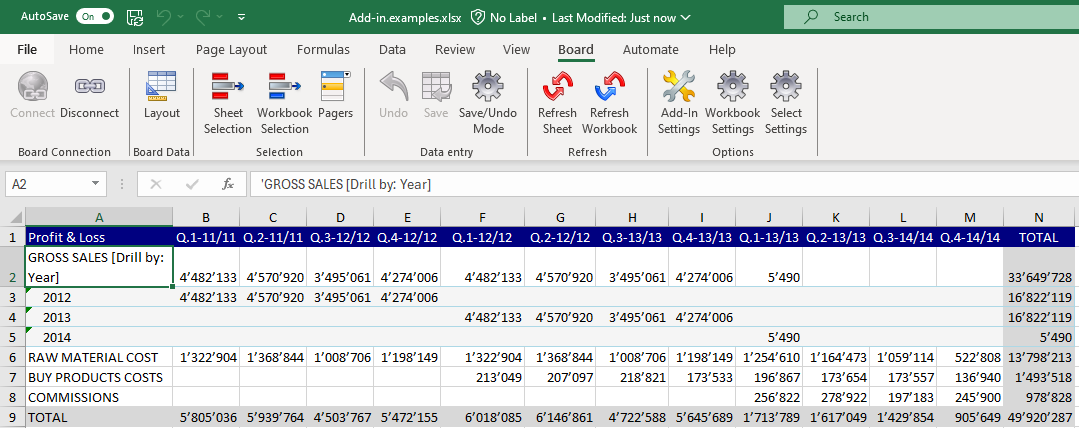
Row cell right-click & double-click
When a drill is not yet configured, right click or double click on any row cell to open the Drill Down configuration menu.
When a drill is configured, double clicking will deploy the drill, while the right-click will open the Drill Down configuration menu.
If the Drill down is disabled from the Board Advanced Options menu, then the regular right-click menu will appear and not the Drill Down menu.
The Excel Add-in Drill Down
The Excel Add-in Drill Down has similar functions and follows the same rules, restrictions, and logic as the Board Platform Drill Down on a Data View, with some differences.
The main differences are:
You can only perform drills on Entities.
The drill results can be displayed directly in the Excel table or in a popup window.
The configuration window looks different.
All drill downs (including the Embedded display) are automatically closed when refreshed.
Read more about how to create a Drill Down in Board Excel Add-in.
Overlapping Layouts
When a Sheet hosts multiple Layouts, there must be enough space already in the worksheet to accommodate the size of the table. This means enough empty cell rows and columns without interfering with any other table or entered value in the worksheet. This applies to creating a new Layout, expanding an already existing Layout, or pasting a Layout.
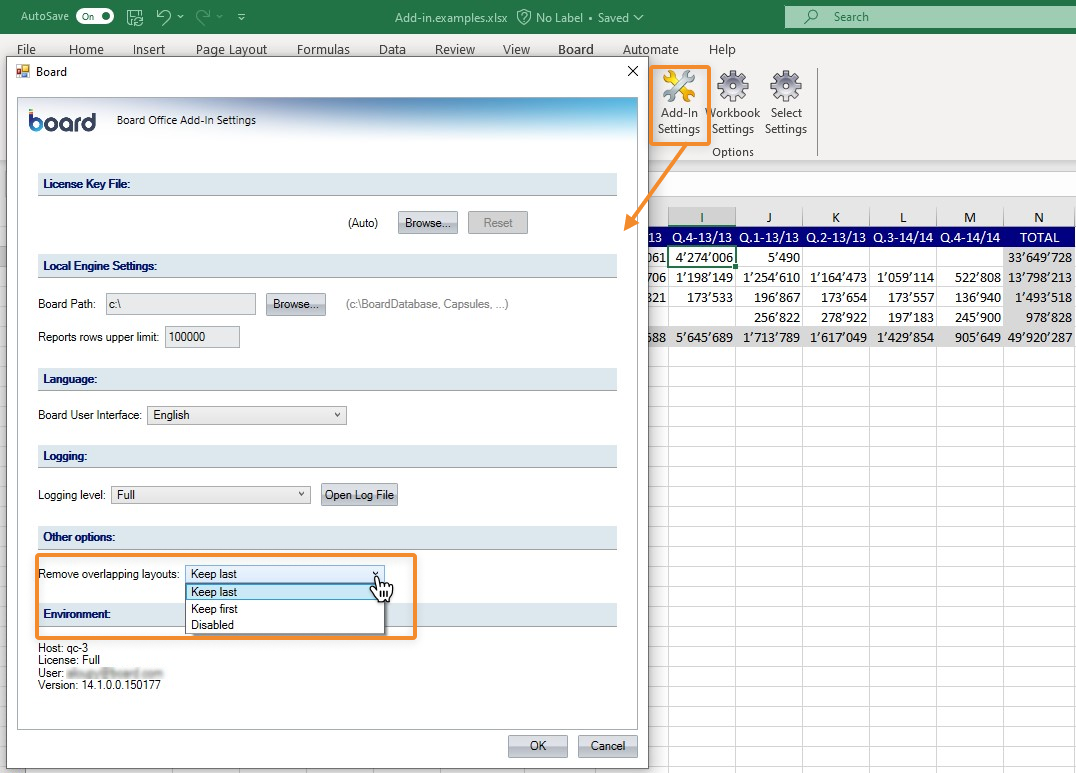
By default, removing overlapping Layouts is disabled. To change this, go to "Add-in Settings".
When there is not enough space to accommodate the Layout, an error message in the cell where you tried to add the Layout tells you how many rows and columns are needed in order to accommodate the Layout.
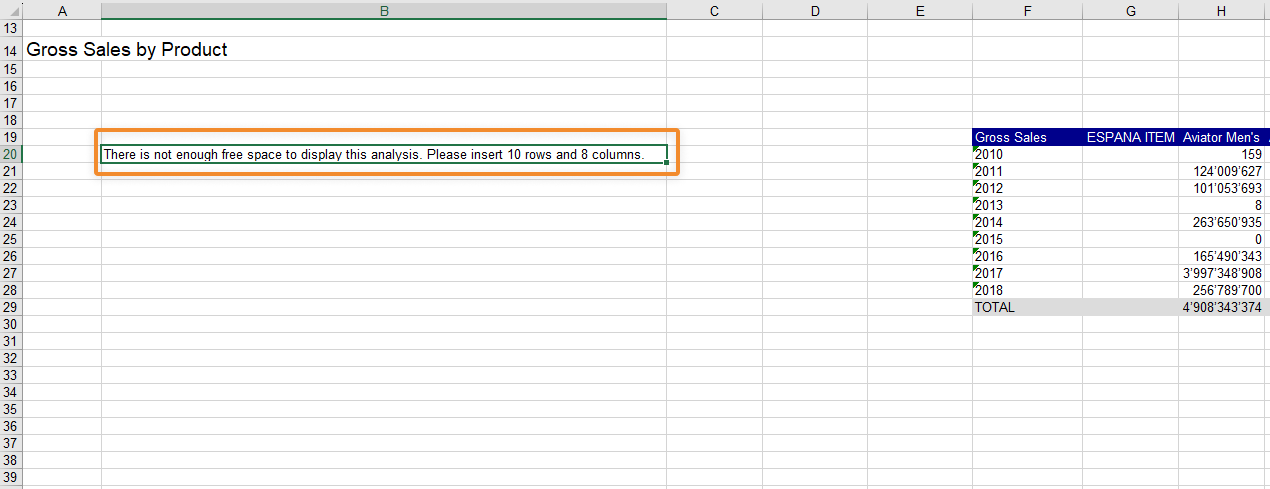
To fix this, add the appropriate amount of rows and columns in the same area by using the "Insert" feature from Excel's Home tab under "Cells". Then, click "Refresh Worksheet" or click on "Layout" again and click "OK" to the Layout that was previously added; the table will appear where you originally added it.
To regulate this, you can customize settings in the "Add-in Settings" from the Board ribbon options. Click on "Add-in Settings" and choose "Keep last" to keep the latest overlapping Layout and delete the older one or "Keep first" to keep the older Layout and delete the newer one which overlaps the older.
Read more about Add-in Settings.
Learn how to create a Data View with Board Excel Add-in.