This topic describes the Appearance section, the information it provides, and the options that can be configured.
In this section you can customize the visual appearance of your Platform and the typography of your Capsules and PDF reports.
To access the Appearance section, access the System Administration area of the desired Platform and click on the Appearance tile. You will be taken to the Appearance homepage, which is divided into 3 subpages:
Homepage theme
On this page, you can upload images to replace the default logo, as well as change the background image for the Header background and Home background.
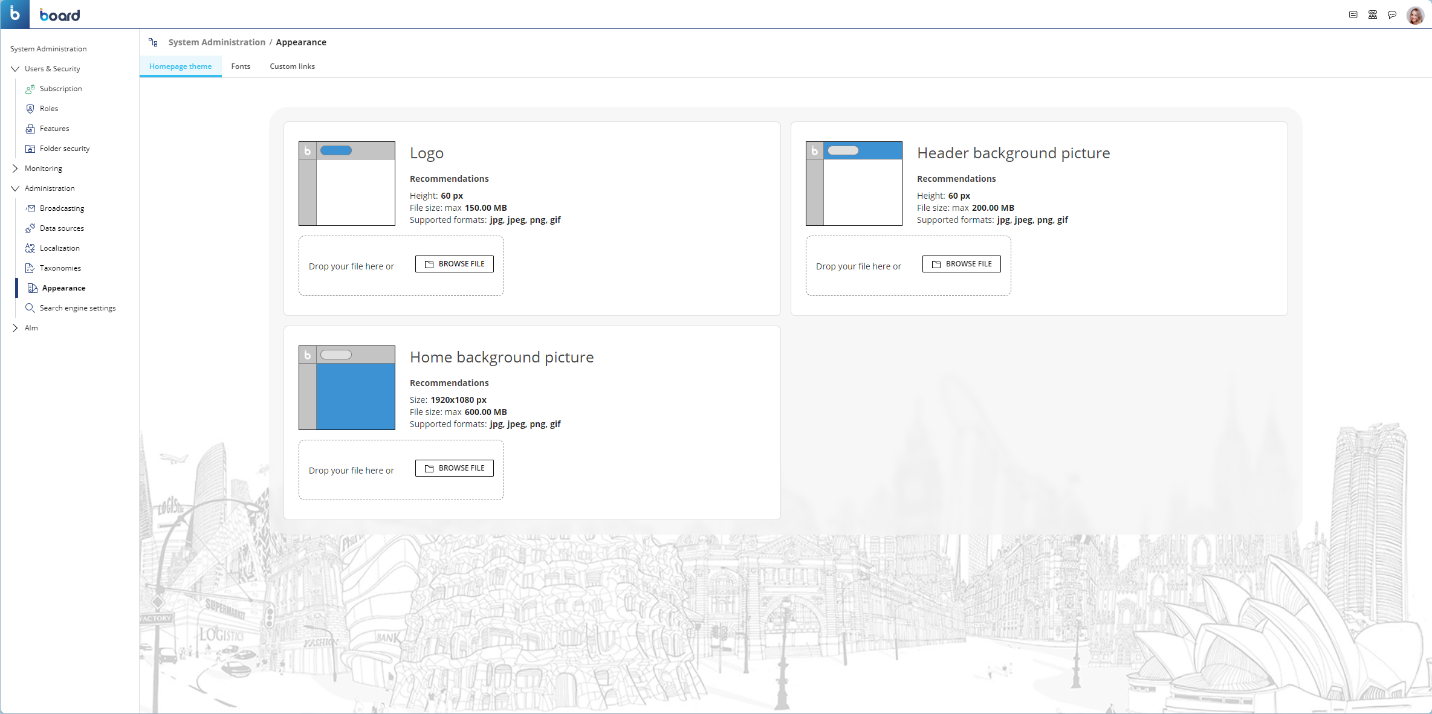
To change the Logo, Header background, or Home background pictures, click on the respective "BROWSE FILE" button and select an image from your local computer or drag and drop the desired image in the designated "Drop your file here" space.
The supported image file formats are the following:
.jpg
.jpeg
.png
.gif
.svg
The maximum file sizes for each image are the following:
Logo image: 150KB
Header background image: 200KB
Home background image: 600KB
You can upload images of any width and height. However, it is recommended to adhere to the specified sizes because the space where the images are displayed has a fixed size. If you do not follow the recommended sizes, the images will be automatically cropped and centered.
The recommended sizes for each image are the following:
Logo image
Width: No specific recommendation
Height: 60px
Header background image
Width: 1920px
Height: 60px
Home background picture
Width: 1920px
Height: 1080px
Fonts
On this page you can upload fonts to replace the default font family for Capsules and the font family for exported PDF files.
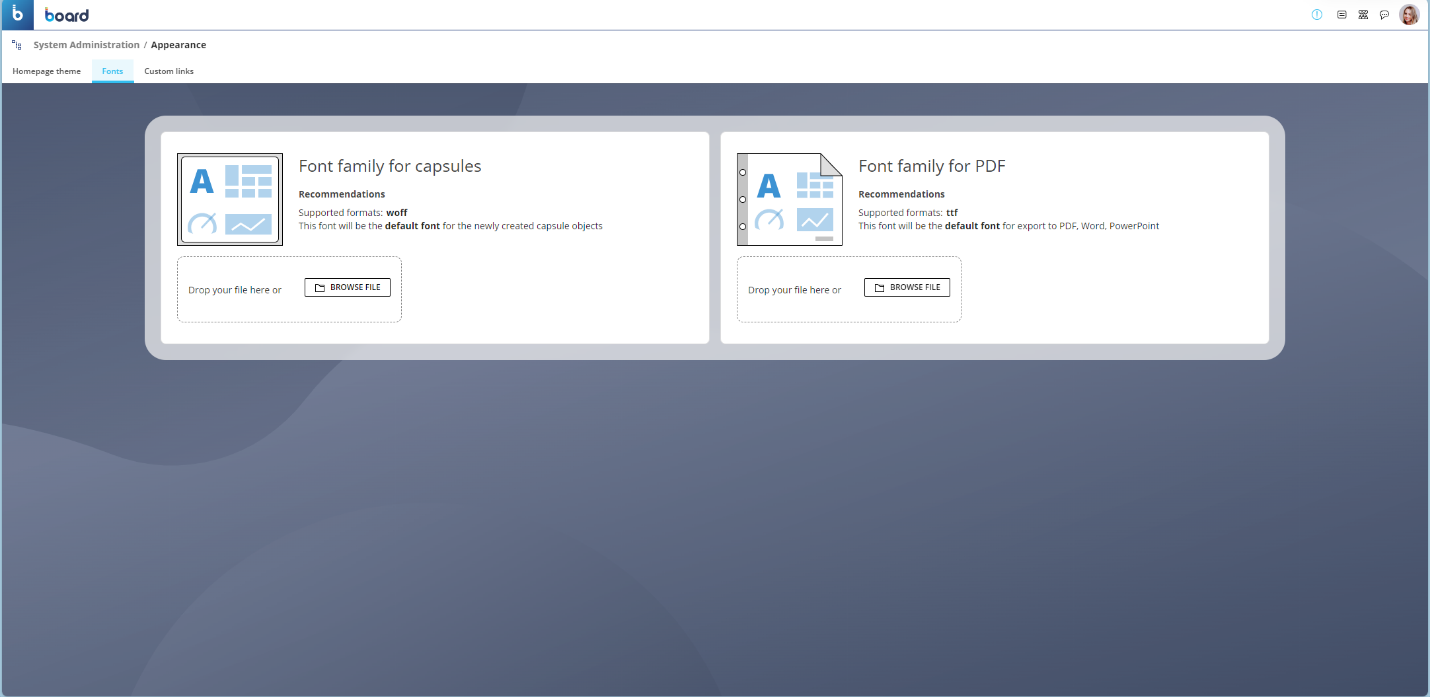
To change the font family for all Capsules of a Platform, click on the left "BROWSE FILE" button or drag and drop the .woff (Web Open Font Format) file containing the desired font family. Once done, all text within Screen Objects with the default font family setting will immediately display using the uploaded font family (also called "Corporate Font") in all existing and new Capsules of the Platform.
You can still change the font of single Screen Objects by entering Design mode, selecting the desired Screen Object, and changing the font under the "Fonts" menu in the Object Properties panel.
To change the font family of PDFs exported with the Export printable report feature, click on the following "BROWSE FILE" button or drag and drop the .ttf (TrueType Font) file containing the desired font family. All text inside the PDFs that will be exported from that moment on will be displayed using the uploaded font family.
The text inside the Screens in the PDF files will be displayed as is, since the Screen is exported as an image inside the PDF file. The color of fonts will not be displayed in the exported PDF in the case of a font family made of chromatic fonts.
Custom links
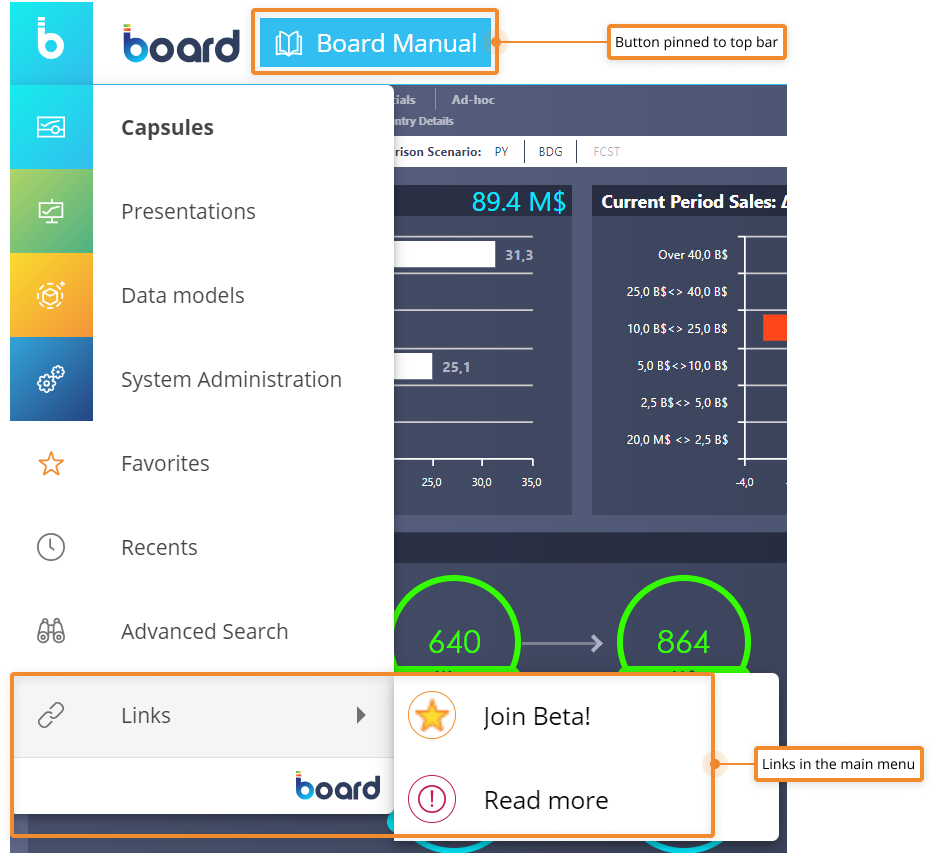
This page allows Administrators & Operators to create custom links to external online resources that are added to the Board main menu or pinned in the top bar to the right of the logo.
This feature is particularly useful, for example, when Administrators & Operators need to notify users about important resources available online, link other systems that are part of a business process, add links to information required by law, and so on.
In the Custom links home page, you see all the existing links in the configured order. By dragging and dropping each row, you can rearrange the links order in the main menu, except for the one pinned on the top bar. You can also pin, edit, and delete links by hovering over each row and clicking the appropriate icon on the right.
You can only pin one link on the top bar.
When you pin a link on the top bar, the pin icon will remain visible in the list. If you pin another link on the top bar, the previously pinned link will be moved to the main menu.
To create a new custom link, proceed as follows:
Access the Appearance section under System Administration, then click on "Custom link" in the tabbed menu.
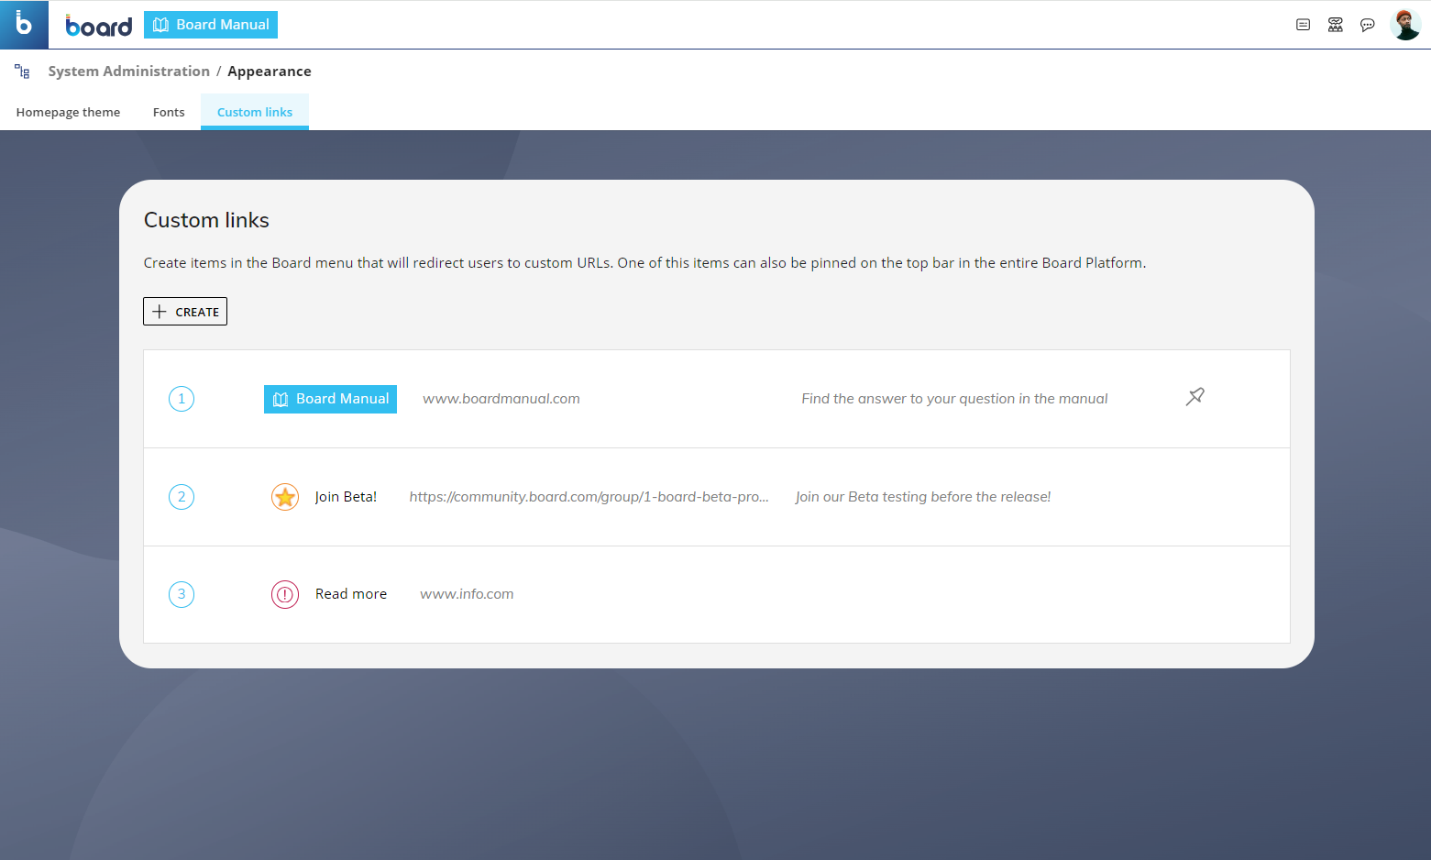
Click the "+ CREATE" button to open the link configuration area.
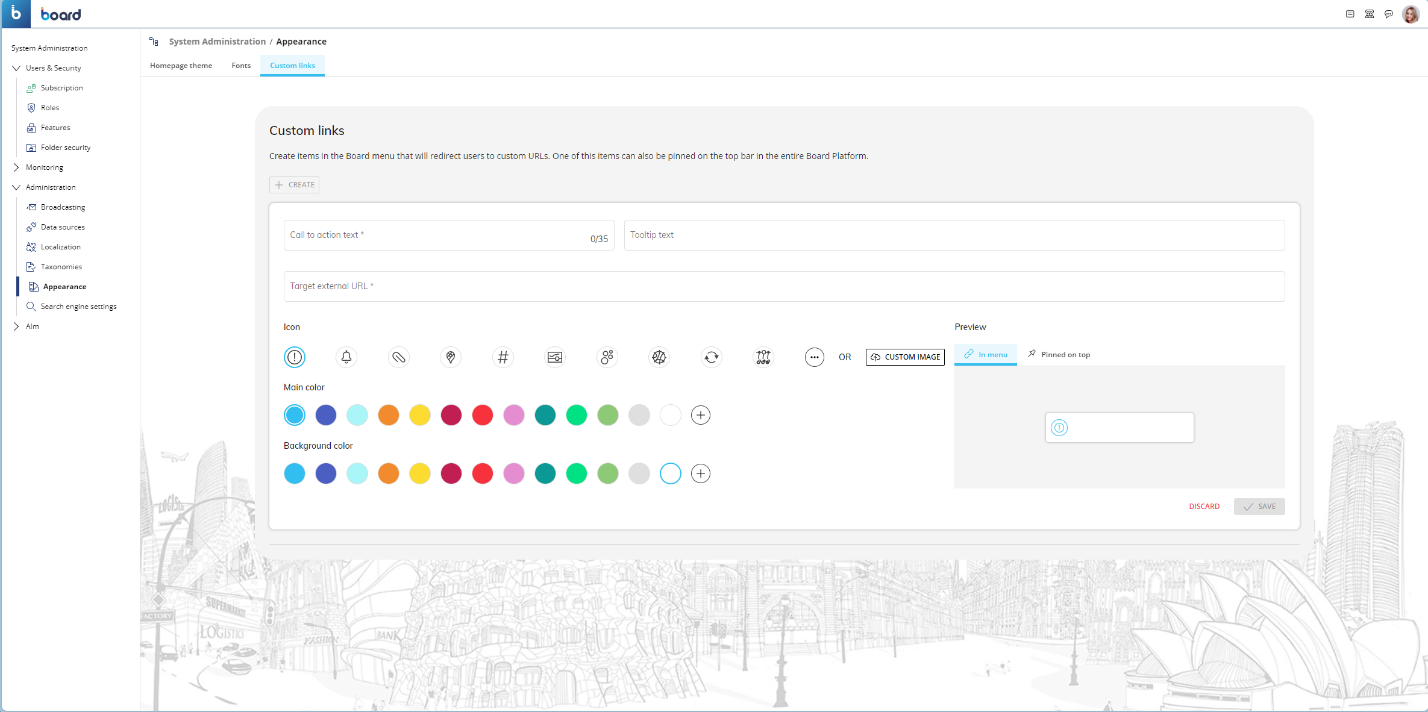
Enter a call to action. The call to action will display on the top bar or in the Board menu and cannot be longer than 35 characters.
Enter a tooltip (optional). The tooltip text will display when a user hovers over the button/menu item.
Enter the target URL. This is the link to the external resource to which redirecting users after clicking the button/menu item. No URLs that redirect to Board resources/services can be used in this field.
Choose an icon. The icon will display alongside the button/menu item.
Choose a main color. The color chosen applies to the icon and the call to action text of the button.
Choose a background color. The color chosen applies to the background of the icon when in menu and applies to the button (icon and call to action) when pinned to the top.
Click the "SAVE" button.
The "Preview" area on the right will show the appearance of the custom link as a menu item and as a button when it is pinned on the top bar.
Newly created links are added to the main menu by default and are located in the new menu item "Links".
All users of the Platform will instantly see the newly created link in the Board menu or in the top bar, depending on the element configuration.