This topic describes the Data Model Package section, how to create and run a Data Model (Transporter) Package, and its other features.
The Data Model Package page allows you to create and manage Data Model (previously called Transporter) Packages, which contain the Data Model structure (i.e. metadata) resulting from comparing two Data Model Snapshots. You can execute Data Model Packages to transport and apply the structure of the Data Model contained in the Package to the desired Data Model of a Platform.
This feature is commonly used to transport the structure of a Data Model from a "Development" environment to a "Production" environment.
In this case, usually the same Data Model exists in both environments, and after making new changes to the Data Model in the "Development" environment, that same Data Model is transported to the "Production" environment.
To transport the new changes from a "Development" environment to a "Production" environment, proceed as follows:
Create a Data Model Snapshot in the "Production" environment and give it a name, for example, "PRODUCTION-SNAPSHOT".
Download the "PRODUCTION-SNAPSHOT" to your local machine.
Upload the "PRODUCTION-SNAPSHOT" to the "Development" environment.
Create a Data Model Snapshot of the Data Model in the "Development" environment and give it a name, for example, "DEVELOPMENT-SNAPSHOT".
Create a Data Model Package by using both the Snapshots "PRODUCTION-SNAPSHOT" and "DEVELOPMENT-SNAPSHOT" located in the "Development" environment.
Download the Data Model Package to your local machine.
Upload the Data Model Package in the "Production" environment and execute it.
To access the Data Model Package section, access the System Administration area of the desired Platform and click on the Data Model Packages tile to open the Data Model Package page.

In the Data Model Package section, you can see all existing Data Model Packages and their main information; the table is sortable and searchable using the interactive header fields. You can also show or hide columns to your liking by clicking the Column chooser button in the upper right corner of the table.
The table contains the following information:
Name. This column displays the name of each Data Model Package.
Target Data model (was Target db). This column displays the name of the target Data Model which each Data Model Package will update (if executed).
Comments. This column displays additional comments about each Data Model Package. You can click on the desired column cell to edit a comment.
Run. This column displays a button that you can click to execute the corresponding Data Model Package.
Last run. This column displays the date and time of the last run of each Data Model Package, in the following format: DD/MM/YYYY, HH:SS.
Result. This column displays the result of the last run of each Data Model Package.
Creating a Data Model Package
To create a Data Model Package:
From the Data Model Package section of the desired Platform, click on the blue plus button (
 ) next to "Data model Package" in the upper left corner to bring up the "New Data Model Package" configuration panel. You can also do this in the Data Model Snapshot page by selecting at least one desired Data Model Snapshot and clicking on the "DATA MODEL PACKAGE" button.
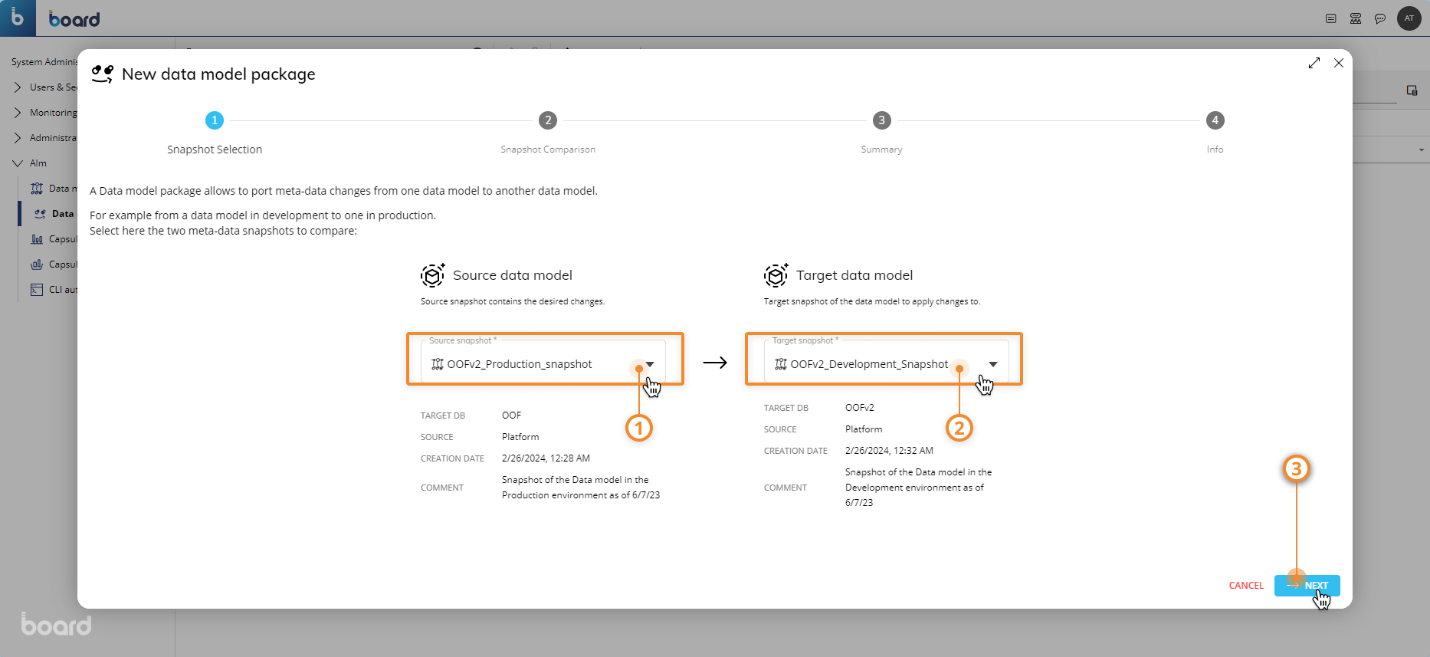
Snapshot Selection. Choose the source Data Model Snapshot from the left dropdown list and choose the target Data Model Snapshot from the right dropdown list. You can click on the arrow in the middle to switch their position, if needed. Click the "NEXT" button to go to the Comparison step.
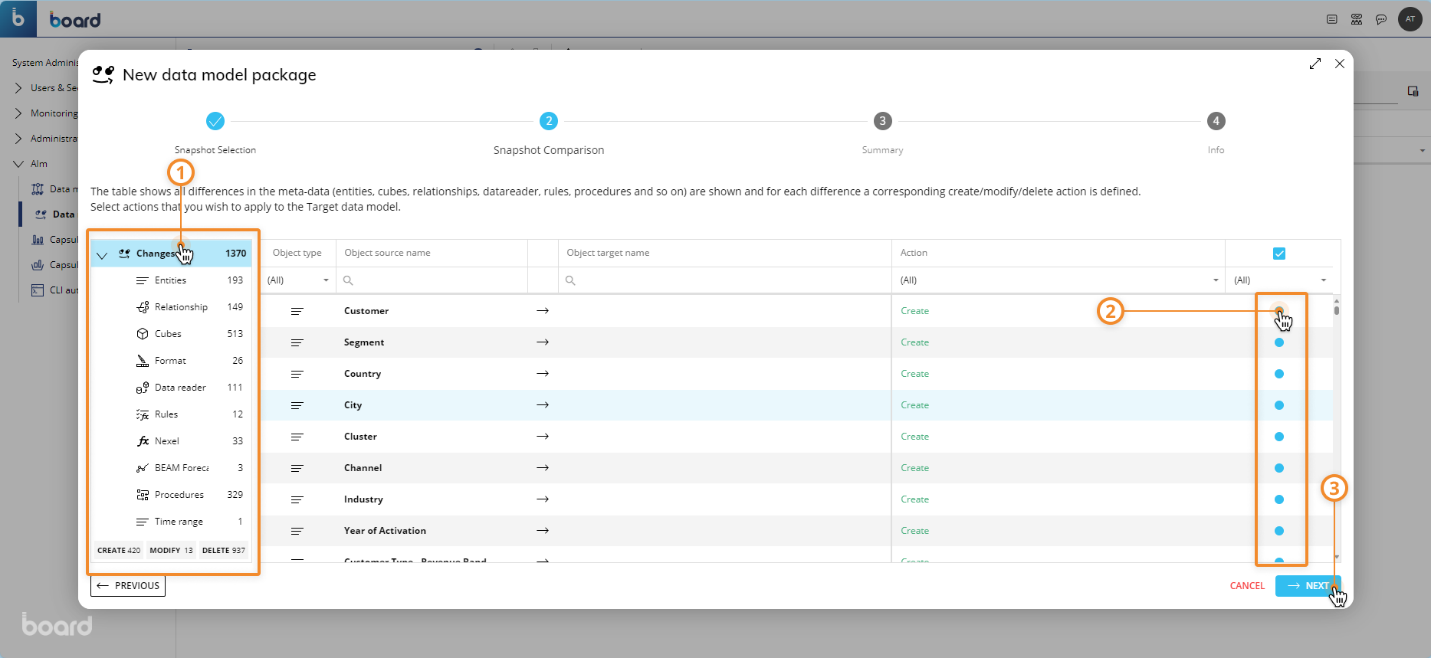
Snapshot Comparison. This page displays changes to elements between the source and target Data Model Snapshots. On the left is a list of the types of Data Model elements that have been modified. You can click on an item of the list to filter the table on the right, which displays the modified elements along with the following information:
Object Type. This column displays the icon related to the type of element.
Object source name. This column displays the name of each element in the source Data Model Snapshot.
Object target name. This column displays the name of each element in the target Data Model Snapshot.
Action. This column displays the type of action that will be performed on each element when the Data Model Package is executed. The actions that display here are: "Create", "Update", or "Delete". If an "Update" action status appears, a "Log" icon is displayed.
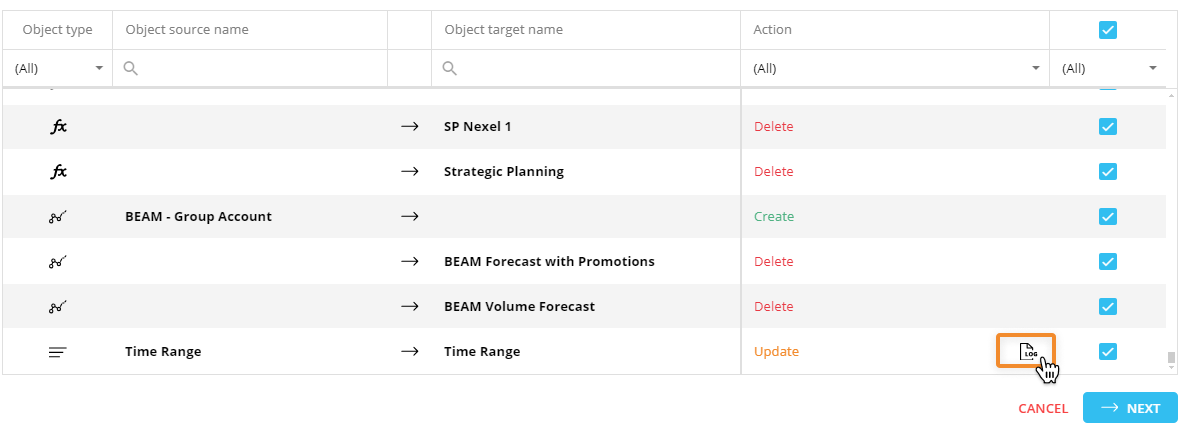
Click it to open a popup window where you can check the specific change to that element.

You can click on one or more elements in the table on the right to include or exclude the action the Data Model Package would execute on those elements (if executed).
Data Model elements that can be transported are the following:
Entity format configurations (Row templates)
Nexel Writeback definitions
BEAM Forecasting scenarios
BEAM Clustering scenarios
The comparison between elements is done by using internal identifiers (i.e. "idx" value for Cubes) for each type of element and not the display name. This is because the display name of elements can change during development and, therefore, cannot be used as an identifier for the comparison.
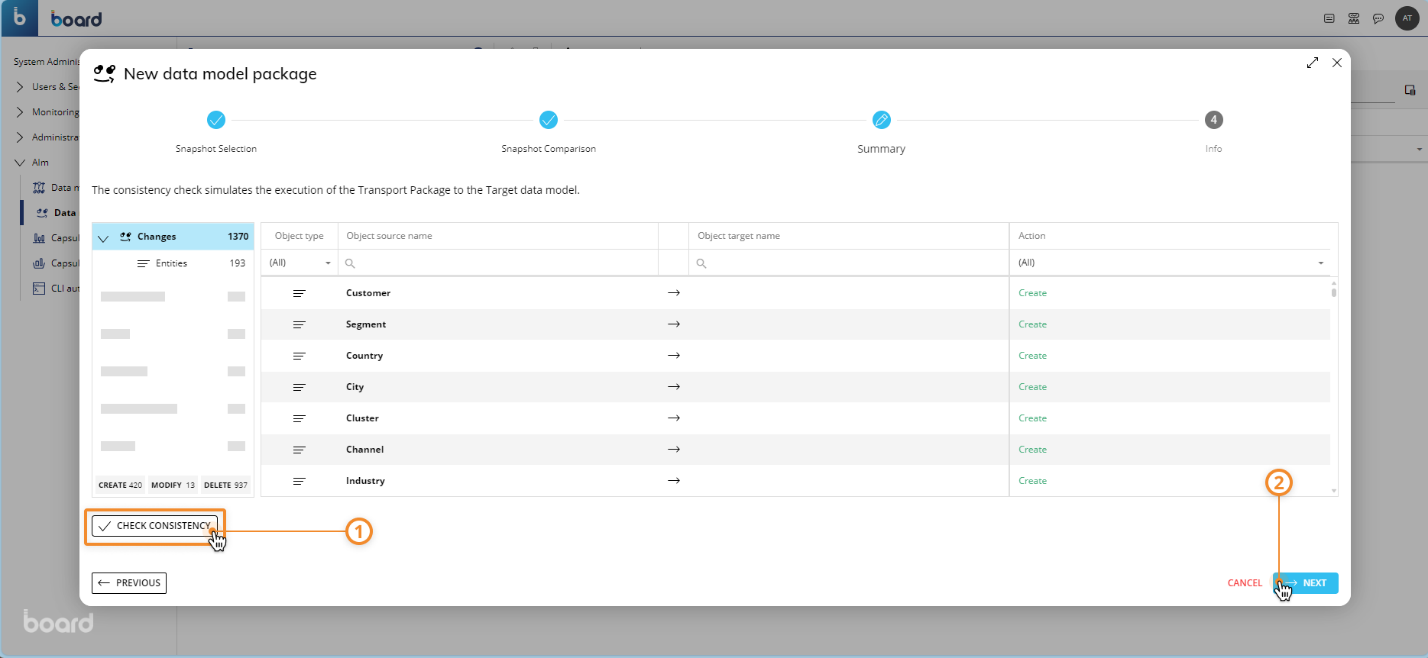
Summary. Here you can see the summary of all the actions that you have included in the Data Model Package in the previous step. You can click on the "CHECK CONSISTENCY" button to check for any inconsistencies between the source and target Data Model Snapshots as well as the actions that you have included and excluded (i.e. deleting an Entity that is part of the Structure of a Cube that will be updated. In this case, a warning message will appear). In the event of warning or error messages caused by the inclusion or exclusion of some actions, you can go back to the previous step and include or exclude them to solve such inconsistencies.
If you cannot solve the inconsistencies in this way, then you may have to manually align the source Data Model with the target Data Model from the Data Model area and recreate the corresponding Snapshots.
You cannot create a Transporter Package if the consistency check is not successful.
SAVE. Here you must enter the name of the Package in the "Name" field and add any additional comments in the "Comment" field. You can also enable the "Backup" option, which automatically creates a backup of the target Data Model when you execute the Transporter Package.
In addition, you can enable the "Maintenance mode" option, which automatically puts the target Data Model into maintenance mode before running the Transporter Package.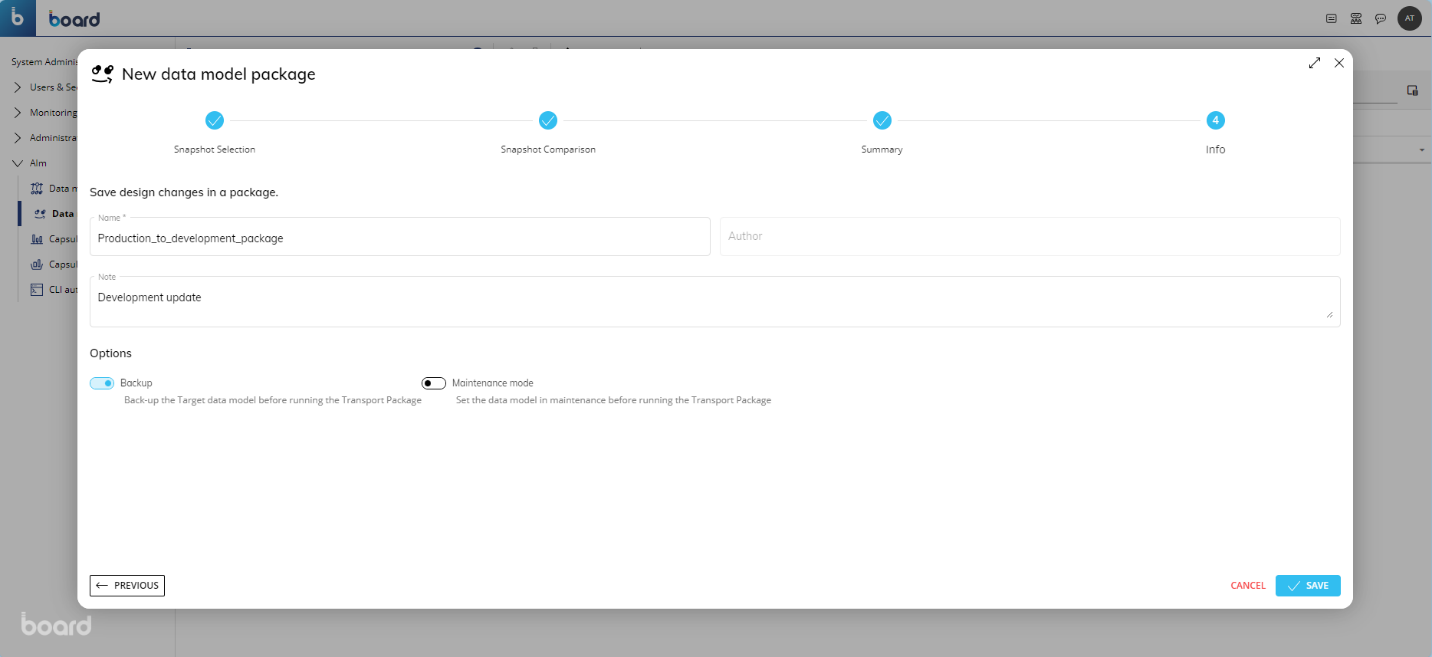
Click on "SAVE" to save the Data Model Package.
Managing a Data Model Package
The Data Model Packages page allows you to perform the following management tasks on existing Packages:
Edit a Data Model Package
Delete a Data Model Package
Upload a Data Model Package to the Platform you are logged into
Download a Data Model Package to your local machine
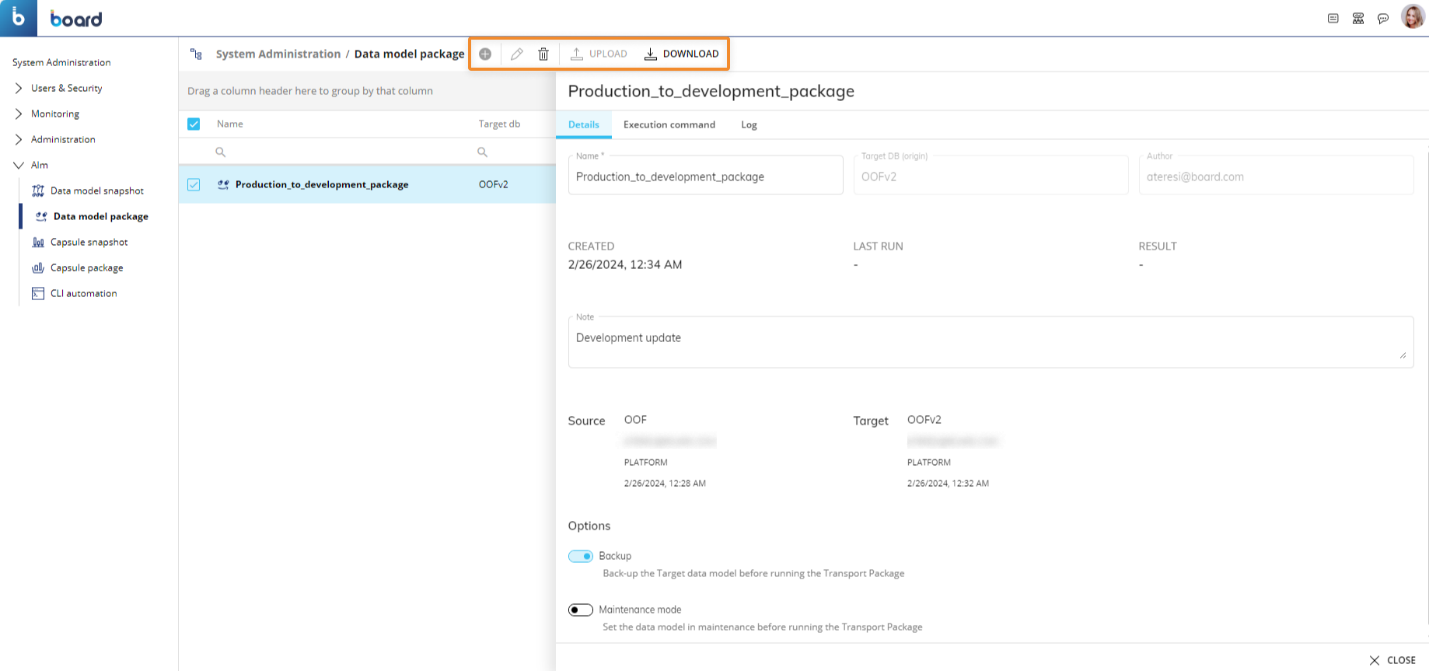
To edit a Data Model Package, select it to bring up the Package configuration panel and modify the desired available options.
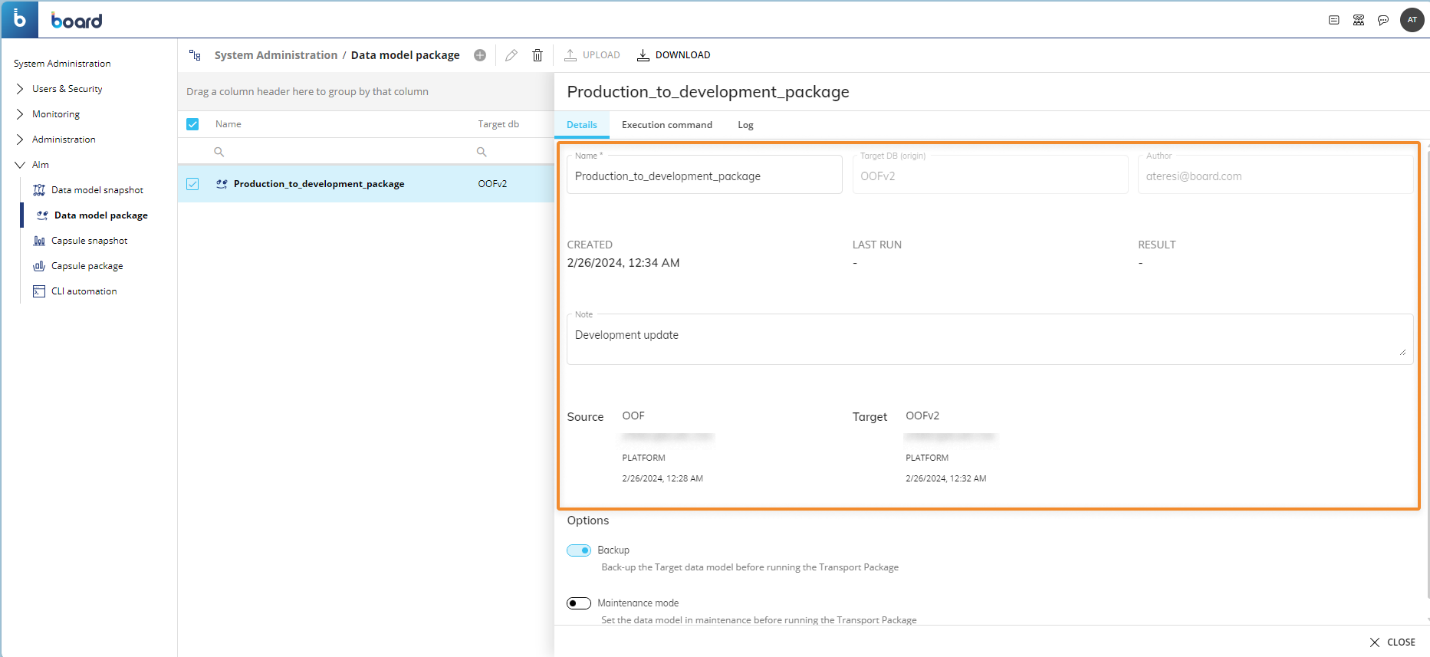
The Package configuration panel displays additional information under the following menus:
Execution command. This menu contains the commands that you can use to run the Package via the CLI Automation feature.
Log. This menu contains a log that provides information about the execution of the Package.
To delete Data Model Packages, select the desired ones and then click the trash icon.
To upload Data Model Packages, click on the "UPLOAD" button and choose the .trsp file containing the desired Packages.
To download Data Model Packages, select the desired ones and then click the "DOWNLOAD" button. A .trsp file containing the selected Packages will download to your local machine.
Running a Data Model Package
To run a Data Model Package:
From the Data Model Package page, click on the (
 ) button under the "Run" column of the desired Data Model Package to run it.
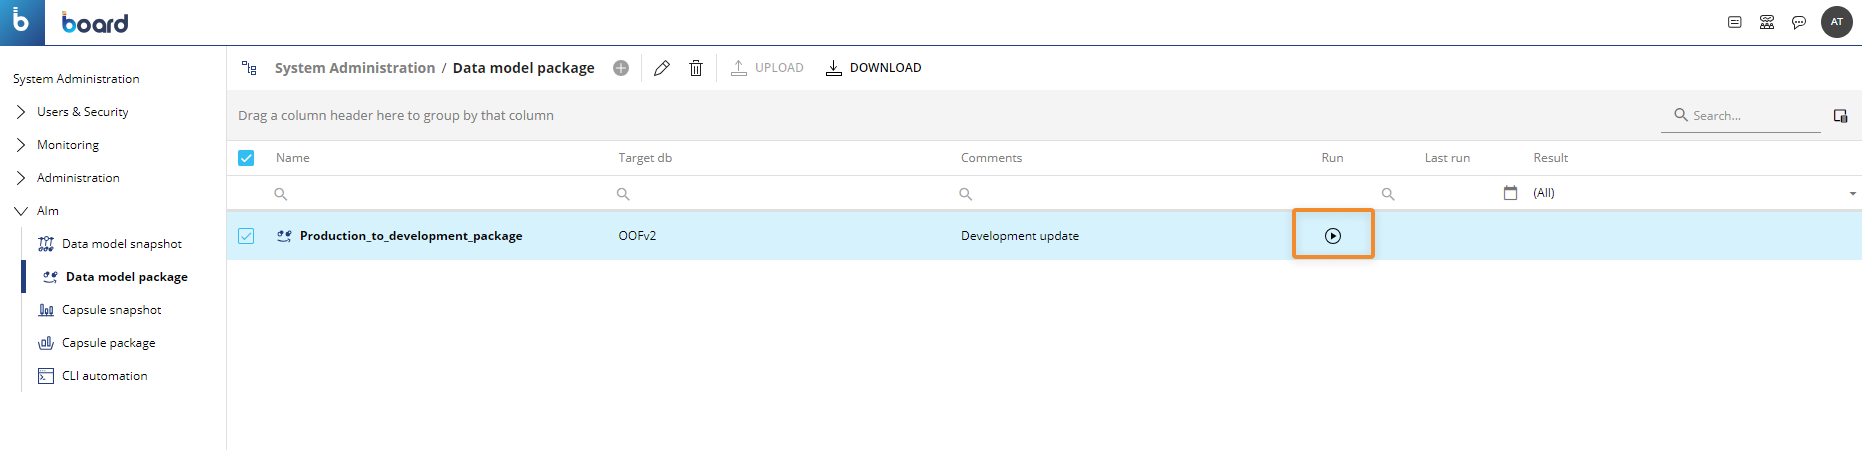
Board will automatically choose the target Data Model that has been configured in the Data Model Package and perform a pre-execution check where it will list any possible warning or error messages caused by inconsistencies found between the source and target Data Models.
You can manually change the target from the "Target DB" dropdown list.
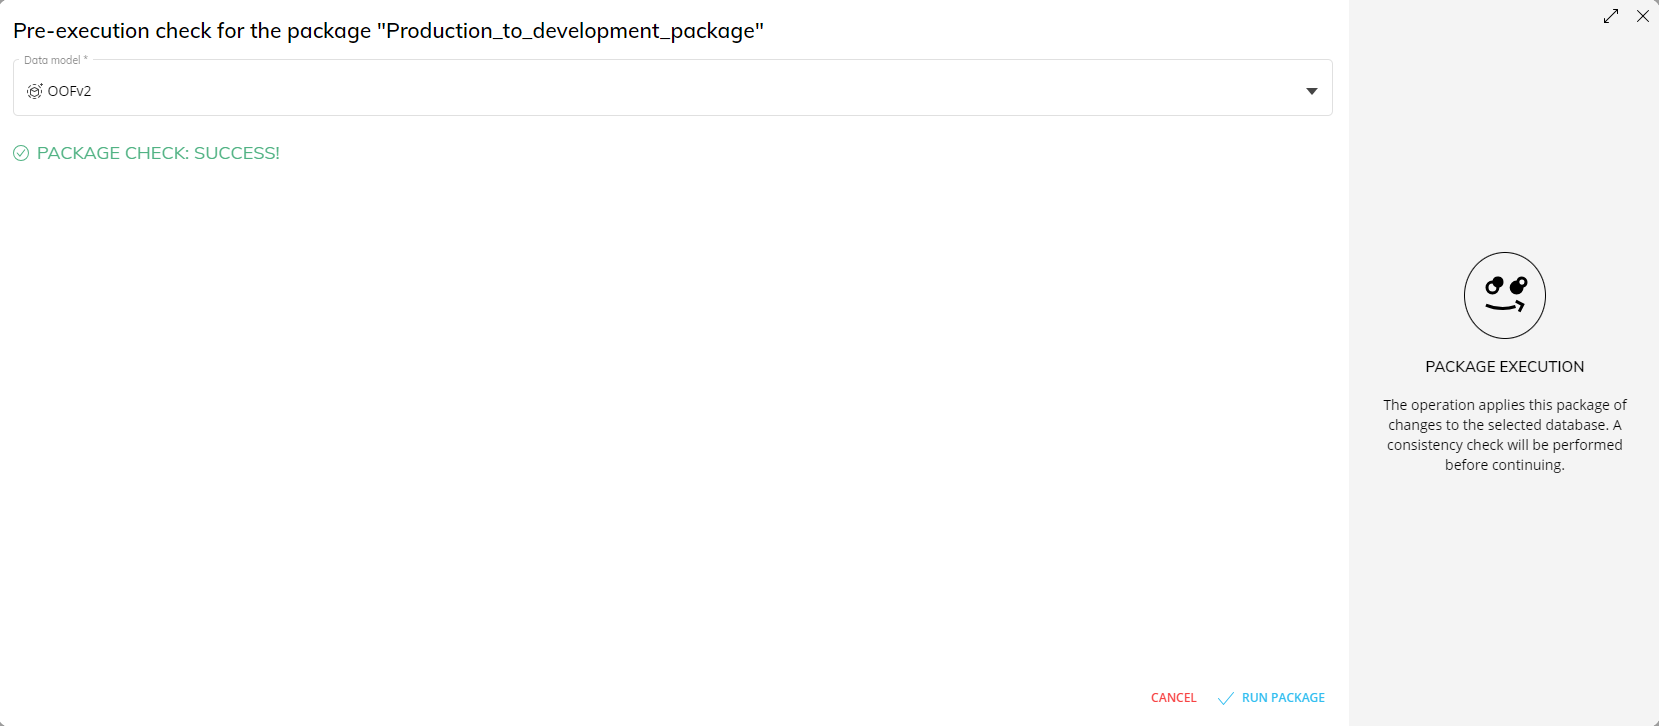
Click on "RUN PACKAGE" to run the Package.
You cannot run a Data Model Package if errors are detected during the pre-execution check.
The Data Model Package only transports the structure (i.e. metadata) of a Data Model and not the data contained inside.
When you execute a Package, the changes are applied as if they were manually made by a user. This means that existing data in the target Data Model may be lost in various cases, such as modifying the Structure of Cubes, adjusting the Time Range, or changing the Max item number of an Entity etc.