To access Office Add-ins, you must download the Office Add-in installer that corresponds with your Board version software. You have the option to download the 64-bit or 86-bit installer, depending on the Excel version you are using. You can find all the Board installers on the Community here.
You must have an active Board license and the appropriate Office Add-in permission assigned to your user profile. To find out if a user has the right license and permission, go to the user profile in the Users section of the Subscription Hub and review their license. The user should have one of the available Board licenses enabled and the "Office" checkmark next to it selected. Read more in the Getting started section.
Once the installers are downloaded, you can install the application.
Depending on user privileges, Administration authorization might be required to complete the installation. Board Office Add-ins are compatible with Office 2010 and newer. Board Office Add-ins are only compatible with the exact version of the Board Platform it connects to.
How to install Office Add-ins
After downloading the appropriate installer, click on the setup.exe file (shown below) to start the Setup Wizard

From the Board Office Add-in Setup Wizard, click on "Next".
Then, select all the Office Add-ins you would like to install (Excel, Word, and PowerPoint) and click "Next".
Once the Setup has finished, click on "Finish".
Installation is complete. Now, add the Add-in to your Office application and then create a connection to a Board server as described below.
Installing Add-ins for multiple users
When a company wants to install the Board Office Add-ins for hundreds of users or if the company policy does not allow each user to install its own programs, the Board Office Add-ins can be deployed centrally. This is done via the .MSI (Microsoft Software Installer) file extension, provided within the Board Office Add-in installation folder, in combination with using Microsoft's Group Policy to remotely install software. Read more about Group Policy and how to use it.
Add the Add-in
Open your Office application and open its Options window.
This is usually found by going to File>Options.
Select "Add-ins" from the menu.
Locate and select the Board Add-in from the "Inactive Application Add-ins" section.
From the "Manage" dropdown, select the Office application Add-in option (For example, for Excel: "Excel Add-ins"; for Word: "Word Add-ins"; etc.).
Click "Go..." which will open a popup window.
From the popup window, click the checkbox next to the desired Add-in.
Click "OK" to save and close the Options window. Now, you will find Board as a tab in your Office application's top menu.
How to set up a Board server Connection
After installation, it is necessary to configure a connection to a Board server to start using one of the Board Office Add-ins. The connection process is the same for Excel, Word, and PowerPoint.
To set up a connection, follow the steps below.
Open an Office application (Excel, Word, or PowerPoint) and navigate to the Board tab in the top menu.
When disconnected, all the available features and settings are greyed out except for the "Connect" button and "Add-in Settings".
Click on the "Connect" button and the Board server connection popup window will appear.

From the Board server connection popup window, click "Edit" to configure the connection.
You must know your instance URL to configure a connection.The instance URL is the same web URL you type into the browser to access a specific Board instance (for example: "https://myinstance-c1.board.com").
If you are a Cloud customer, enter the URL in the host field and give the connection a name. All other available fields are disabled and automatically assigned.
If you create multiple host connections, check the default box for the specific connection you'd like to connect to by default. You must have all the previous requirements (including license and user permissions) for the specified host URL in order to connect.
For example, if you have multiple host URLs, one of which gives you Office Add-in permissions and one which does not, and you select "Default" for the latter host URL (with no Office Add-in permissions), your connection will not be successful.
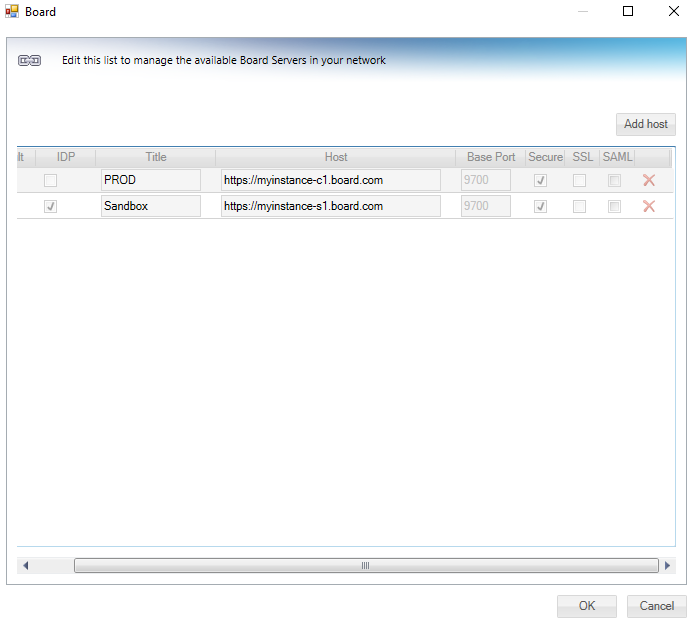
Click "OK"
From the Board server connection popup, select the Host from the dropdown menu and click "Connect".
A web browser page will open the host URL to prompt a secure login. If you have an SSO connection and are already logged in, you will not have to login again. If SSO has not been configured, the connect popup will show the Username/password fields needed to connect. Upon return to the application, all the options under the Board tab will be available except the "Connect" button.
Should you need support with installation, contact Board Support.