This article describes the Subscriptions section in System Administration, the information that the section provides, and the actions available to Administrators.
Subscriptions allow users to receive a Presentation or a Capsule Screen by email on a scheduled basis, for example daily, weekly, or monthly. The Presentation or Capsule Screen is sent as an email attachment in one of the following formats: PDF, MS Word, MS Excel, or MS PowerPoint.
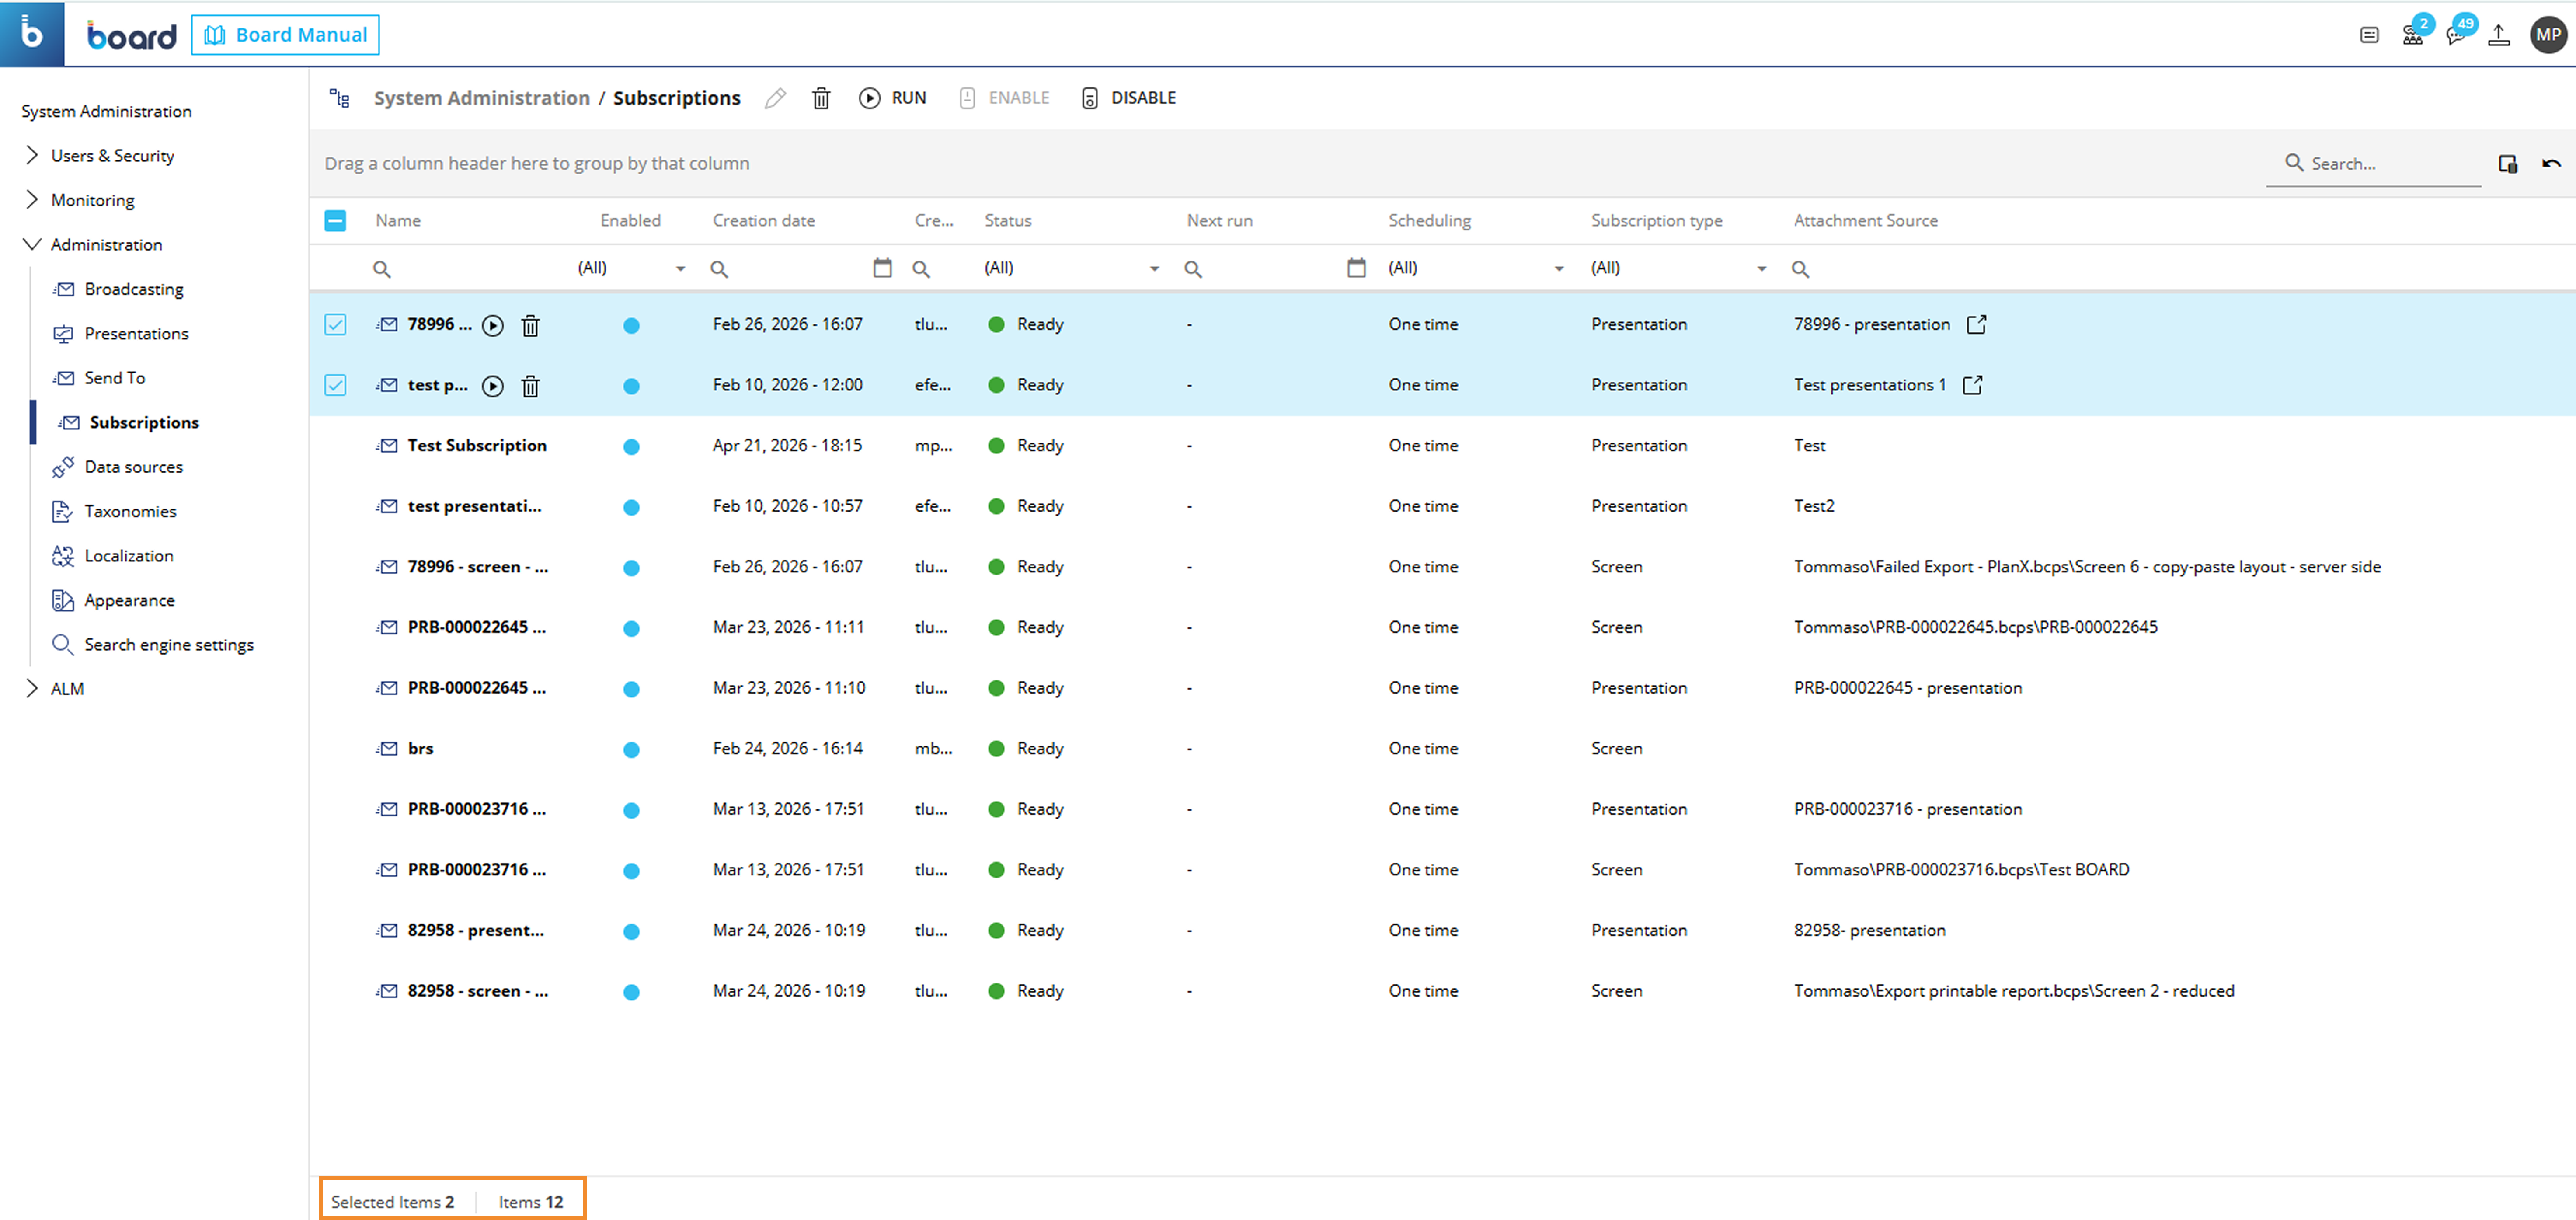
The Subscriptions section provides a centralized view of existing Subscriptions across the Board Platform.

From the Subscriptions interface, Administrators can monitor Subscriptions, run them, enable or disable them, and delete them without changing the original configuration owned by the user. Administrators can also view key information about each Subscription, including its name, creation date, last run date, schedule, attachments, and email content.
The interface also shows the total number of Subscriptions and how many Subscriptions are currently selected. This information appears in the lower-left area of the page and follows the same behavior as other grids in the Board Platform.
Subscriptions cannot be created or edited from this section. Users create and edit Subscriptions from the Presentations area. For more information on how to create and edit Subscriptions, see Create a Subscription and Edit a Subscription.
Subscriptions page overview
The Subscriptions page provides Administrators with a centralized view of all Subscriptions configured across the Platform.
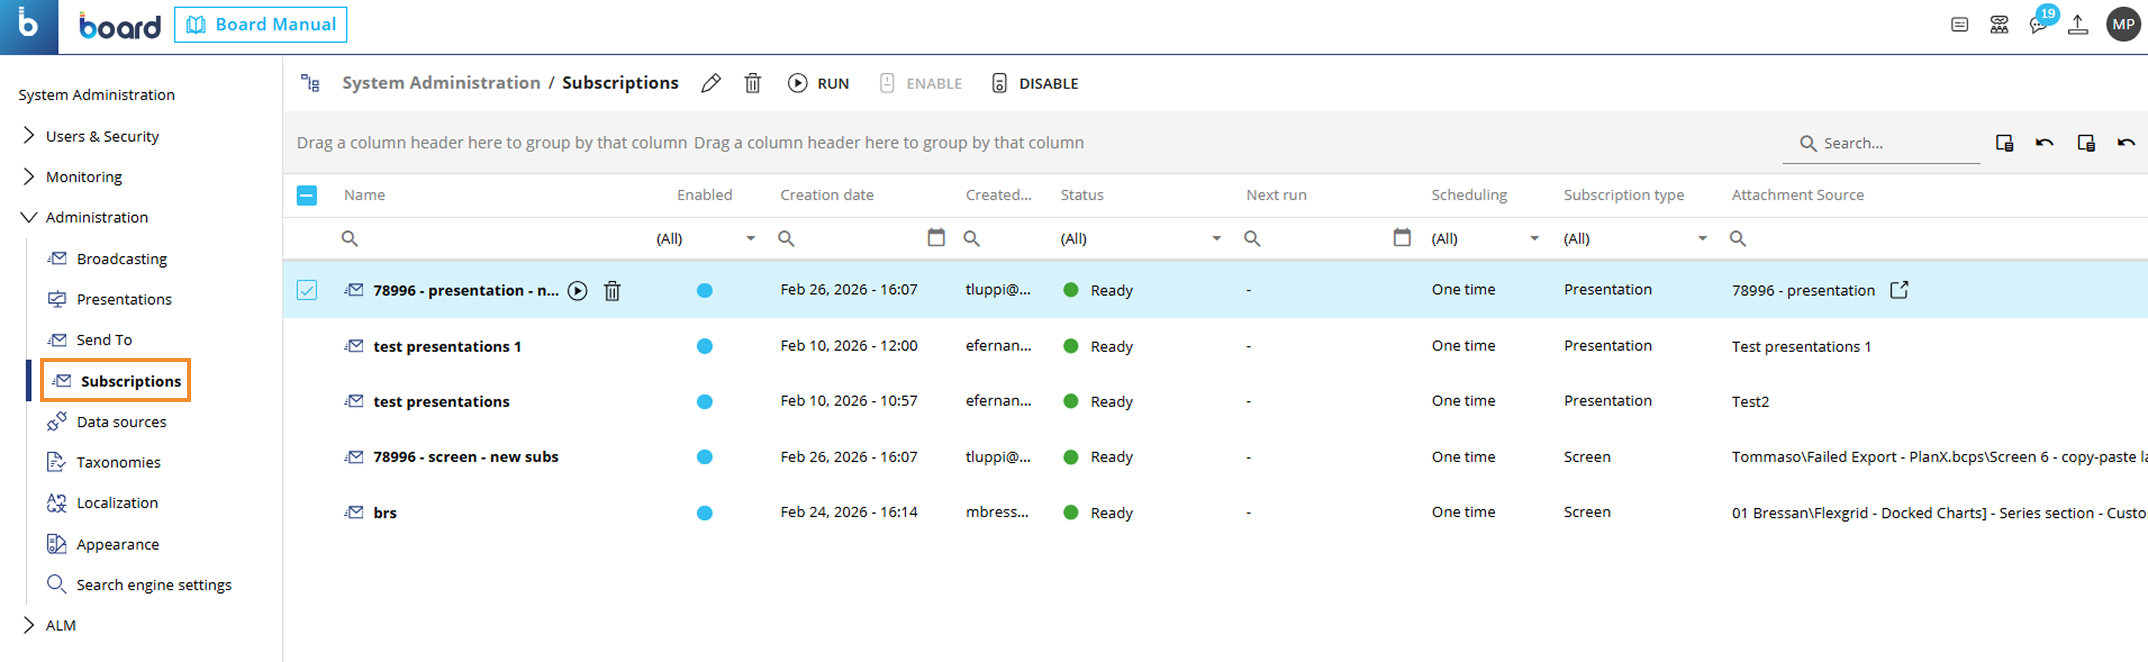
The page includes the following fields:
Name. This column displays the name of the Subscription.
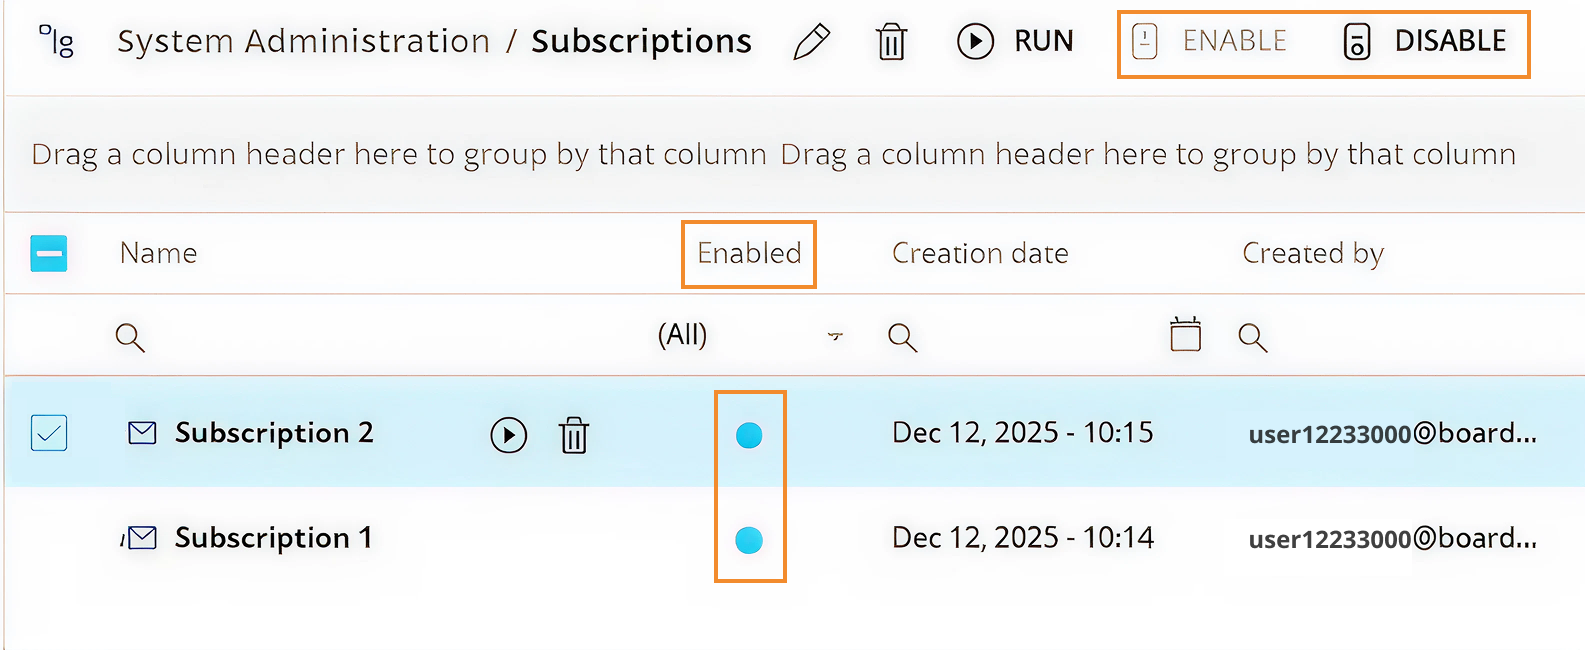
Enabled. This column indicates whether the Subscription is active. This column displays a radio button that, when filled blue, indicates that the Subscription is enabled. When the radio button is not filled blue, the Subscription is disabled. Subscriptions are enabled by default. Users can change the status directly from this column or within the Subscription details, by setting the "Enabled" toggle. A confirmation message, such as "Subscription(s) successfully enabled/disabled", appears at the bottom of the page to confirm the action.
Creation Date. This column displays the date and time of the creation of the Subscription in the following format: Month Day, Year - HH:MM (i.e. Feb 26, 2026 - 16:07).
Created By. This column displays the email address of the user who created the Subscription.
Status. This column indicates whether the Subscription is ready for execution. This column displays a radio button that, when filled green and accompanied by the status "Ready", indicates that the automatic execution of the Subscription is enabled. If the column is blank, the automatic execution of the Subscription is disabled.
Next Run. This column displays the date and time of the next time the Subscription will be executed, in the following format: Month Day, Year - HH:MM (i.e. Apr 29, 2027 - 10:00).
Scheduling. This column displays the execution frequency, such as one time, daily, weekly, or monthly, based on the configured schedule.
Subscription Type. This column defines the type of content delivery configured in the Subscription, i.e. Presentation or Screen.
Attachment Source. This column indicates the origin and name of the content included in the Subscription.
Last Run (hidden by default). This column displays the date and time of the most recent execution, in the following format: Month Day, Year - HH:MM (i.e. Apr 29, 2027 - 10:00).
File Format (hidden by default). This column displays the format of the generated output.
Administrators can review all configuration details, but they cannot change the setup of a Subscription created by another user. Only the owner can modify the configuration. Administrators can change only the enabled status.
Top menu bar
The top bar provides controls to edit, delete, run, enable, and disable Subscriptions.
 (11).png)
These actions become available after selecting one or more Subscriptions by using the checkbox next to the Subscription name. Some actions are also available from row-level icons when you hover over a Subscription name.
.png)
Actions
Edit. The Edit button
 appears in the top menu bar. Users can open the Edit Mode of a Subscription in two ways:
By clicking the pencil icon or the Subscription's name directly.
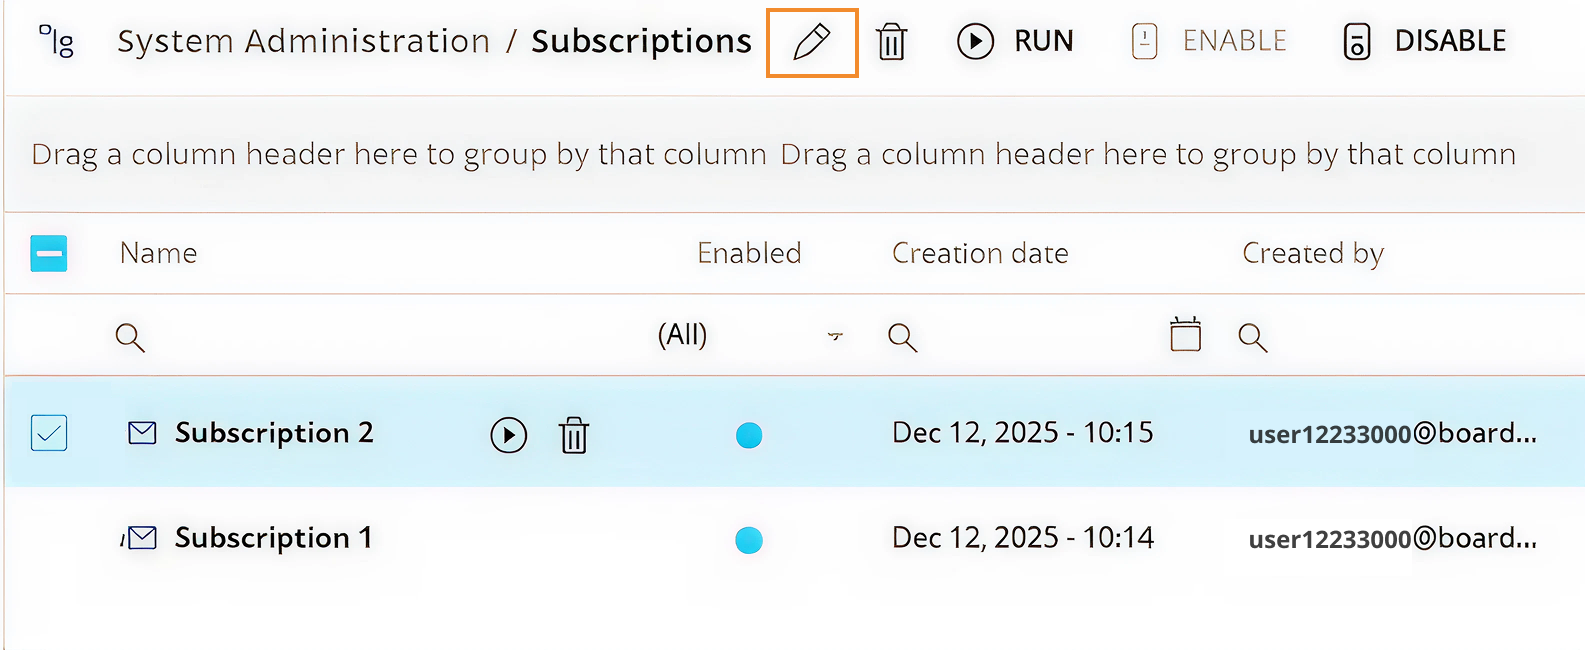
By right-clicking on a Subscription's name and selecting "Edit".
.png)
The Edit action depends on how many Subscriptions are selected:
Single selection: When one Subscription is selected, Edit Mode opens. For Administrators, the Subscription opens in read-only mode. Administrators can review the Subscription details, but they can only change the Enabled status.
Multiple selection: Multi-editing is not supported. Only one Subscription can be edited at a time. If you try to edit multiple Subscriptions, the Edit button will become unavailable.
To edit a Subscription, users need to access the Subscription from the Presentations or Capsules areas. Editing is unavailable from the Subscriptions area in System Administration. See Edit a Subscription for detailed information about how to edit a Subscription.
Delete. The Delete button
 appears in the top menu bar and when hovering over a Subscription's name. It allows deletion of one or multiple Subscriptions.
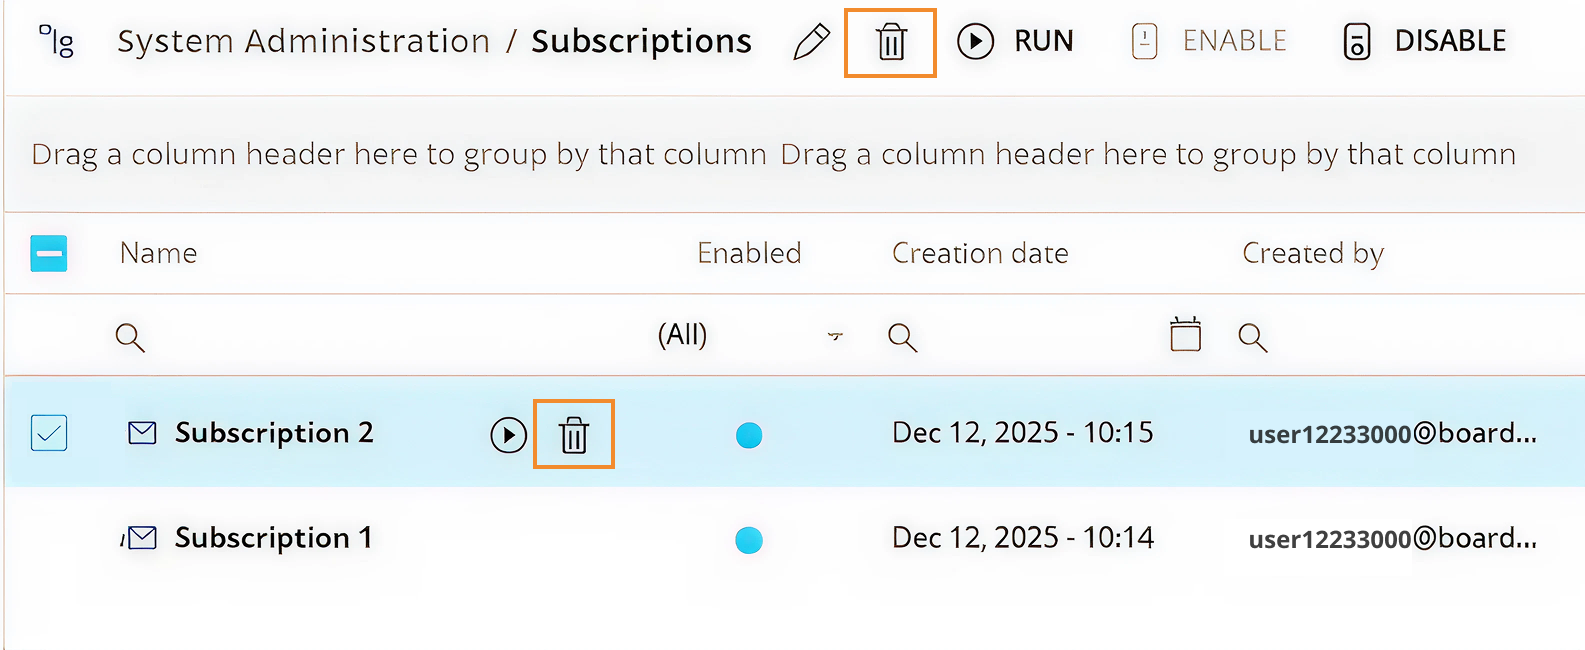
Run. The Run button
 appears in the top menu bar and also when hovering over a Subscription's name, and it executes the selected Subscriptions sequentially. During execution, a modal window shows the progress of the operation. When execution ends, a confirmation message lists the Subscriptions that were run successfully. Users can run one or multiple Subscriptions.
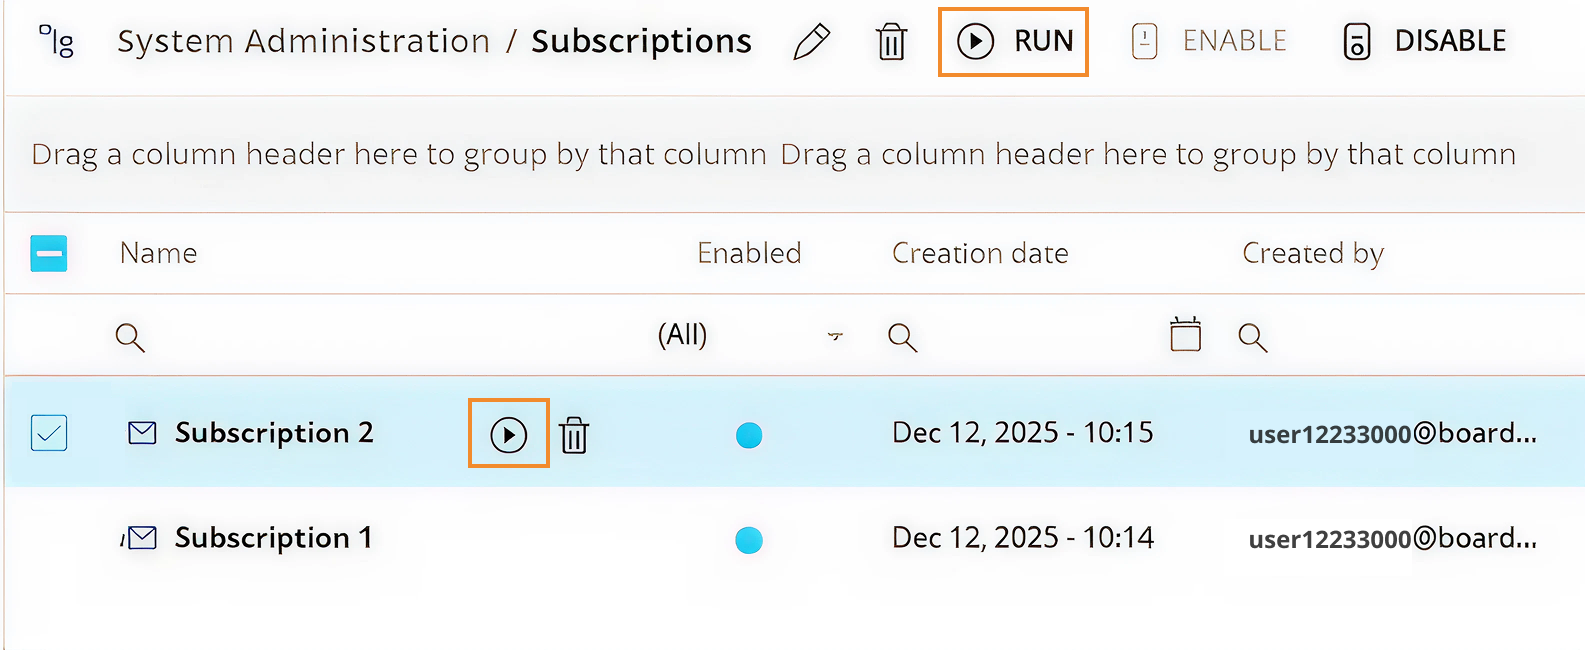
Enable/Disable. The Enable and Disable actions allow Administrators to activate or deactivate one or multiple Subscriptions at once. To change the status of a Subscription, click on the radio button in the Enabled column. When the radio button is filled blue, the Subscription is enabled. When the radio button is not filled blue, the Subscription is disabled. A confirmation message appears when the Enable or Disable action is completed successfully.
Additional tools
Column chooser. Click on the Column chooser button in the upper right corner of the Screen to show, hide, or reorder columns and customize the grid view.

Create a Subscription
Subscriptions are created from the Capsules and Presentations areas, not from the Subscriptions interface in System Administration. The System Administration page provides a centralized view of existing Subscriptions and allows users to view them in Edit Mode, run them, enable or disable them, and delete them. For detailed information about how to create a Subscription, refer to Create a Subscription.
Edit a Subscription
When accessing a Subscription from a Presentation or a Capsule, Edit Mode opens with the Subscription details and editable settings. From this page, users can modify the selected Subscription.
When accessing a Subscription from the Subscriptions page in System Administration, users can open Edit Mode by clicking on the Subscription name or the pencil icon. In this case, Edit Mode is available for review only. Administrators can view the Subscription details, but they can only change the Enabled status.
For detailed information about how to edit a Subscription, refer to Edit a Subscription.