This article is about how to configure the Flex Grid Layout. The topics covered are as follows:
The Flex Grid Layout has some commonalities to a Data View Layout, however, there are many differences. To configure the Flex Grid Layout, Entities are dropped into only one area titled "By Row" and the "Filter and sort" and "Object settings" submenus are disabled, all of which are possible to configure directly in the Flex Grid Object.
Similar to a Data View, data is displayed in a table format with Entities by row, you must configure the Layout with at least one Data Block, and you must dimension the Layout with at least one Entity. The first Data Block of a Layout must be a Cube or an Algorithm.
The Flex Grid has a row limit of 2.5 million rows. This is important to consider when configuring a Flex Grid with vertical alignment because the number of rows increases when switching from non-vertical to vertical alignment.
Data area
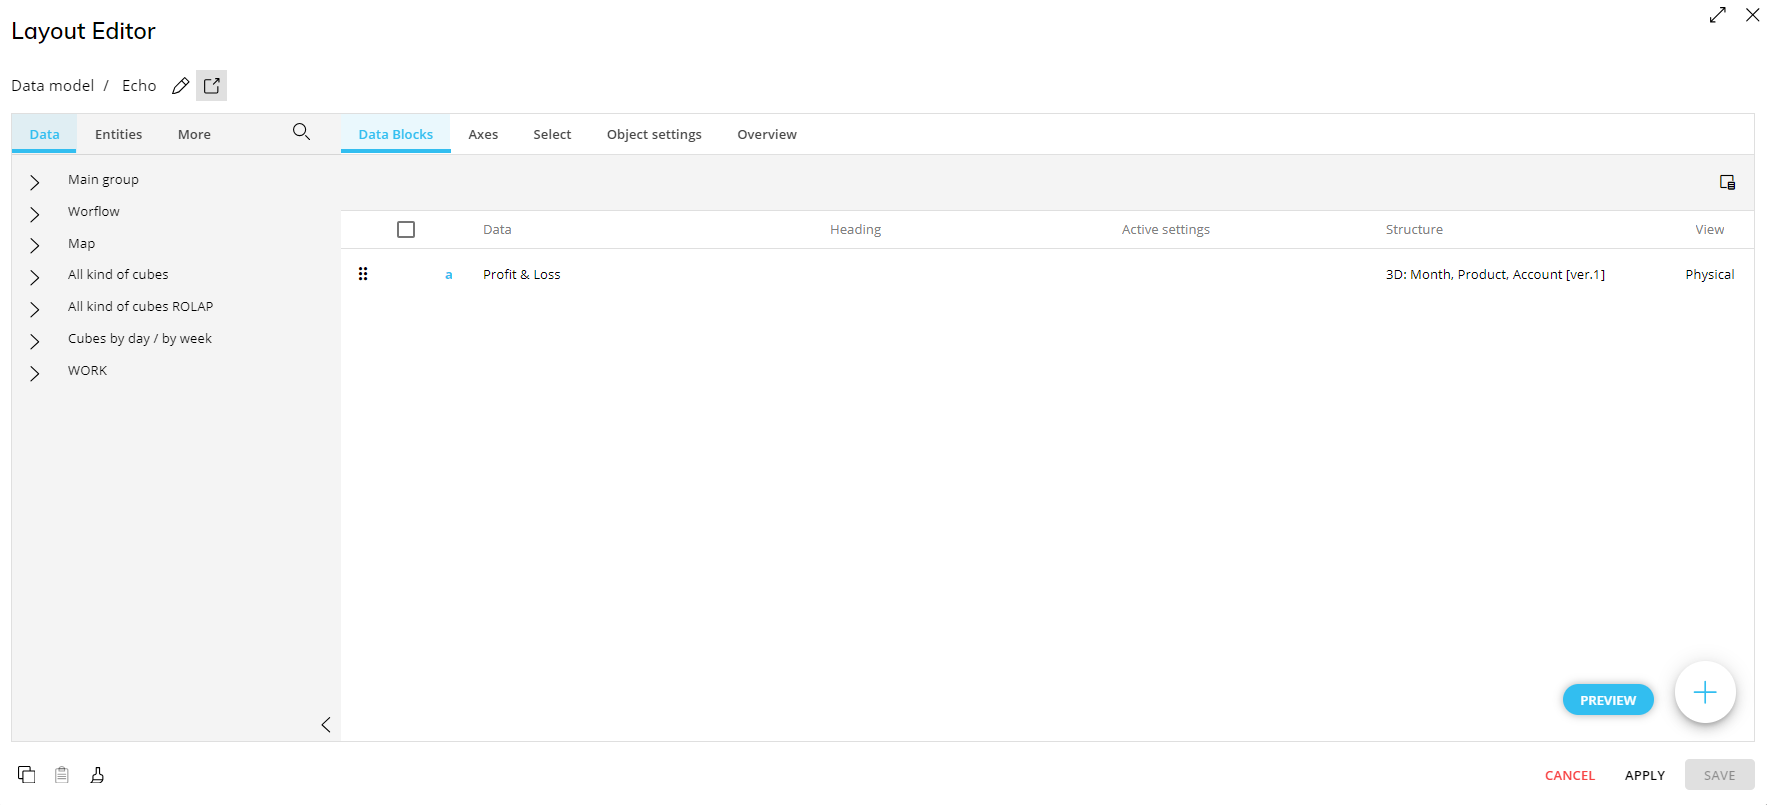
Similar to a Data View, Data Blocks are added to the Data area. Data Blocks are configured and customized in a similar way as with any other Object. You can add Cubes, Algorithms, Entities, and Rules.
You must configure the Layout with at least one Data Block, and you must dimension the Layout with at least one Entity.
The first Data Block of a Layout must be a Cube or an Algorithm.
Picture type Blocks are not compatible with vertical alignment
Data Block settings
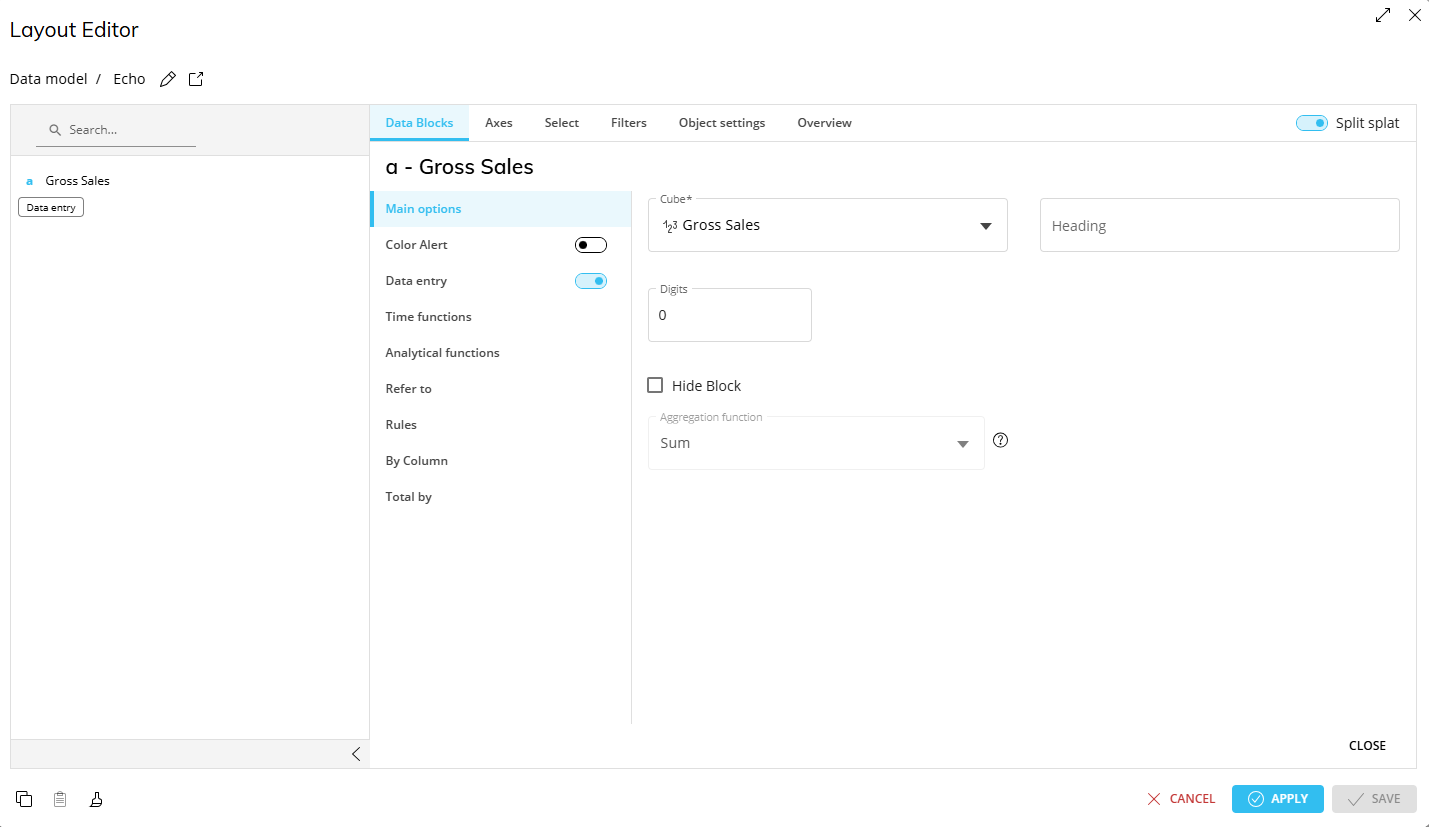
The Data Block settings in a Flex Grid Layout are similar to a Data View but with fewer options. The available Block settings are:
Main options. Similar to all Layouts, the main options include “Cube”, “Heading”, “Digits”, and “Hide Block”. Differentiating the Flex Grid is the replacement of “Summary” with:
Aggregation function. Defines how data in a hidden Block is aggregated. For Blocks that are not hidden, aggregation function is defined directly in the Flex Grid when a field is added as a Value in the “Fields” panel.
Hidden Blocks and aggregation function are disabled in Vertical alignment
Substitution formulas cannot be used in the Block header of a Flex Grid Object
When used in Block headers, these functions have both additional features and several known limitations as compared to their use elsewhere.
Color alert. As with a Data View, alerts are a useful way to highlight certain data points with customizable formatting.
Data Entry. Data Entry is available in Cubes Blocks, Algorithms Blocks (i.e. reverse algorithms), Row Headers (configured in the Axes tab) and to manage Relationships (i.e. Entity Block). Read more about Data Entry on a Flex Grid.
Data Entry formatting is ignored when exported to Excel or printable report.
Time functions. As with a Data View and other Objects, you can add a function, enable the Previous year checkbox, add a period offset and cycle configuration, or select a Calendar Time Entity.
Time functions cannot be used when Data Entry is enabled.
Analytical functions. As with a Data View and other Objects, you can add Analytical functions.
Refer to. As with other Objects, set a "Refer to" rule.
Rules. As with other Objects, add a Rule to the Layout.
Rules with range functions are supported.
Flex Grid execution bypasses one limitation of a rule which still exists in a Data View: Rules are also executed if the Entity is not the "most-nested", and instead positioned as a grouped Entity by row.
By Column. Similar to the Detail By feature in a Data View, the Flex Grid Layout Editor allows the configuration of Data Blocks with data broken down by column, allowing users to set and reorder each Entity, regardless of its hierarchical relationship.
By Column is not supported for Unbalanced Hierarchies.
Vertical alignment is not compatible with Blocks configured with the 'By Column' option and Entities set By Row.
By Column totals across multiple Blocks are not supported when those Blocks share the same By Column configuration and are grouped by 1 or more Entities. If a total sum column is needed with By Column Blocks, it can be recreated by using a new algorithm Block that sums the multiple Blocks together.
If you extend the selection of Entity members used in a Column By configuration, the selected Entities appear in the grid but not in the "Values" section of the Fields panel.
Total by. As with other Objects, add a "Total by" configuration.
To find out more, read about Data Block settings.
Axes
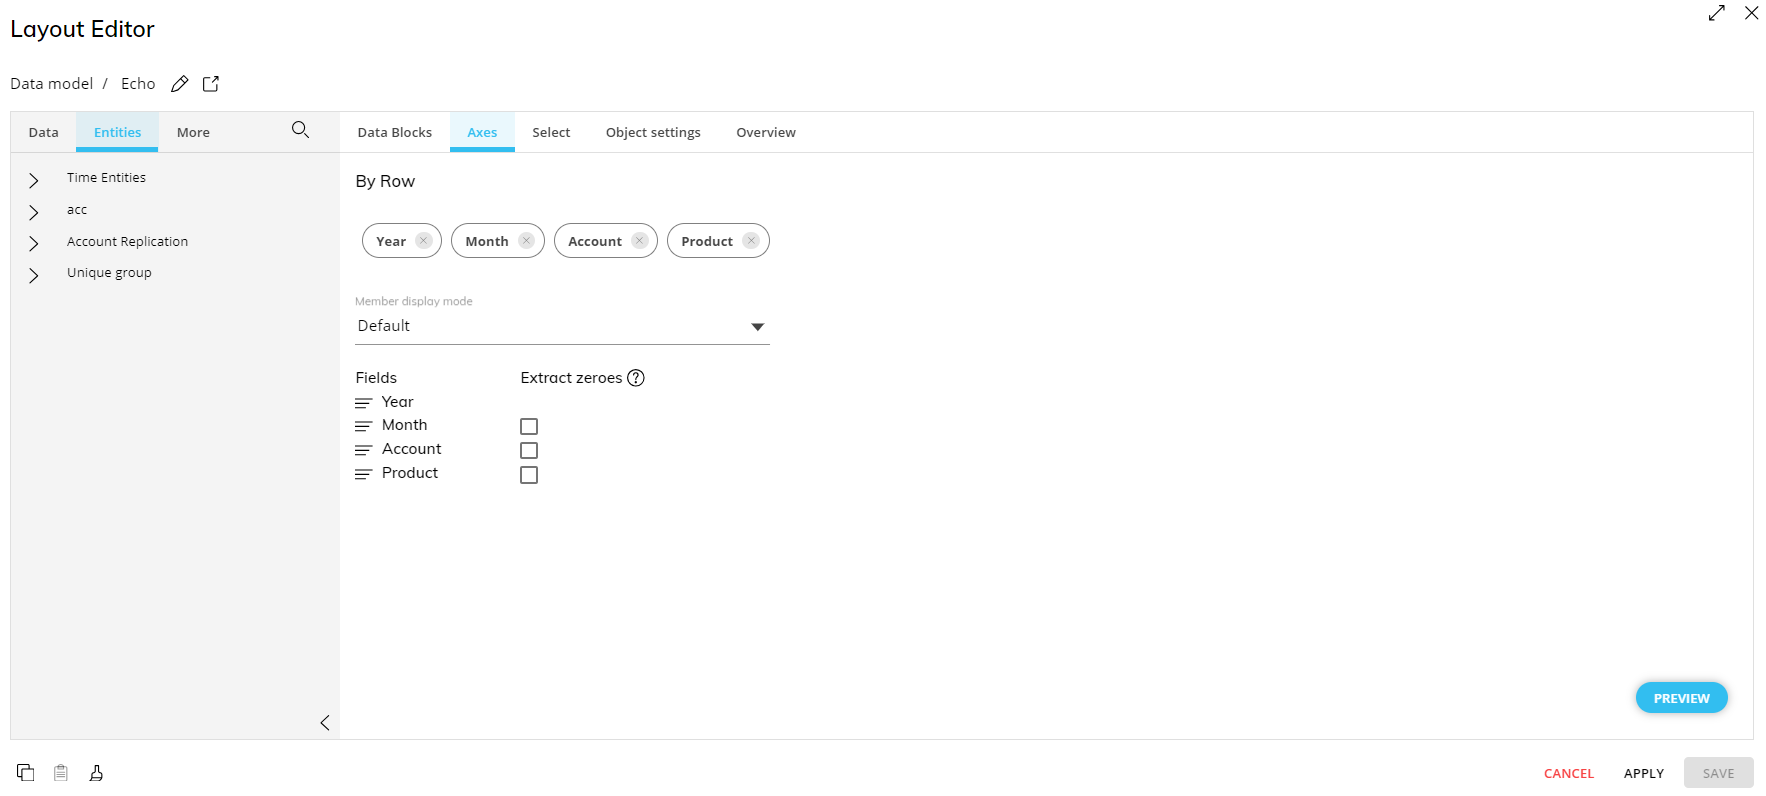
In the Axes area, you can add multiple Entities to the "By Row" area. In fact, you can add much more Entities by Row than in a Data View in order to display complex grids of data in different ways with the powerful Pivot Mode tool.
Unlike a Data View, rows and columns are not configured within the Layout but rather within the Flex Grid Object. Entities are only set "By Row" in the Layout and configured in more detail directly from the Flex Grid itself, for example dimensioning the grid using the Fields panel, grouping, and defining specific sorting and filtering from each Entity heading.
Underneath the "By Row" area, you can define the Member display mode and enable or disable the "Extract zeroes" feature like with other Objects.
The functionality of Data Entry on Row Headers is not available.
For a Layout with multiple Unbalanced hierarchies, the Flex Grid execution bypasses one limitation of Unbalanced Entities: that only the most-nested Entity by row is executed in terms of aggregation while the others are only used to group rows. With the Flex Grid Object, the aggregation of multiple unbalanced Entities is executed regardless of this limitation.
For example, in a Data Model where the Entities Account and Reporting Unit are both unbalanced, a Flex Grid calculates the roll-up of Account (e.g. Total Revenues) and then further rolls-up these figures from each Reporting Unit into the parent Reporting Unit (e.g. Organizations, Sub-Regions, Regions, etc.)
Select
In the Select area, you can add a Layout Selection solely on the Flex Grid Object, similar to a Data View with a few differences outlined below. The Layout Select is configured exactly like the Select function, considers security selections, and follows the Selections application sequence (Select at runtime).
To make a selection on a Flex Grid Layout:
Open the Select tab.
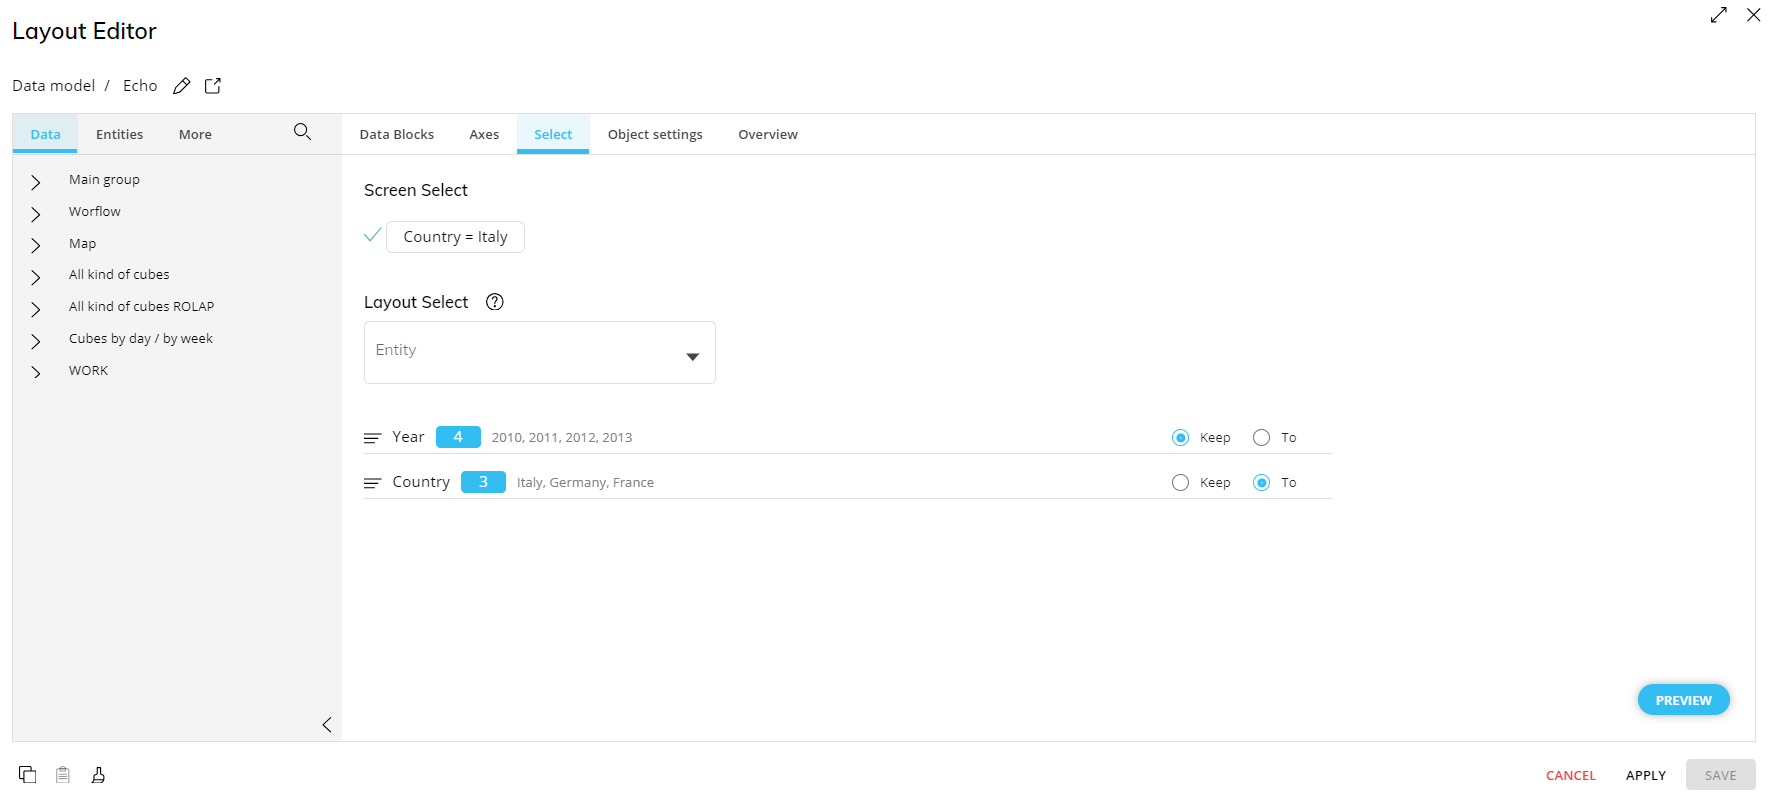
Select an Entity from the dropdown menu.
When you have selected the desired Entity members, click on the "TO" button to override the current Screen selection on the selected Entity or "APPLY" to keep the Screen selection. This can be changed once the Selection is made from within this submenu of the Layout by clicking on the corresponding radio buttons that appear next to the Selection, "To" or "Keep".
Select To. Overrides the Screen Selection.
Select Keep. Keeps the Screen Selection and intersects the two selections. If the Screen Selection does not exist in the Flex Grid, the resulting selection will be empty.
If you extend the selection of Entity members used in a Column By configuration, the selected Entities appear in the grid but not in the "Values" section of the Fields panel.
In the example below, the Screen Select is on the member "Italy" of the Country Entity, while the Layout Select is on members Italy, Germany, and France using the "To" function. This means that the Flex Grid will ignore the Screen Select and show data for all three countries.
Flex Grid Layout Select behaviors
A Layout Select on a Flex Grid differs from other Objects in that the selection is applied to a dataset, whereas a selection is applied to the Layout of other Objects, i.e. a Data View. In some cases, this results in differing outcomes when the Flex Grid Layout Select interacts with Screen and security selections and is summarized below.
The Flex Grid selection rules are simple, applying each Layout Select in order as they appear in the Layout Select area, from top to bottom. This means that a new "Select To" selection overwrites the previous ones and a new "Select Keep" selection intersects with the previous ones. The rules for the Layout Select of a Flex Grid are as follows:
Select To. Overrides the Screen Selection.
Select Keep. Keeps the Screen Selection and intersects the two selections.
For a more detailed understanding of the different Flex Grid outcomes resulting from the Layout Select interaction with Screen and security selections, read the below paragraph.
You can rearrange the Layout Selects by dragging and dropping them into the order you want.
Details of the Flex Grid Selection behaviors
Since the Select behaves slightly different than with other Objects, like a Data View, the following selection behaviors should be noted as specific to a Flex Grid:
Select To. In addition to the rule above, the following behaviors also apply:
If a Screen Select To is made on unrelated or stand-alone Entities, the selection is kept and applied along with the Flex Grid Layout Select To.
A Layout Select To applied on the same Entity tree as an invalid Screen Select (i.e. with 0 members to select) overwrites the Screen Selection, leading to a valid selection.
Select Keep. In addition to the rule above, the following behaviors also apply:
If the Screen Selection doesn't exist (results in an empty dataset) in the Flex Grid, the Flex Grid displays as empty.
If a Screen Select Keep is made on unrelated or stand-alone Entities, the selection is kept and applied along with the Flex Grid Layout Select Keep.
A Layout Select Keep applied on the same Entity tree as an invalid Screen Select (i.e. with 0 members to select) always results in an invalid selection, displaying the Flex Grid as empty.
If an Entity or member no longer exists and is applied to the Layout Select, the behavior is the same for both To and Keep and is as follows:
If the deleted Entity is not dimensioned in the Axes area nor in the dimensions of the Layout Blocks, an error is logged as "Warning" and the selection on this Entity is ignored. Execution occurs as if the Select doesn't exist.
If the deleted Entity is dimensioned in the Axes area or in the dimensions of a Layout Block, an error message displays.
If one or more members are deleted, but the Select still contains valid members, an error is logged as "Debug" and the Select executes considering only the valid members.
If all members of the Selection are deleted, the Select is invalid. In this case an error is logged as "Debug" and the Flex Grid displays as empty.
If a Security Select exists on the same Entity or tree, to avoid displaying out-of-security data, the behavior is as follows:
If the Select is within the parameter of the Security Select (even partially), the intersection between the members configured in the Layout Select and those active in the Security Select are executed.
In the case of a Select Keep, the members selected in the Layout Select are those active in the current Screen Select (intersection between Screen Select and Select Keep, as explained above).
If all members configured in the Select To are outside of the Security Select parameters, the selection is invalid and an error message displays.
If a Screen Select is outside of the Security Select parameter, because the Layout Select To overrides a Screen Select, the error is also overridden and a selection (as long as it is valid) displays.
If all members configured in a Layout Select Keep are outside of the Security Select parameters, the Flex Grid displays as empty, as if the intersection between the Layout Select Keep and Screen Select were empty.
If a Screen Select is outside of the Security Select parameter, an error displays.
Filters
In the Filters area, you can set filter rules to your Layout. This is useful when copying a Layout from a Data View to a Flex Grid or vice versa, and specific rules apply. See Copy/Paste formatting for more information.
Only numerical Blocks and Blocks without By Column configured support filters in a Flex Grid Layout. Should one of these limitations exist when copying over, the filter will be ignored.
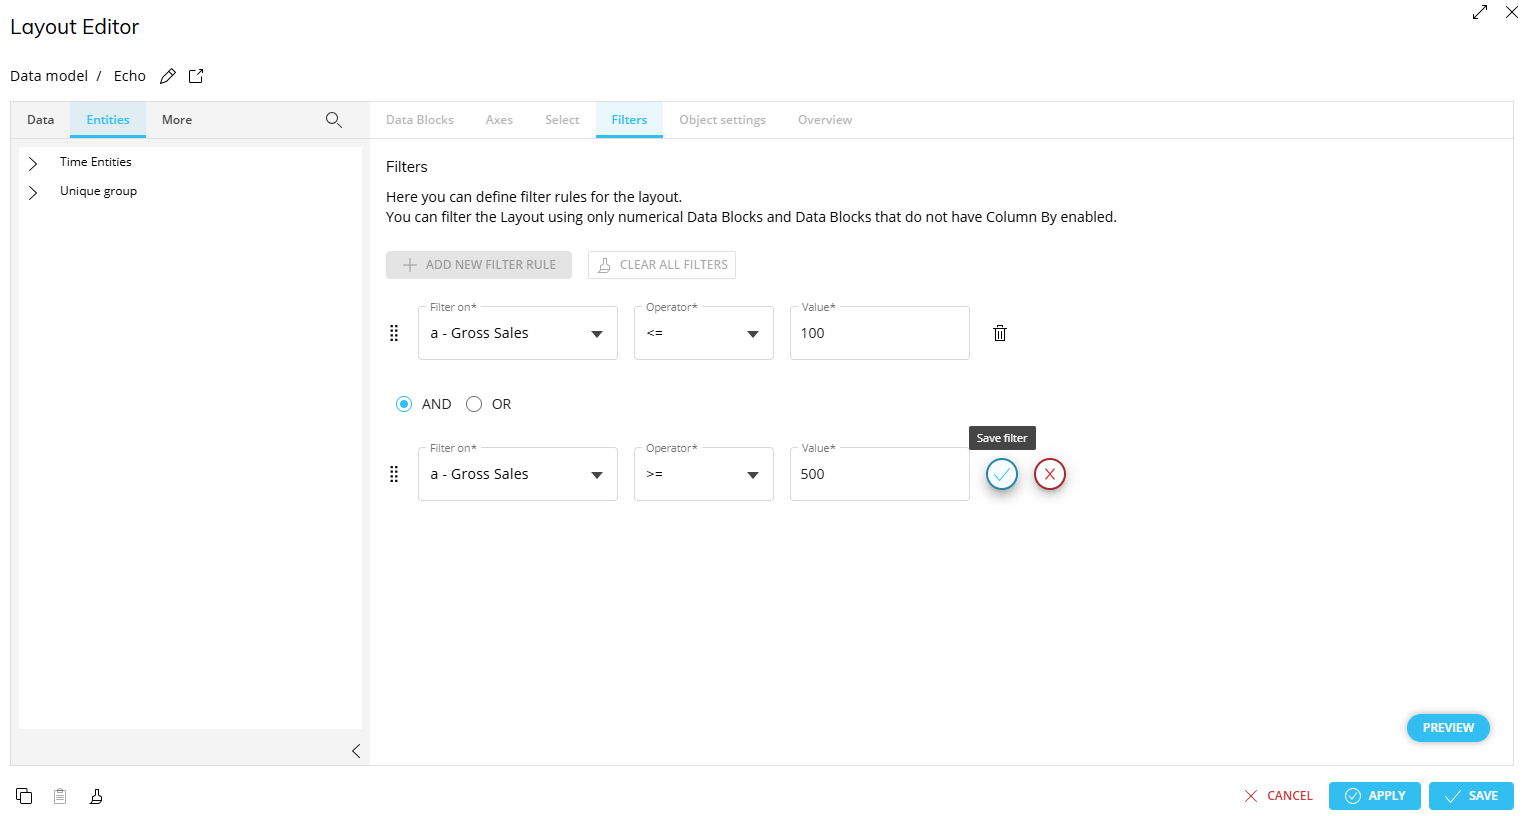
Create Filter rules
Click “ADD NEW FILTER RULE”

Configure the rule with the following settings:
Filter on. Choose the Block you wish to apply the filter on.
Operator. Choose the operator to define the filter rule
=. Equal to a value
<>. Less than and greater than a value
>. Greater than a value
>=. Greater than or equal to a value.
<. Less than a value.
<=. Less than or equal to a value
Range. Choose a minimum and maximum value to filter a range of values.
Values. Depending on the operator, you will have the option to type different values. For all but “Range”, write in 1 value in the “Value” field. For “Range”, write the minimum value and the maximum value.
Click the blue check mark to save the filter rule. To cancel, click the red X.
Optional: Add multiple rules by repeating steps 1 and 2
While configuring the second step, choose between “AND” or “OR” to complete the rule parameters.
The “AND” or “OR” parameter you choose for the second rule will apply for any additional filter rules. You can change the parameter in the second rule, but it will apply to any additional filter rules.
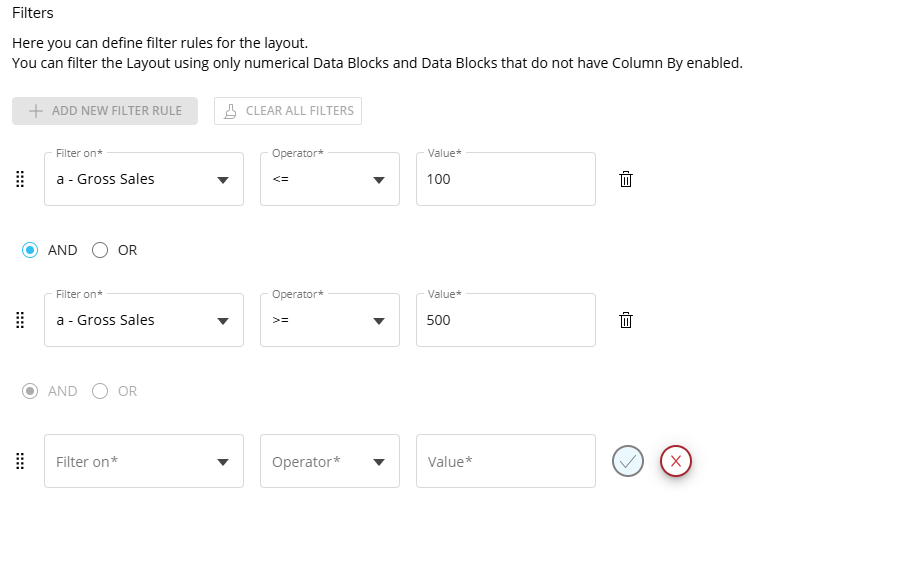
Click the blue check mark to save the filter rule.
Save the Layout.
Object settings

The Object settings area of a Flex Grid Object allows you to configure how cells should look. The following options are available in the dropdown menu for each Data Block of the Layout:
Default
Button
Checkbox
Drill Configuration for a Flex Grid
You can also click "CONFIGURE TO DRILL" to configure a Drill down, Drill-to-Screen, Drill-Procedure, and Drill Through on one or more Data Blocks. Docked Charts can also be configured, edited and customized within a Drill Down.
Docked Charts in a Drill Down are allowed for Planner use by default.
To disabled Docked Charts in a Drill Down, Developers must uncheck the option “Allow Docked Charts in Drill Down” in the Flex Grid Properties Panel under the “Data” tab.
The Drill configurations for Flex Grid are the same as they are for Data Views. See the following Drill-related articles for more details:
Drill down with Vertical Alignment
Drill down on an Entity is supported on a vertically aligned Block. Drilling on an Entity in vertical alignment displays the Entity’s members within the Sum Values configured in the Values area. In the drill window, all KPIs are kept. Drills can be customized and saved.
Drill-Procedures, Drill Throughs, and Drill-to-Screen are not compatible with Vertical Block Alignment and are ignored in vertical format.
Drills made in vertical alignment will override any previous made drills when reverting back to non-vertical format.
After configuring the Layout
Once the Layout is configured, click "SAVE" to complete the Layout configuration and exit the Layout Editor. Select the Flex Grid Object within your Capsule Screen to create a customized data configuration that can be saved as the default view available in Play Mode.
The following options, which might usually be found in a Layout Editor, are done directly within a Flex Grid and can be read in more detail in the Design mode interaction with a Flex Grid article:
Customize the Pivot Mode configuration. From the Fields panel, enable Pivot Mode to customize the default display of data as you want the Planners to initially see it in Play Mode. Click "SAVE" to create a default view for the Planners with the configurations set.
Grouping. You can group Entities and Blocks by row in flat view directly from within the Flex Grid Object. Click "SAVE" to save the grouping for the default view of the Planners. Read more about grouping, how to group, and its behaviors.
Filtering and sorting. Configure the filter and sorting enablement for Planners so they can do so directly from the column headers. You can also save a configuration of filters and sorts by doing so directly in the Flex Grid and clicking "SAVE" in the Top menu.
Copy/Paste formatting (Data View <> Flex Grid)
When copying a Layout from a Flex Grid to a Data View or vice versa, the basic Layout structure, including the Data Blocks, Entities, and Axes configuration, is correctly applied. The general copy/paste Layout limitations apply in addition to the Object-specific ones, all specified below:
Data Block settings
Not all Block settings are copied.
The following Block settings are copied and unchanged:
Color alerts
Time functions
Analytical functions
Refer to
Rules
Ranking function
Total by
Rules and Ranking functions are copied, however their Blocks are removed and replaced with a placeholder. To fix this, the user must replace these if they exist in the Layout with alternative Blocks.
The following Block Settings are removed, changed, cleared, ignored, or reset.
Divide by is removed
Summary is set to Total by
Tooltip is cleared
Hide zeros and row totals are reset
Detail by (Data View)/ By Column (Flex Grid) is cleared. The user must re-configure the Object specific feature
Aggregation is cleared and not supoprted in a Flex Grid
Nexel is cleared and not supoprted in a Flex Grid
Axes
Down totals are not copied
Show all is not copied
Incompatible elements (e.g., multi-axis rows, nested algorithms) are automatically remediated or flagged.
Sorts and Filters
Sorting is not copied and must be reconfigured between Objects.
Not all filters of the Layout are copied. The following are kept, while the others are removed:
>=
<=
Only numerical Blocks and Blocks without By Column support filters in a Flex Grid Layout. Should one of these limitations exist when copying over, the filter will be ignored.
Object Settings
Object Settings, like with other Objects, are not copied.
Because the Object Settings section is not copied, the pasted Layout may appear structurally identical but will not automatically retain these display or drill behaviors. It is therefore recommended to review and restore the desired configurations in the Object Settings section after performing the copy/paste operation.
Data Entry
When Data Entry is activated and configured, the following copy rules apply:
Pattern-based allocation is removed
Total locked by Block is removed
Cube cells locked by is removed
Substitution formulas
Substitution formulas are copied, however, if they are unavailable in the Object where the Layout is pasted, they simply stop working (E.g. @Selection_EX is not supported in a Flex Grid and therefore will not work if copied from a Data View).
Formatting
All common formatting in Row Templates and the Design Object Properties is copied, like fonts, font size, borders, and colors. Others specific to an Object are removed.
Block Format is not copied.
Flex Grid interactions
Any in-grid interactions like pivot mode, filtering, sorting, grouping, and vertical alignment are ignored