The Send To feature allows users to automatically send a Presentation to one or multiple Board users by email. Presentations can be delivered in the following formats:
PDF
MS Word
MS Excel
MS PowerPoint
Send To jobs are created from the Presentations area, not from the Send To interface in System Administration. This approach ensures that each Send To job is linked to the specific Presentation it sends and that users can define recipients, scheduling, and delivery settings in the same context as the Presentation content.
The following section describes how to create a Send To job.
Create a Send To job from Presentations
To create a Send To job from the Presentations area, follow these steps:
Open the Presentations area in the Board Platform.
Select the "Send To" icon from one of the following areas:
The top of the page.
The left side of the page.

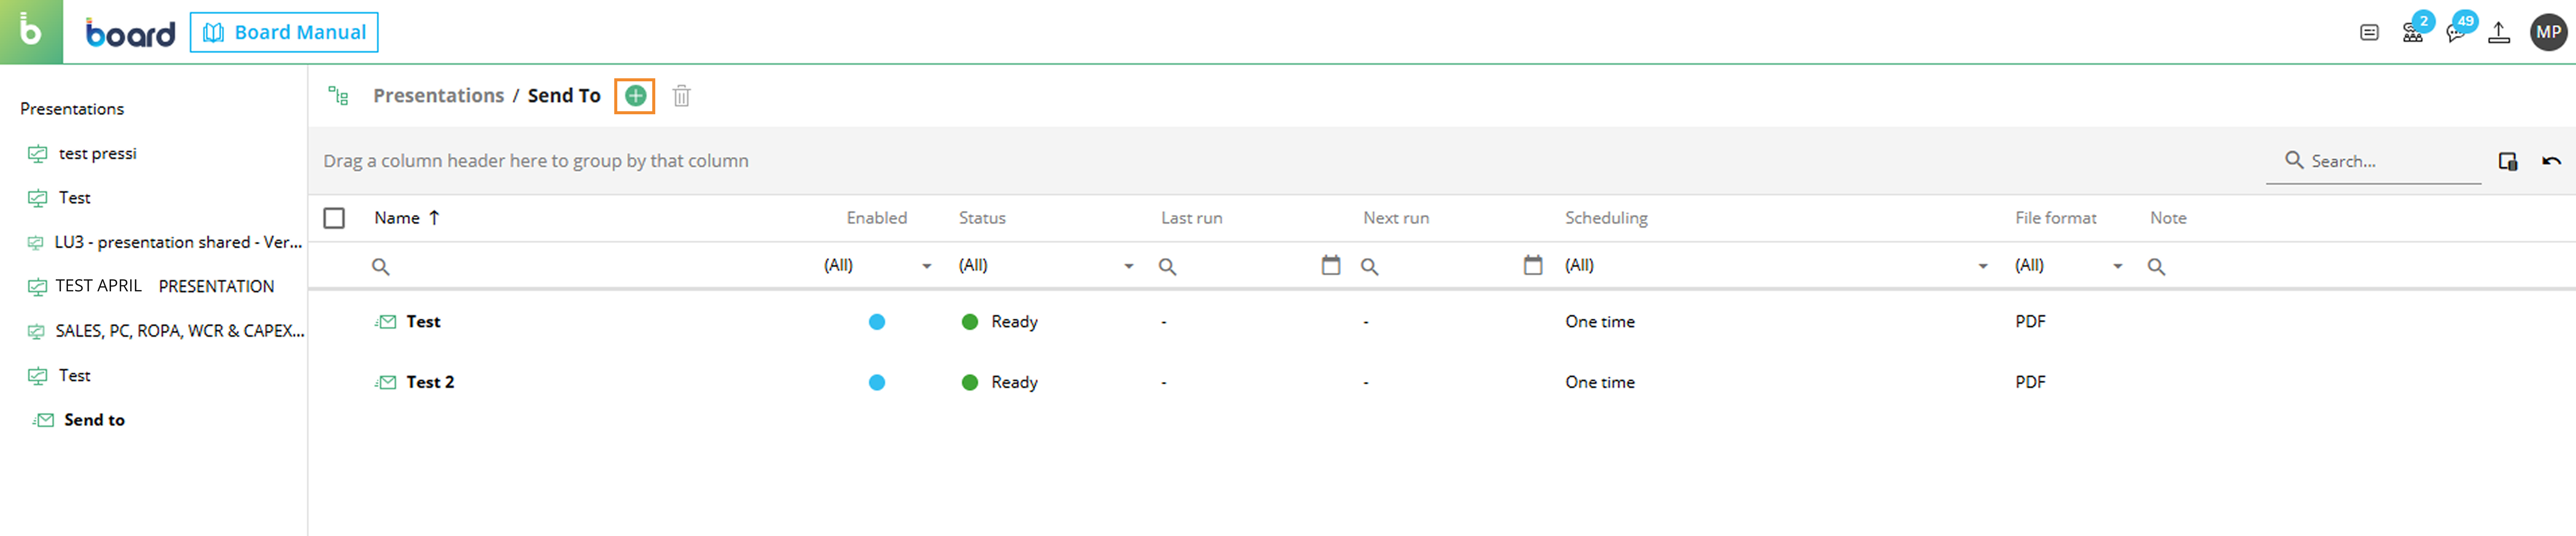
The Send To panel opens, which provides a centralized view of all existing Send To jobs across the Board Platform. Additionally, on the left side of the page there is a list of all Presentations available in the Platform.
In the Send To panel, users can see existing Send To jobs that they created and their main information: the table is sortable and searchable using the interactive header fields.
Users can also customize the table view by showing or hiding columns through the Column chooser icon
 in the upper-right corner of the table.
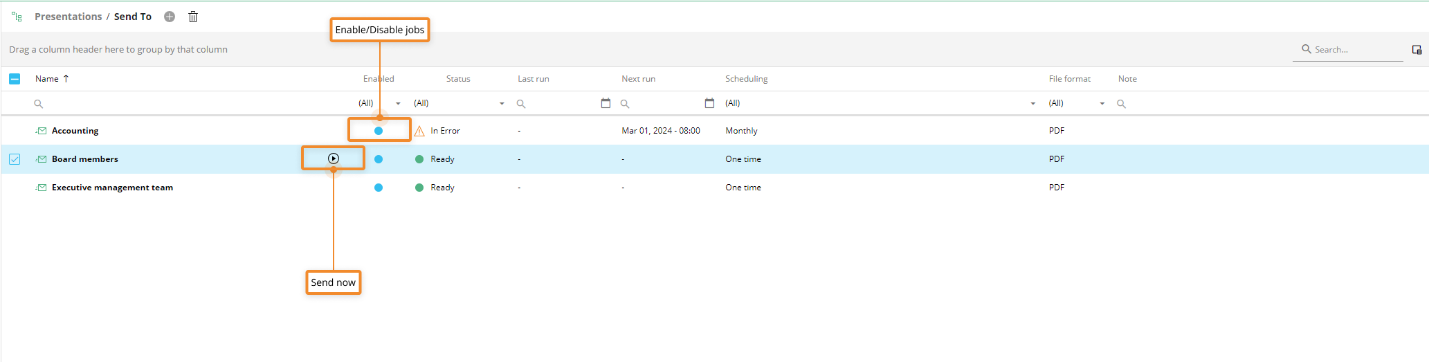
Users can enable or disable Send To jobs directly from the table. Additionally, each Send To job can be executed immediately by clicking the "Send now" icon that appears when hovering over a row.
The "On open trigger" feature is not supported in combination with the Send To feature. This means that if the Slide being exported includes the "On open trigger" functionality, the associated Procedure executes but the export does not wait for the Procedure execution to complete. To avoid issues in these cases, we suggest to generate the export via the Broadcasting Procedure actions which allow more flexibility in performing Procedure actions before the export execution.
The table contains the following details:
Name. Displays the name of the Send To job.
Enabled. Indicates whether the Send To job is active. This column displays a radio button that, when filled blue, indicates that the Send To job is enabled. When the radio button is not filled blue, the Send To job is disabled. Send To jobs are enabled by default. Users can change the status directly from this column or within the Send To job details, by setting the "Enabled" toggle. A confirmation message, such as "Send To successfully enabled/disabled", appears at the bottom of the page to confirm the job.
Status. This column indicates whether the Send To job is ready for execution. This column displays a radio button that, when filled green and accompanied by the status "Ready", indicates that the automatic execution of the Send To job is enabled. If the column is blank, the automatic execution of the Send To job is disabled.
Last run. This column displays the date and time of the most recent execution, in the following format: Month Day, Year - HH:MM (i.e. Apr 29, 2027 - 10:00).
Next run. This column displays the date and time of the next time the Send To job will be executed, in the following format: Month Day, Year - HH:MM (i.e. Apr 29, 2027 - 10:00).
Scheduling. This column displays the execution frequency, such as one time, daily, weekly, or monthly, based on the configured schedule.
File format. This column displays the format of the generated output.
Note. This column displays additional information that the user has added to the Send To job . If no additional information was added, the column appears empty.
Creation date (hidden by default). This column displays the date and time of the creation of the Send To job in the following format: Month Day, Year - HH:MM (i.e. Feb 3, 2026 - 16:07).
Select the "+" icon to create a new Send To job.
A pop-up window appears, where users must enter a name for the new Send To job. Select one of the following options:
"Cancel" to close the window without creating a Send To job.
"Next" to open the "New Send To" window and configure the Send To job.
.png)
Configure the Send To job. For this, there are four main sections that need to be configured:
Who. Allows the Admin user to select the recipients of the Presentation that will be sent by email through the Send To job. You can select one or multiple recipients. To select recipients:
Use the search bar to search a user by name.
Enable the checkbox to the left side of the user name.
Select one of the following options:
Cancel. Closes the window without saving your selection.
Next. Saves the selection and opens the next configuration step.
Previous. Returns to the previous configuration step.
.png)
What. Allows the user to configure the Send To job details, including the following options:
Presentation. Select the Presentation that will be sent as an email attachment.
File format. Select the file format for the selected Presentation. The available formats are MS Excel, PDF, MS Word, and MS PowerPoint.
Email content. Contains the fields used to define the email that accompanies the attachment. A Send To email is the message automatically generated and delivered to the configured recipients together with the attached Presentation. This section allows Admin users with permissions to access the selected job to edit the email subject and body, so the message can provide context and useful information to recipients.
Subject. Edit the email subject.
Formatting toolbar. Below the subject field, there is an editor toolbar. The toolbar includes visible formatting and editing controls, including Undo, Redo, Bold, Italic, Underline, font color, text alignment, lists, hyperlinks, and other text formatting options. Other visible controls include the following:
Substitution formulas. This dropdown list lets users insert predefined dynamic values into the email body. When the Send To job runs, each formula is replaced with the corresponding value in the generated email. The available formulas are:
@Date. Inserts the current date
@Link. Inserts a link related to the Send To job content
@Time. Inserts the current time
@User. Inserts the name or identifier of the user associated with the job email
Email body. Below the Substitution formulas dropdown list, there is the email body editor.
.png)
When. Allows the user to configure how often the Send To job runs. Configure the following options:
Frequency. Select how often the Send To job runs. The available options are:
One time. Runs the job one time only.
Daily. Runs the job every set number of days.
Recur every (days)*. Defines how often the job runs, in days. For example, enter 1 to run the job every day, or enter 7 to run the job every 7 days.
Weekly. Runs the Send To job every set number of weeks, on selected days of the week.
Recur every (weeks)*. Defines how often the job runs, in weeks. For example, enter 1 to run the job every week, or enter 2 to run the job every 2 weeks.
Days*. Defines the days of the week when the job runs.
Monthly. Runs the job in selected months, on selected days of the month.
Months*. Defines the months when the job runs.
Days*. Defines the days of the month when the job runs.
Monthly (Days of the week). Runs the job in selected months, during selected weeks of the month, on selected days of the week.
Months*. Defines the months when the job runs.
Weeks*. Defines the weeks of the month when the job runs.
Days*. Defines the days of the week when the job runs.
Start time. Defines the time when the job starts.
Start date. Defines the date when the job starts.
.png)
Summary. Shows all configurations applied to the Send To job. It also shows a confirmation message before the job is created.
Cancel. Cancels the creation of the job.
Save. Saves the new job.
.png)
After applying the configuration, the Send To job is created and it appears in the main view of the Send To panel.