Filtering lets users narrow the data displayed in a Table so they can focus on the information relevant to their analysis.
Filters apply to the data already returned by the Dataset and do not retrieve new data from the source.
This article covers filtering capabilities only. Sorting behavior is documented separately.
How to filter a Table
To filter a Table:
Select the Table icon on the Task pane and click on Filter & Sort.
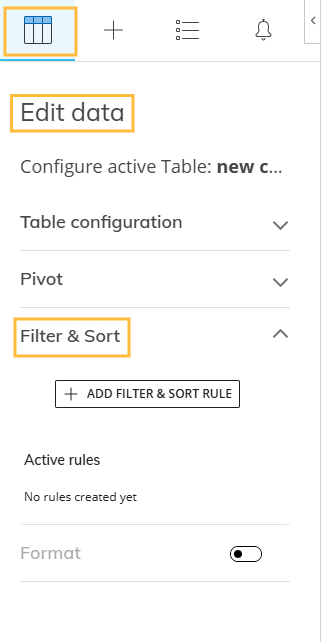
After selecting the feature, the Add Filter & Sort Rule button appears. Select it to add a new filter or sort rule.
Each rule always includes both filtering and sorting options, even when configuring only filtering criteria.
Add one rule to filter by a single item (for example, one Region). Users can add only one Filter & Sort rule per field.
If adding more rules to refine the results (for example, Region and Quarter), each rule must apply to a different field.
If you do not add a sort rule, the Table uses the default order defined for the Entity in the Entity detail panel of the Data Model.
A Filter drop-down menu appears. In this menu, select a field to filter in Choose field.
Users can filter on any field, even if it is not currently used in rows, columns, or values.
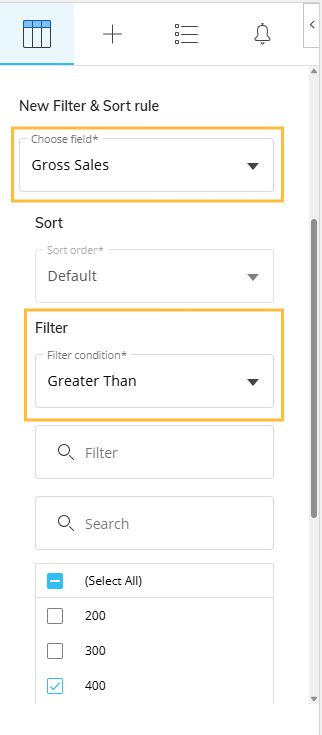
Choose a condition.
The available conditions depend on the data type of the selected field: text or numeric.
For text fields, the following conditions are available:
Contains
Does Not Contain
Equals
Not Equal to
Starts With
Ends With
For numeric fields, the following conditions are available:
Equals
Not Equal to
Greater Than
Greater Than or Equal to
Less Than
Less Than or Equal to
Between
After creating the filter, members update automatically. Select the members you want to include from the list or click on Select All.
Select All applies only to the values currently shown in the list. If another rule narrows the list, Select All selects only the remaining displayed values.
Select ADD to add the rule or DISCARD to discard the rule and return to the Filter & Sort menu.
To change the configuration later, open Filter & Sort again. In the side panel, users can review, edit, delete a rule, or clear all active rules.
When removing a field from Rows, Columns, or Values, any rule defined for that field remains applied and can still be managed in the Task pane. When removing the field from the underlying Dataset, the rule is removed automatically.
About filtering
No rules are applied by default. The Table displays the full Dataset, including any selection defined in the Dataset configuration, which is always applied when creating Tables based on that Dataset.
Rules apply only to the current Table and do not change Board selections or the Dataset definition.
Rules do not affect other Tables.
Filtering is different from Board selections, which affect data retrieval for the entire worksheet.
Supported filter types
The available filter types depend on the data type of the selected field and change accordingly.
Depending on the field, users can apply:
Field filters
Value filters
Date filters
Not all filter types are available for all fields. For example, Date filters cannot be applied to numeric fields.
Filtering behavior is similar to Excel filtering.
Filtering in Excel
After the Table is rendered, users can also apply Excel-native filters.
Excel-native filters:
Operate only on visible data
Do not modify the Dataset definition
Do not affect Board selections or Data Filters.
Excel-native filters operate only in Excel and are not saved as part of the Table definition in Board. When refreshing the Table, Excel-native filters are removed and must be applied again.