The following image shows a full-featured Entity Editor associated with an Entity and its interactive elements:
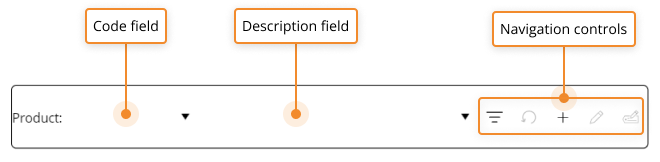
Depending on its configuration, the Entity Editor may offer the following options:
The Code field and the Description field allow you to select existing Entity members. Click on the down-facing arrows to open the list of members codes or the list of members descriptions.
Filter
 . Allows you to make a selection on a parent Entity in order to reduce the amount of members displayed in the Code and the Description fields.
Reset selection
 . Clears the current selection.
Insert new member
 . Allows you to create a new Entity member. See How to create a new Entity member for more details.
Edit existing member
 . Allows you to modify the Relationships and the description of an existing Entity member. See How to edit an existing Entity member for more details.
Edit member's description
 . Allows you to modify the description of an existing Entity member. See How to edit the description of an existing Entity member for more details.
If there are other Objects in the same Screen, the Entity Editor acts as a Pager and filters all data displayed on the Screen as a member is selected or created. Other Objects in the Screen will only show data once a selection on all available Entity Editors has been made. Any custom filter applied using an Entity Editor will be lost if you leave the Screen or update it. New Entity members or changes made to existing ones will be retained.
How to create a new Entity member
To create a new Entity member using the Entity Editor Object:
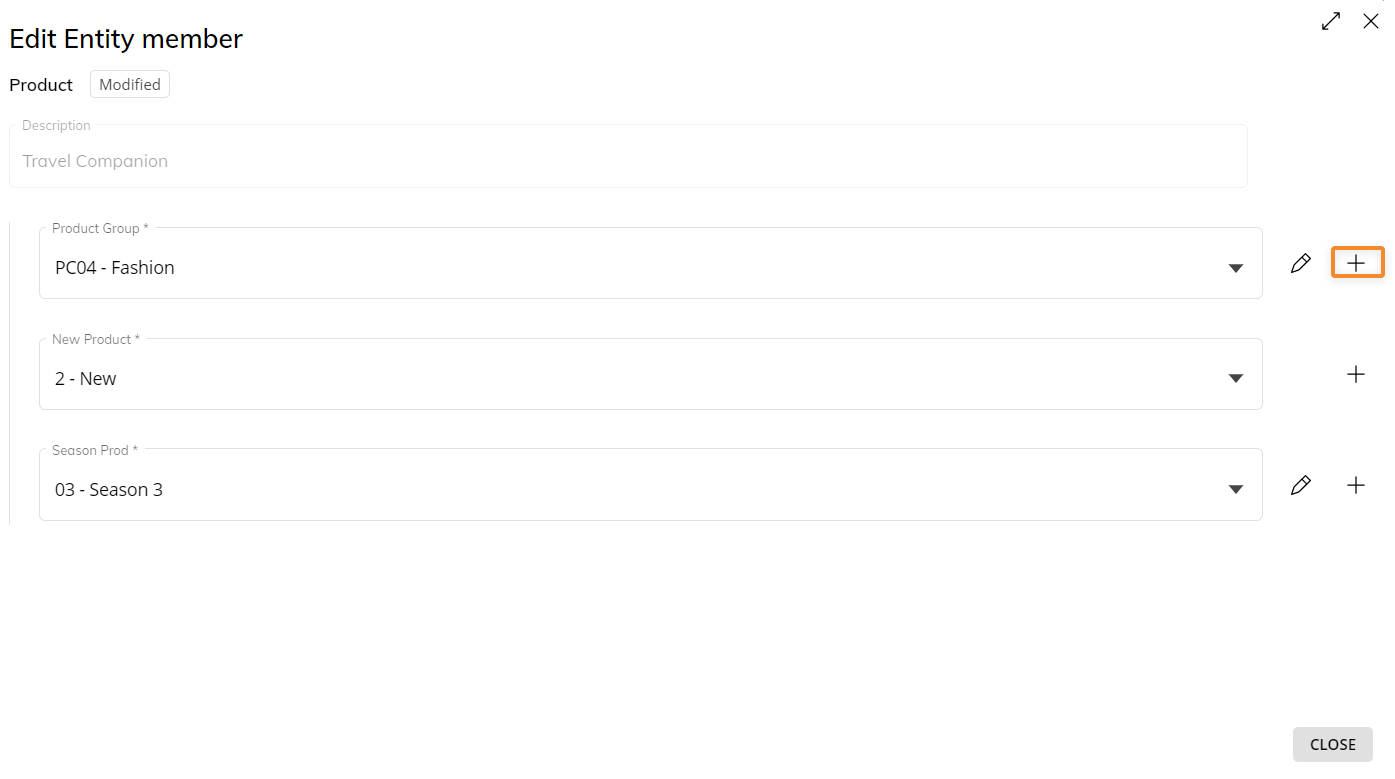
Click on the "Add new member" icon (
 ) to open the member creation window shown below:
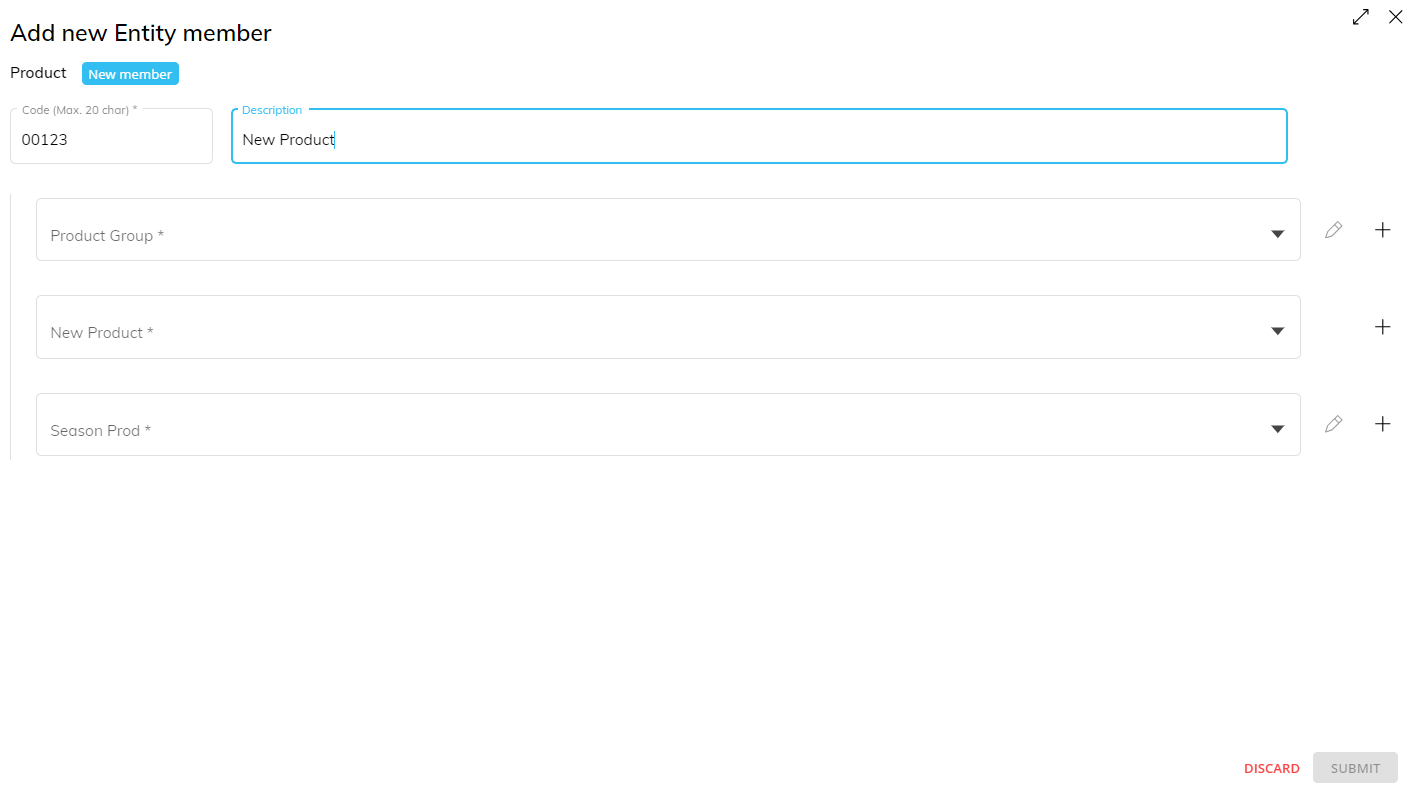
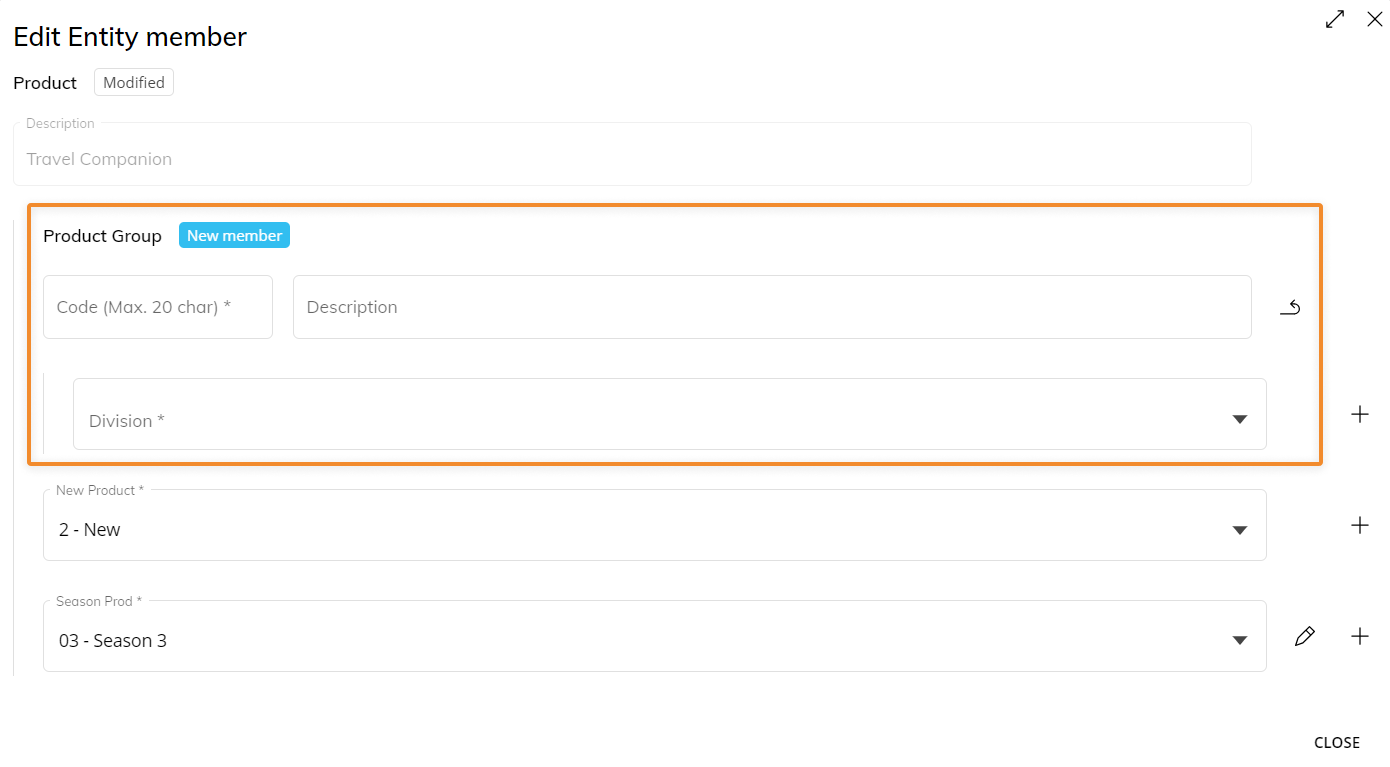
Enter a Code for the new member (if the option is available) and a Description.
Define the Relationships between the new member and its parent Entities from the dropdown menus available.
(Optional) If the option is enabled for parent Entities, from the member creation window you can also create new members at higher levels of the hierarchy using the "+" buttons next to each dropdown menu.
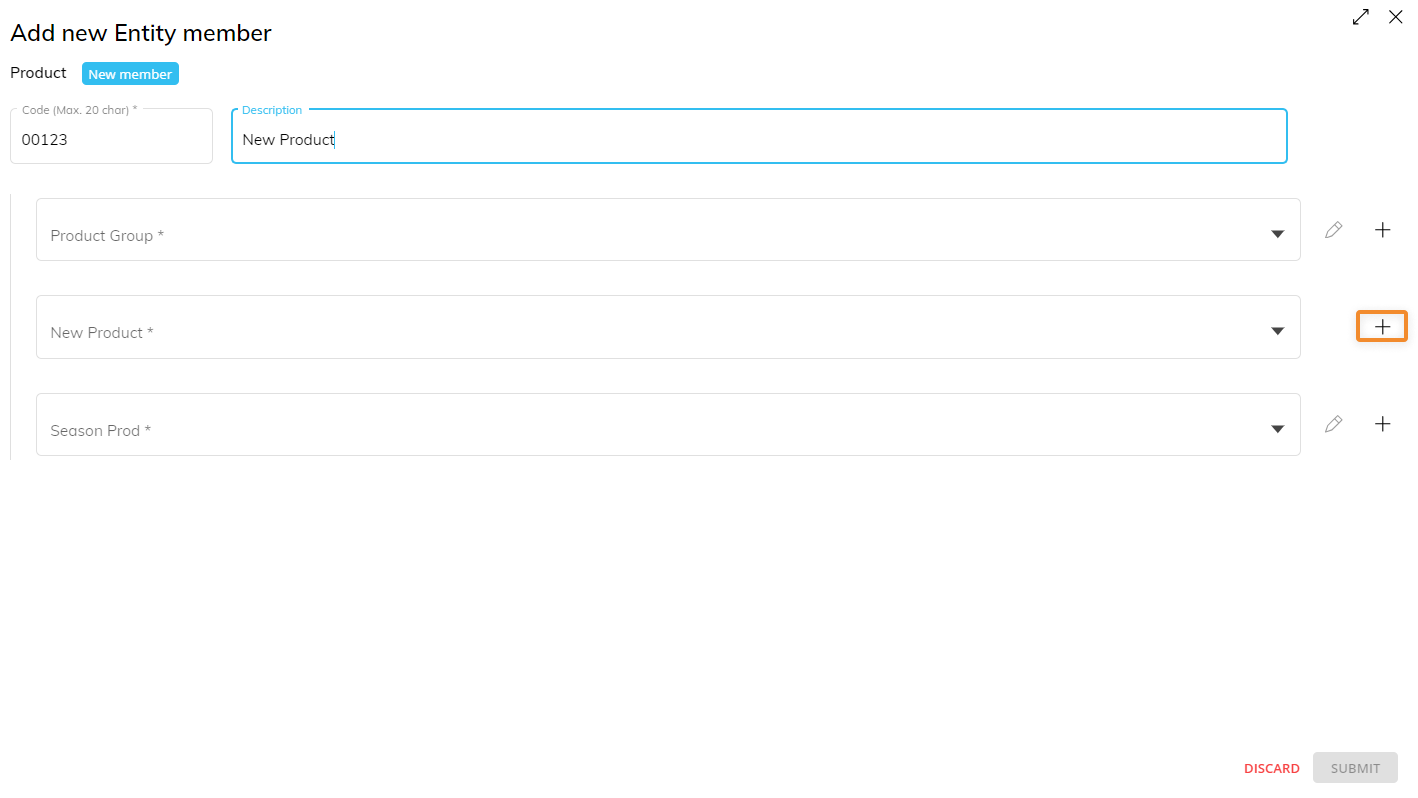
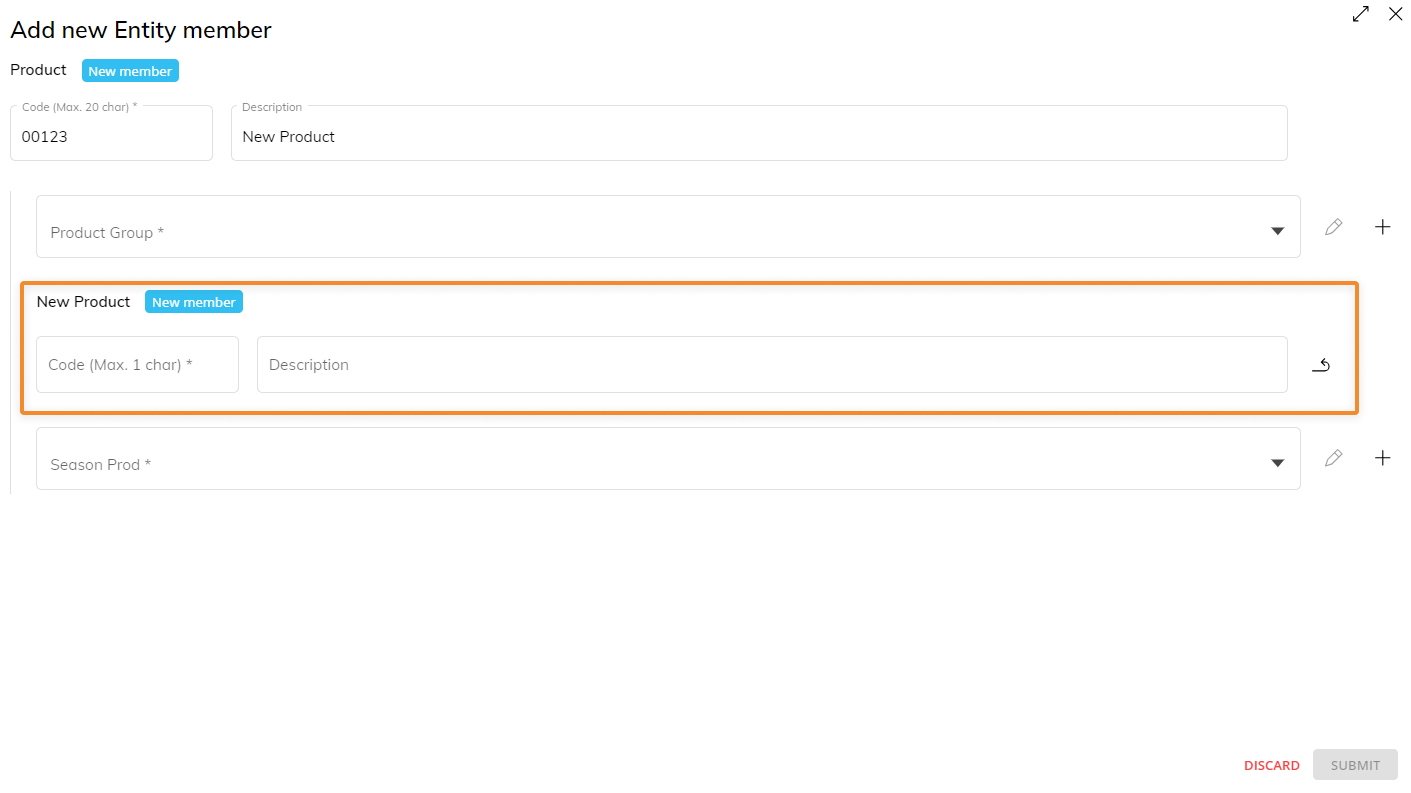
Click on "SUBMIT" to save the new Entity member.
The new member is immediately added to the associated Entity and will appear as selected in the Entity Editor Object.
To see the newly created member in other Objects on the Screen, refresh all Screen Objects using the Refresh option in the Top menu of the Capsule workspace.
How to edit an existing Entity member
To edit a new Entity member using the Entity Editor Object:
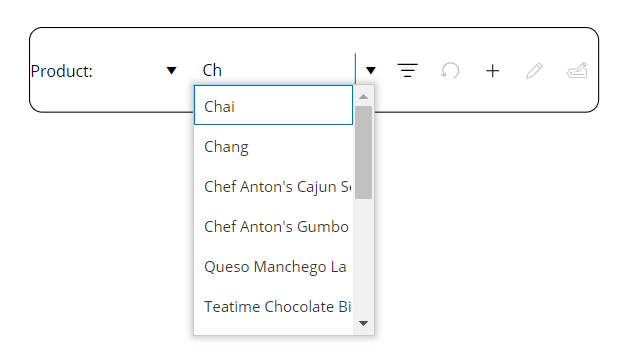
Click on the down-facing arrow next to the Code or the Description fields to open the list of members codes or the list of members descriptions.
Select an existing Entity member.
You can also make a selection by clicking on the Code or the Description field and typing the desired member code or description: search results will automatically appear below as you type, as shown in the following image:
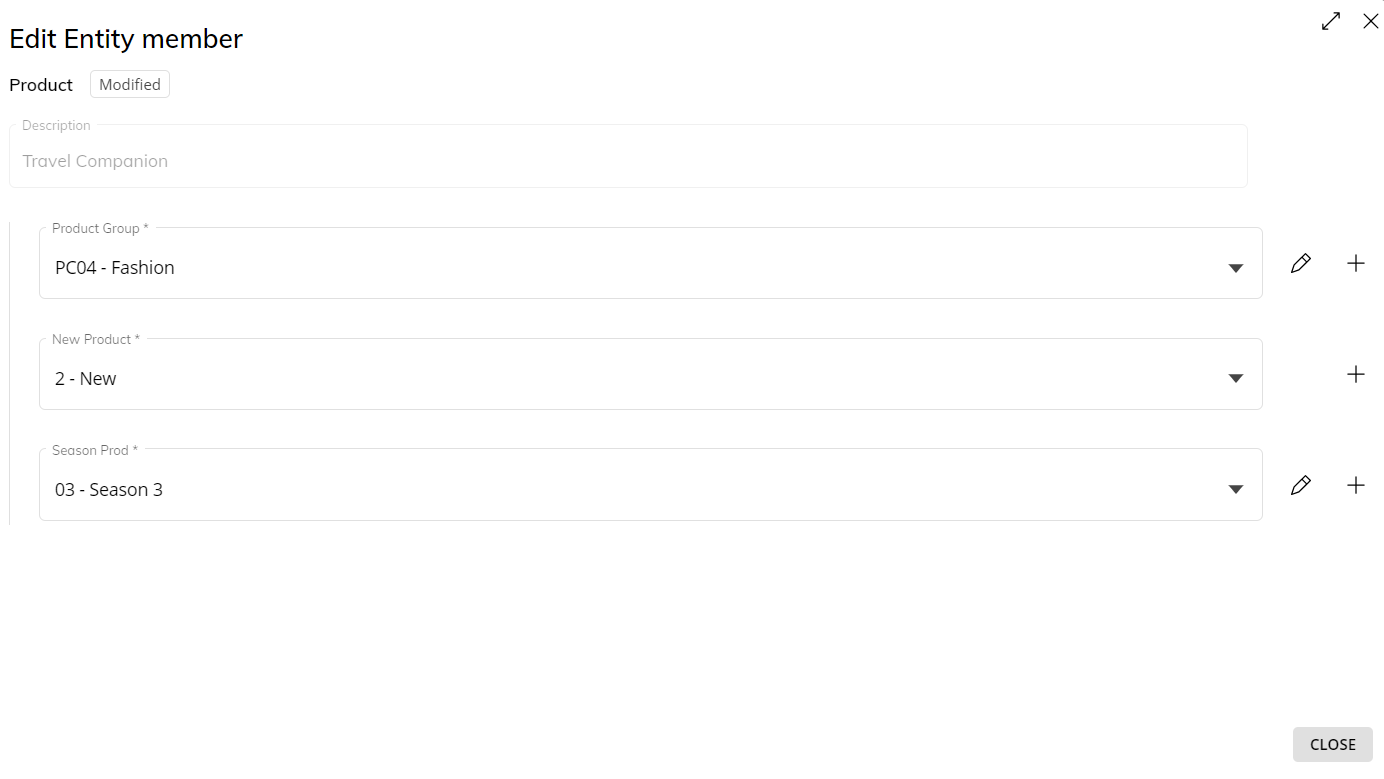
Click on the "Edit existing member" icon (
 ) to open the member editing window shown below.

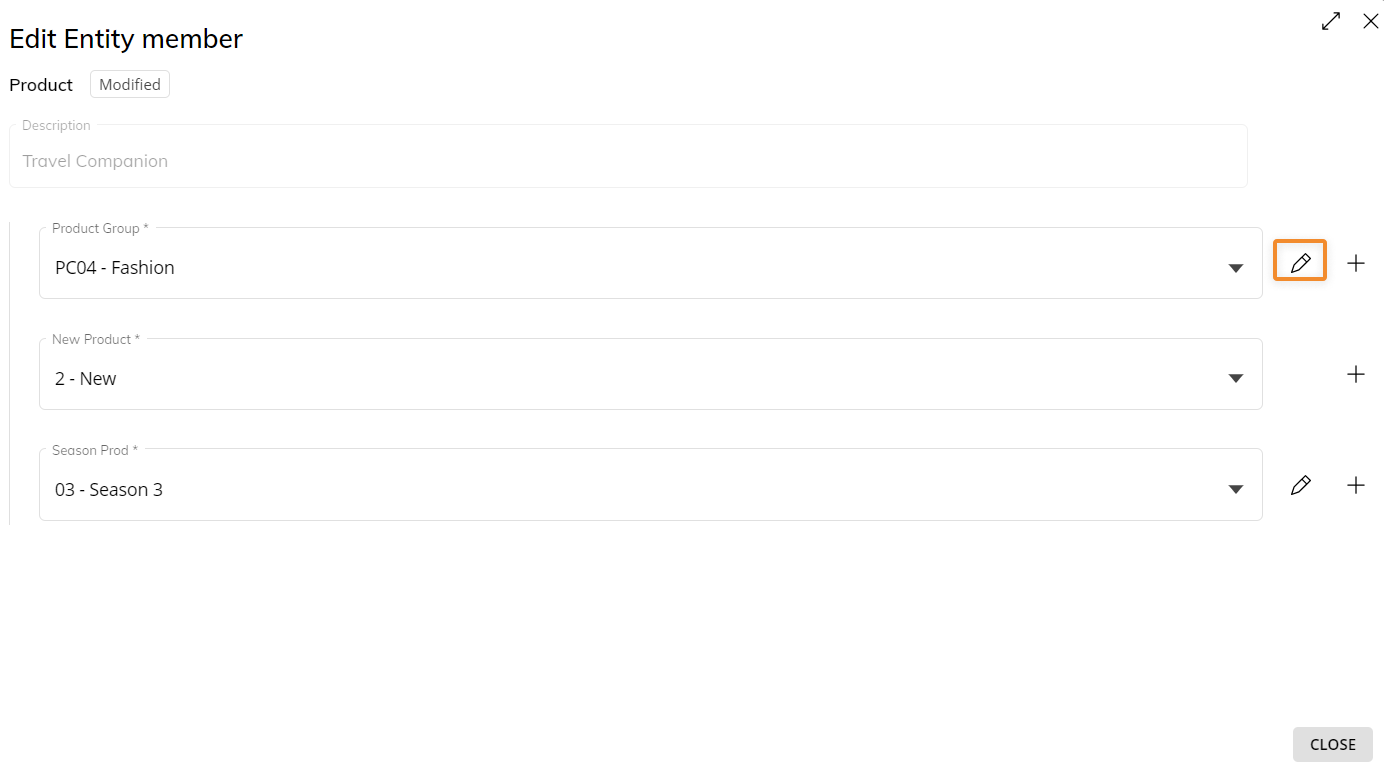
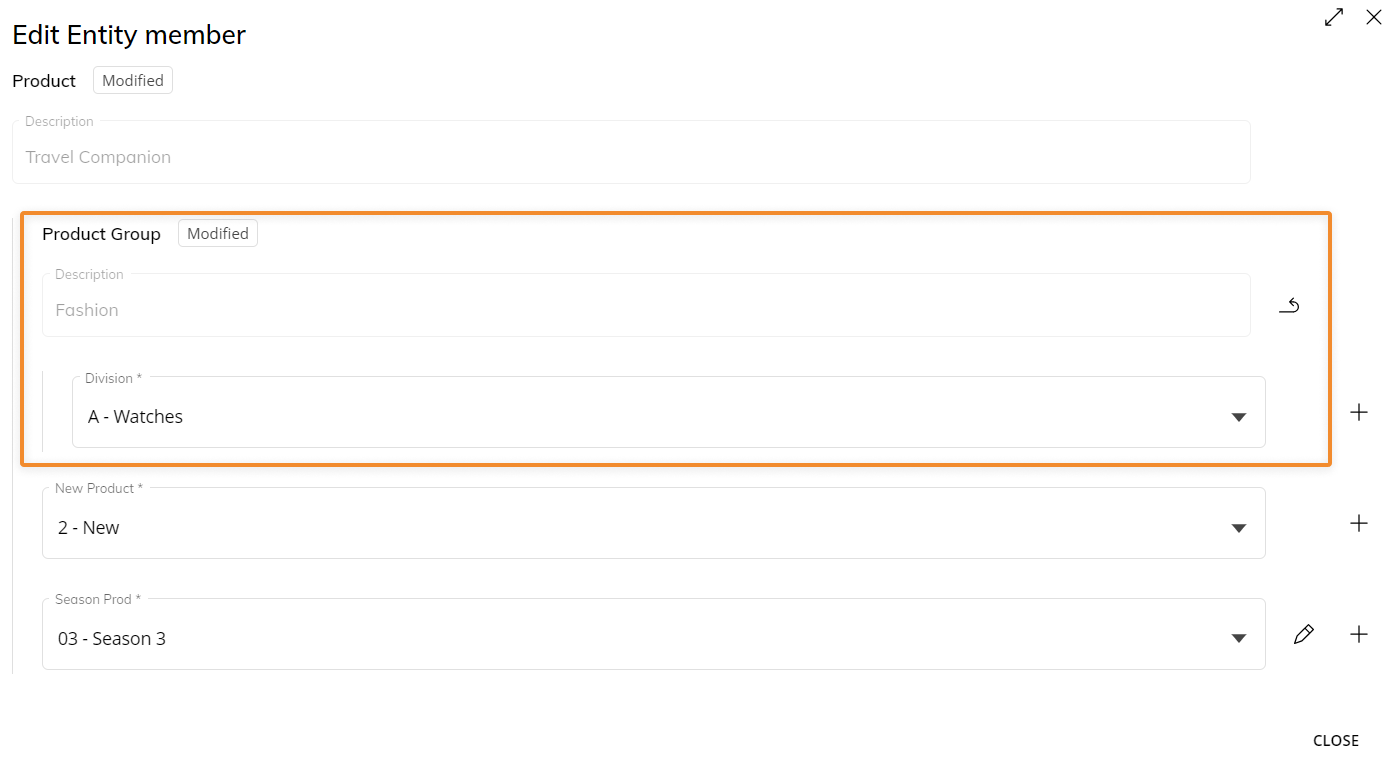
Edit the description and/or the Relationships between the Entity member and its parent Entities as needed by clicking on the pencil icon (
 ).
).
It is not possible to change the code of an existing Entity member.
(Optional) If the option is enabled on parent Entities, you can also create new members at higher levels of the hierarchy using the "+" buttons next to each dropdown menu from the member editing window.
Click "SUBMIT" to save the modified Entity member.
How to edit the description of an existing Entity member.
To edit the description of an existing Entity member using the Entity editor Object:
Click on the down-facing arrow next to the Code or the Description fields to open the list of members codes or the list of members descriptions
Select an existing Entity member.
You can also make a selection by clicking on the Code or the Description field and typing the desired member code or description: search results will automatically appear below as you type, as shown in the following image.

Click on the Edit member's description icon (
 ) to open the description editing window shown below:
Edit the description as needed.
Click on the "UPDATE" button to save the new description.