The Data Management page is the first screen displayed after logging in to Foresight Operational.
It allows users to upload, view, and manage data used for forecasting. It contains two main sections: Upload File and Uploaded Files.

Upload File
Use this section to upload a new file. Drag and drop a file from your local system or click "Browse Files" to select a file.
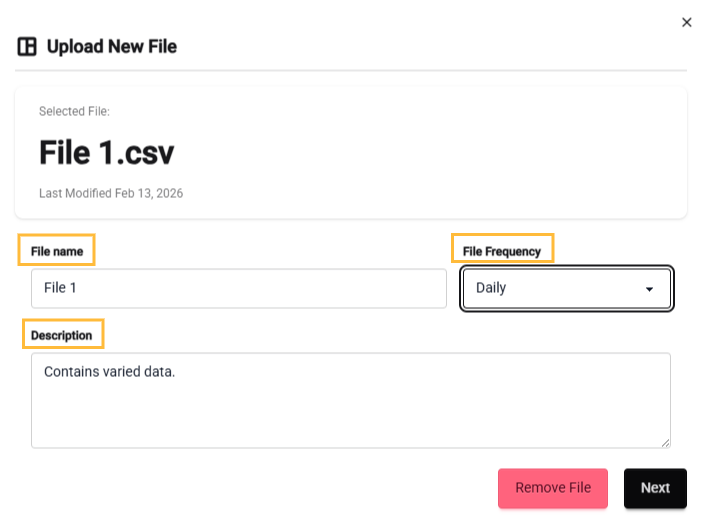
During the upload process, a configuration window opens and displays the file name and last modified date. In this window, define the following:
File name
File frequency
The file frequency must be set to either daily, weekly, or monthly. This setting defines the time granularity of the data contained in the file.
Description
Click "Next" to proceed or "Remove File" to cancel the upload.
After clicking "Next", the Data Preview page opens. This page displays:
Up to the first 25 records in the file
The total number of records
This step allows the user to validate the file content before completing the upload.
Click "Back" to cancel the upload process or "Upload" to confirm and upload the file.
Supported file formats
The following file formats are supported:
CSV
Parquet
TSV
If the user attempts to upload an unsupported file format, an error message appears stating "File type must be CSV, Parquet, or TSV".
Data validation requirements
To be processed for forecasting, the uploaded file must contain the following columns:
A date column representing the time dimension of the data.
A numeric column containing the values used as the forecast target.
At least one hierarchy column (such as Product or Location) used to define the forecasting granularity.
If these requirements are not met, the file cannot be used to run forecasting jobs.
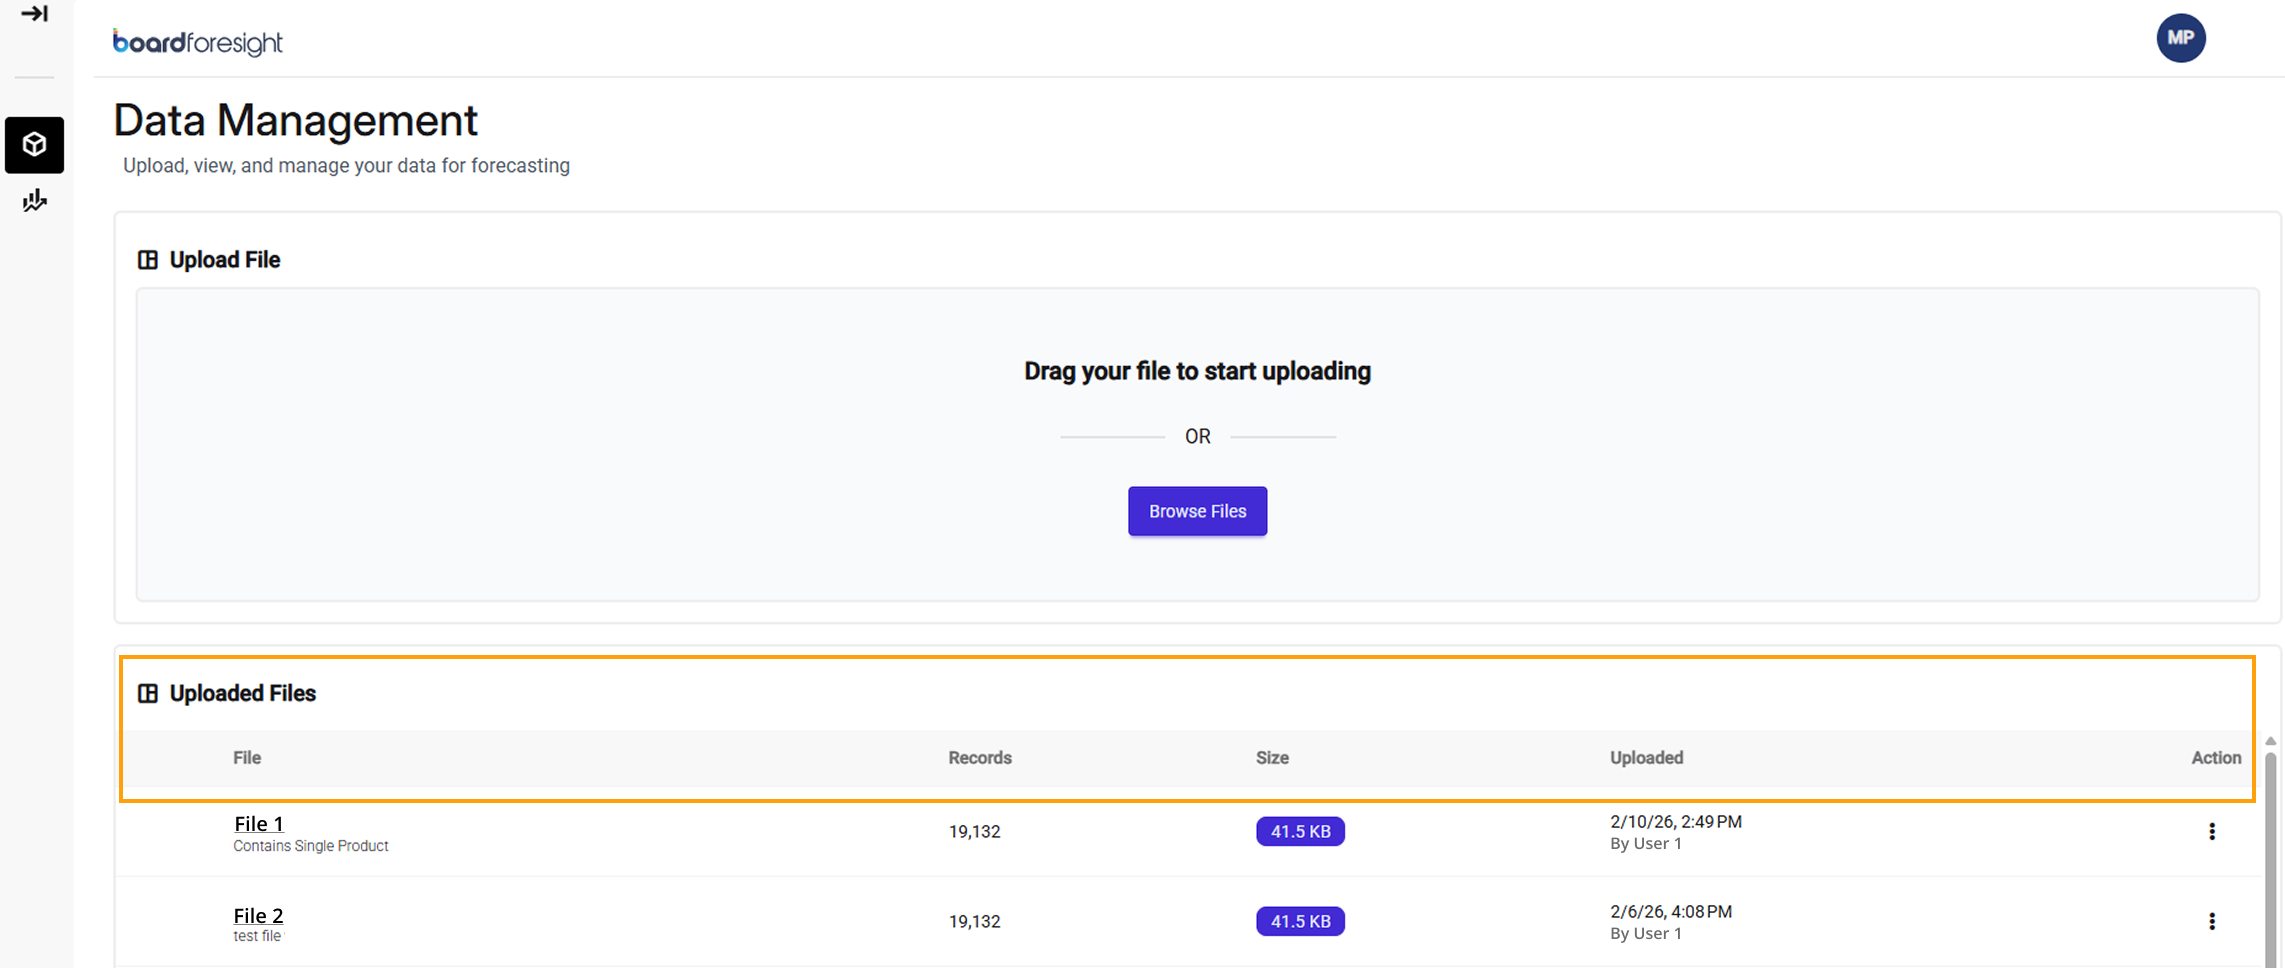
Uploaded Files
This section displays all successfully uploaded files. In this view, users can see:
File. Displays the file name and description.
Records. Displays the total number of rows in each file.
Size. Displays the size of each file.
Uploaded. Displays the user who uploaded each file and the date and time of upload.
Action. Provides the following options:
Rename. Opens a dialog where the user can change the Dataset name and description. Click "Save" to confirm or "Cancel" to discard changes.
Delete. Permanently removes the file.
.png)
See the image below for a complete view of the information available for uploaded files.
Selecting a specific file name opens two sections: View File Contents and Jobs.
View File Contents
This view displays the data contained in the selected file.
.png)
Users can view:
File name and description
File size
Name of who uploaded the file
Creation date and time
Column sorting options. Sort the file data by specific columns, such as date, store, demand, or state. Sorting can be applied in ascending (A–Z) or descending (Z–A) order.
Row display options. Select how many rows display per page. Available options are 10, 25, or 100 rows.
Export CSV. Export the dataset as a CSV file.
Update File. Upload a new file to replace the existing file.
Jobs
This view lists all forecasting jobs created and executed using the selected file.
.png)
Users can view the following information about the file:
File name and description
File size
Who uploaded the file
Creation date
And the following information about each job:
Job name
Status
Forecast target
Forecast horizon. Displays the number of future periods to forecast.
Job creator
Creation and completion dates
Action. When available, the View Results action opens a new tab displaying the job forecast results.
Users can also open this tab from Job Setup → Job Executions by selecting a Job name. See the Job Setup article for more information.
Job Results
Job results are organized by the following options:
Row display options. Select the number of rows displayed per page (25, 100, or 1000).
Calculation method. Select the aggregation method: SUM or AVG.
Displayed items. Select the items to display on the screen.
Frequency (daily, weekly, or monthly).
Additional options include:
Export CSV. Export your forecast results in CSV format.
.png)