This section describes how to get started with Board Foresight. This article covers:
Logging in to Board Foresight
To access Board Foresight, you can either log in directly using Single Sign-On (SSO), or, if you're a Board Developer, launch Foresight directly from within your Board instance.
Single-Sign On
Navigate to https://app.prevedere.com/.
Enter your email address. After clicking Next, you will be redirected to Board to complete the login with your password.
.png)
Click Log In to access the Board Foresight Projects homepage.
.png)
Directly from Board
In a Data Model, navigate to Data Structures and select Economic indicators.

Select Go To Foresight.

After redirection, you'll land on the Board Foresight Projects homepage.
What is a Project?
Once you log in, you’ll automatically land on the Projects homepage, which serves as your central hub for creating and organizing workflows within the Board Foresight application. From this page, you can access the Foresight Discover engine, your workbenches, forecast models, and jobs - all in one place.
The Projects homepage includes features that help you filter, condense, and expand your view to quickly find and manage the projects that best suit your needs. As a project owner, you can also control who has permission to view or edit your project content.
.png) Filter: Enter keywords to narrow down your results and quickly locate the workflows you need.
Filter: Enter keywords to narrow down your results and quickly locate the workflows you need..png) Condense/Expand: Toggle between a simplified or detailed view of your job descriptions to better manage your workspace.
Condense/Expand: Toggle between a simplified or detailed view of your job descriptions to better manage your workspace.
How to Create a Project
Click the New Project icon located in the top-right corner of the Projects homepage.
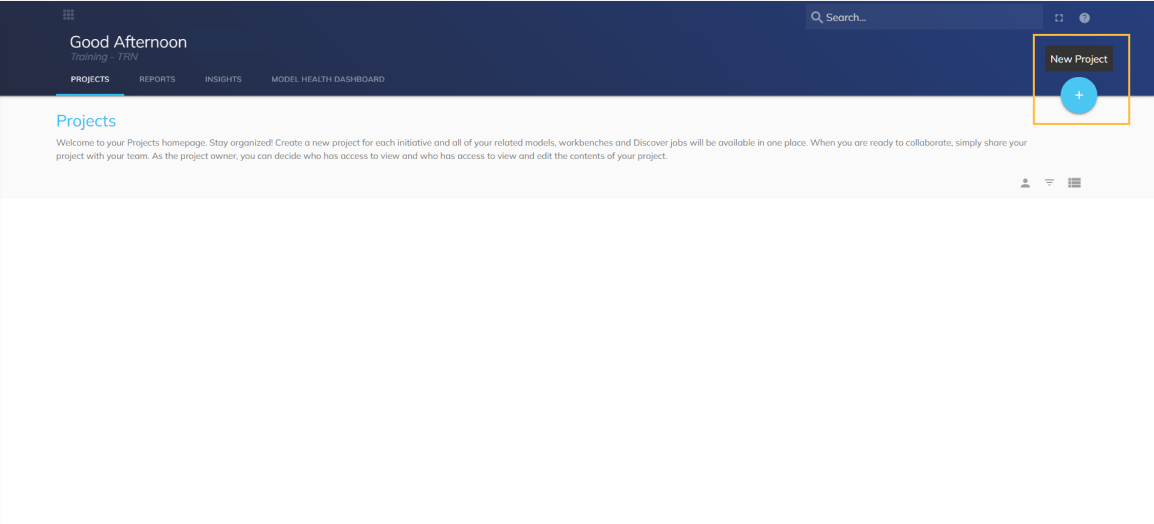
A New Project modal will appear. Enter a Project Name and Description - there are no character limits for either field.
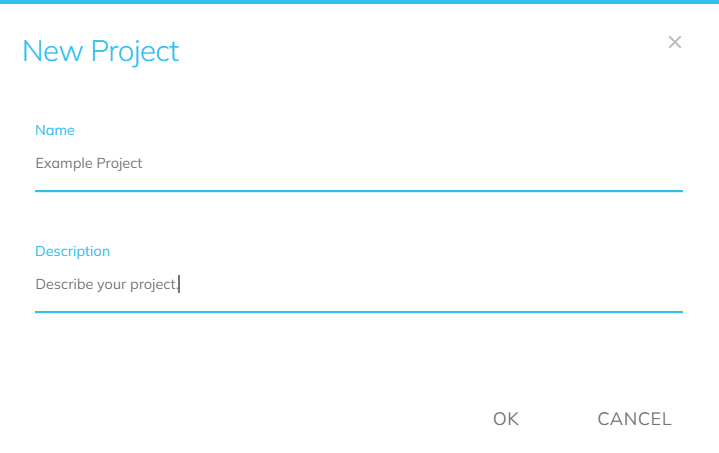
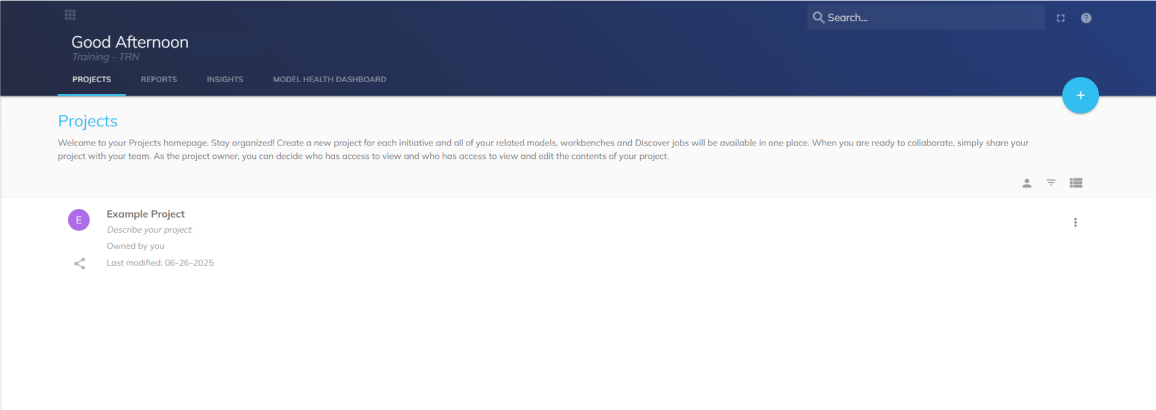
Click OK to create your project. Your project will now be available on the Projects homepage.
How to Sync Board Data in Foresight
As of version 14.4, users can create indicators in Board Foresight directly from existing Datasets (See Datasets). To enable a Dataset for Foresight data exchange, it must be configured with the following components:
Data Blocks: The Dataset must contain at least one numeric Cube. Multiple Cubes are supported. The following data types are compatible with this data exchange: Single, Double, Integer, and Currency.
Axes: A Time Entity is required. Data will be ingested into the Foresight platform at the highest available time frequency. For example, if both Month and Day Time Entities are present, the data will be loaded at the daily level.
How to Import Dataset
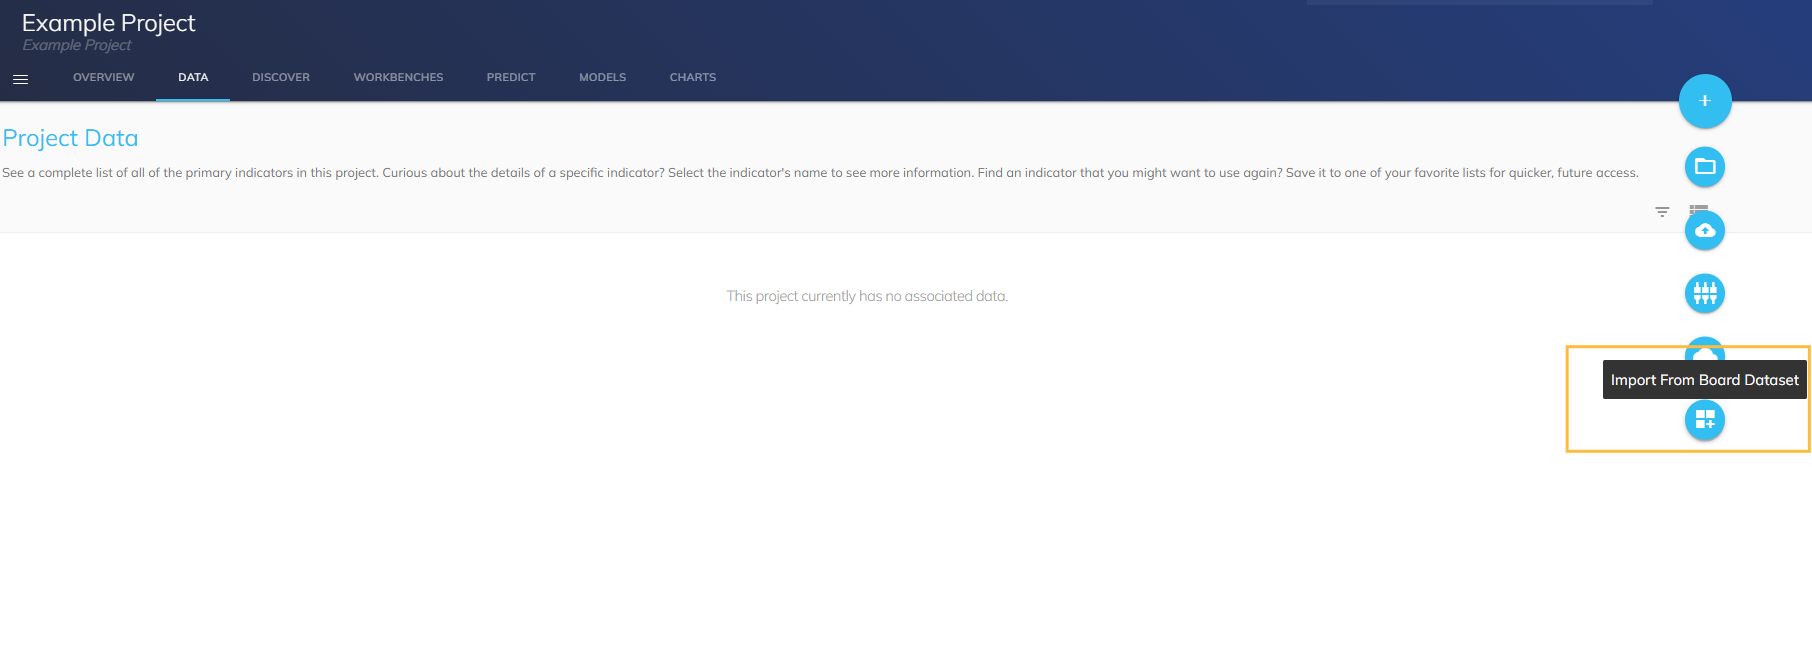
From the Project Data page, a new upload option is available for creating indicators.
Navigate to the Project Data page in Foresight.
Click Import from Board Dataset to begin importing data into your project.
The Select Dataset modal will appear, showing a list of Datasets you have access to. Choose the Dataset you want to import, then click Next to proceed.
.png)
If multiple numeric Cubes are available, an additional dropdown will appear, allowing you to select the desired Cube. In all cases, you must select one option before continuing.
Review the Aggregation Method, then click Confirm. Click the Preview Data button to view a sample of the imported data.
.png)
A preview of your Dataset will appear. You can filter the data using the Applied Filters tool to narrow down the results as needed.
.png)
After applying filters (if needed), click Next to proceed to the Create Indicator screen. Complete the form, then click Create Indicator to finalize the setup.
.png)
Form Properties:
Name: Defaults to the name of the Cube
Description: Defaults to import details, including the Dataset name, date of import, and Cube name
Aggregates: Defaults to the aggregation method selected during import
Units: Defaults to the name of the Cube
Source: Defaults to the name of the Dataset
Your Board Dataset has been successfully uploaded into Foresight.
How to Add Foresight Data to a Board Data Model
Once a forecast has been created or indicators from the Global Intelligence Cloud have been selected, several screens within Foresight will allow you to add that data to a Board Data Model. The available Data Model list will be limited to those you have access to.
Indicator Page
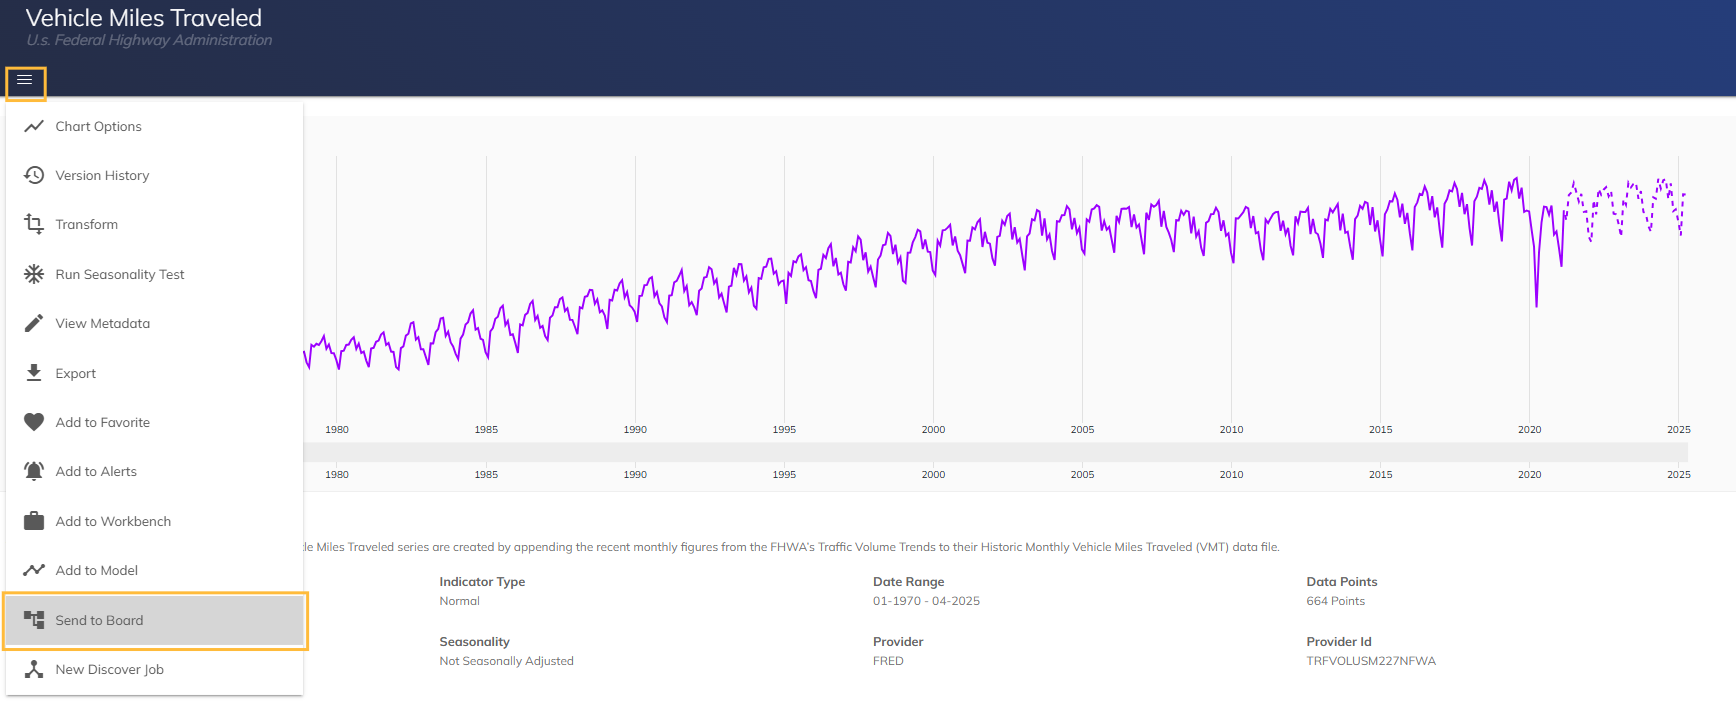
On an indicator page, there is an option in the hamburger menu to send data to a Board Data Model.
Navigate to the indicator page.
Click the hamburger menu and select Send to Board.
A modal will appear displaying the list of available Data Models. Select your desired Data Model, then click OK to proceed.
.png)
A success message will appear in the lower-left corner of the screen, stating: “Indicator sent to Board successfully.”
.png)
A Cube is automatically created in the selected Board Data Model and is now available for use in Capsules and Screens.
.png)
Global Intelligence Cloud / Search
The Global Intelligence Cloud (GIC) provides access to a wide range of global datasets that are collected, cleaned, and regularly updated from various sources. To enhance usability, the data is organized using a tagging system, allowing users to easily identify relevant indicators by business focus, industry, or region.
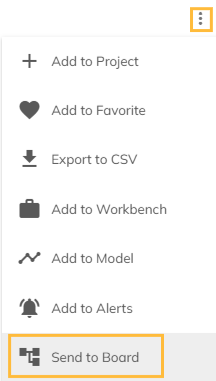
Adding a Single Indicator
Click the kebab menu on your chosen indicator. A list of actions pop up.
Select Send to Board.
A modal will appear displaying the list of available Data Models. Select your desired Data Model, then click OK to proceed.
A success message will appear in the lower-left corner of the screen, stating: “Indicator sent to Board successfully.”
A Cube is automatically created in the selected Board Data Model and is now available for use in Capsules and Screens.
Adding a Multiple Indicators
In the GIC, use the checkboxes to select one or more indicators.
Click on the hamburger menu, and select Send to Board.

A modal will appear displaying the list of available Data Models. Select your desired Data Model, then click OK to proceed.
A success message will appear in the lower-left corner of the screen, stating: “Indicator sent to Board successfully.”
A Cube is automatically created in the selected Board Data Model and is now available for use in Capsules and Screens.
Workbenches
Workbenches allow users to collect, organize, and visualize large volumes of data to analyze the relationship between a primary variable and secondary indicators.
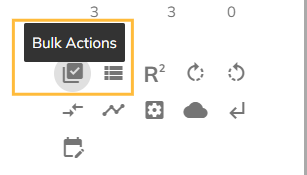
On a Workbench, click Bulk Actions from the toolkit located on the left-hand side.
The Bulk Actions modal will appear. In the left panel, select Send to Board from the list of available actions.
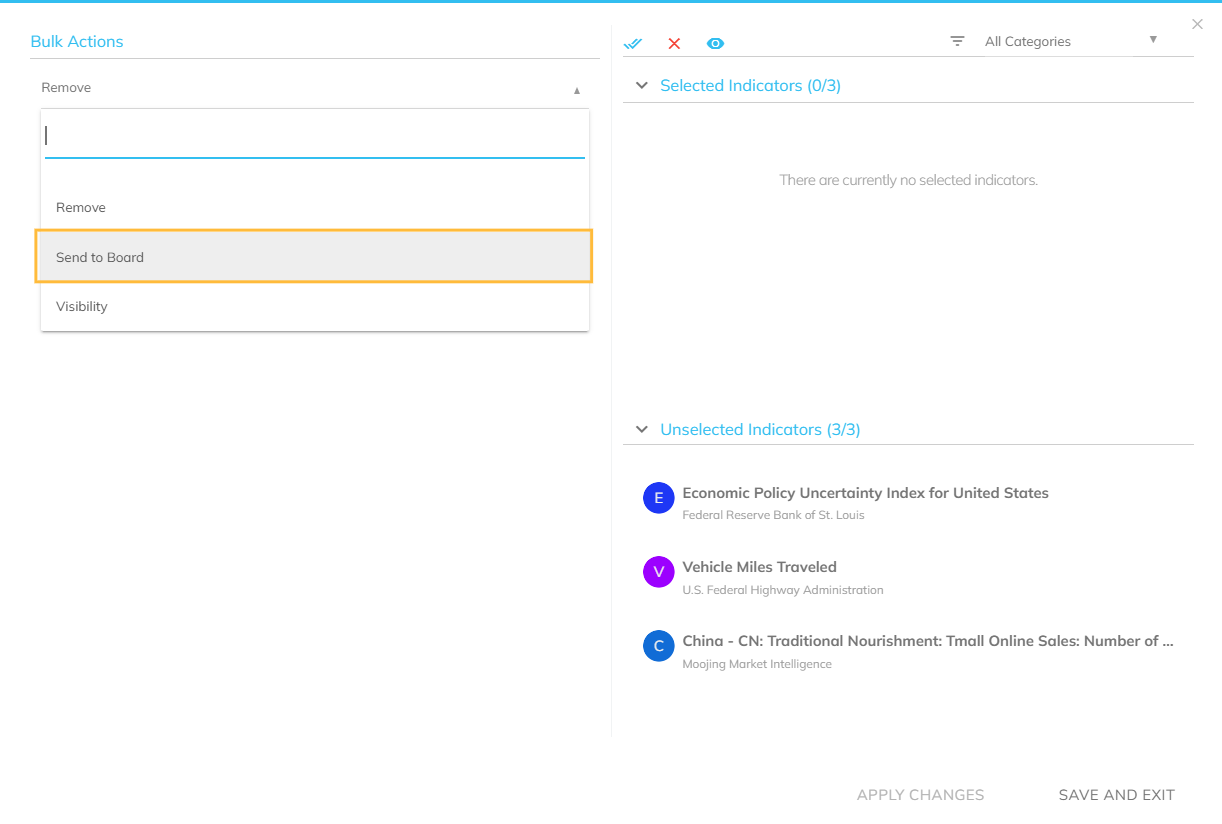
From the second drop-down list, choose a Data Model, then select the indicators you wish to send to Board. Selected indicators will move from the Unselected Indicators section to the Selected Indicators section.
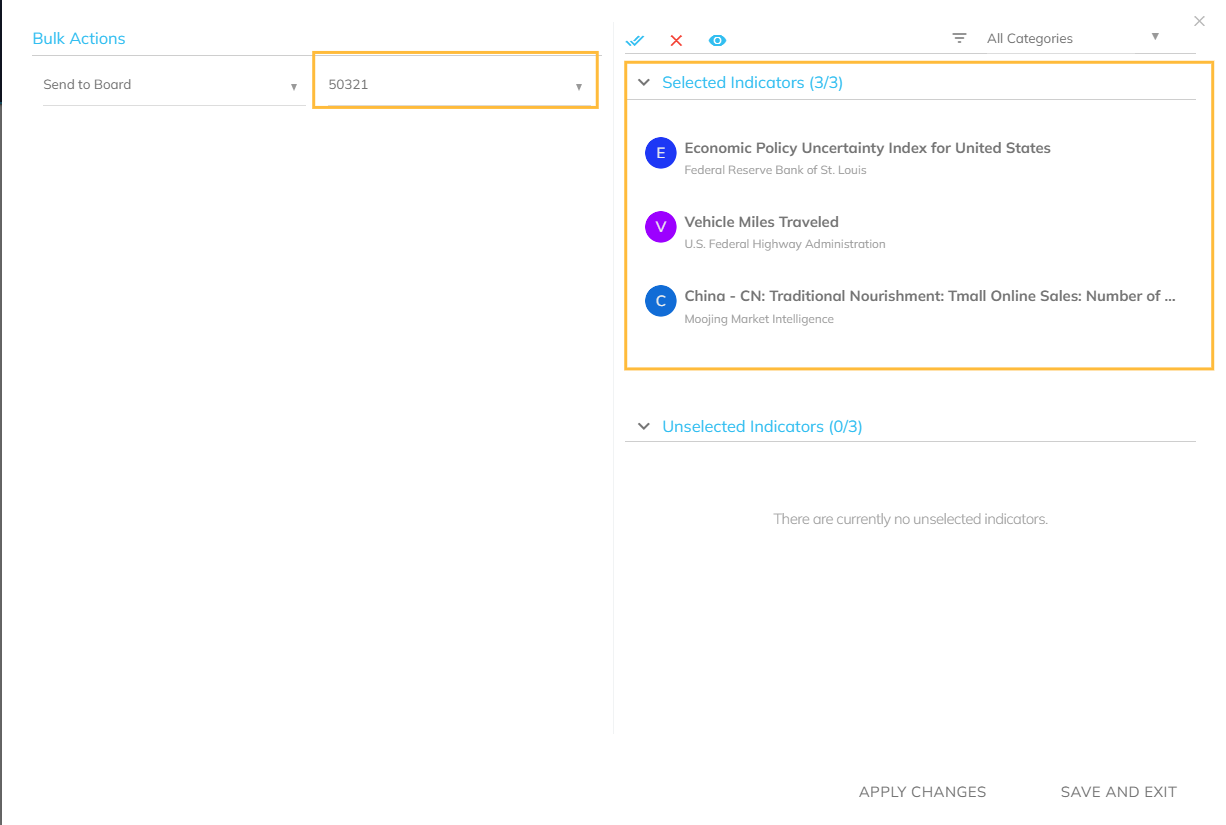
Select either Apply Changes or Save and Exit.
Apply Changes: Use this option to perform the action while keeping the modal open. Selected indicators will be cleared, allowing you to perform additional bulk actions.
Save and Exit: Use this option to complete the action and close the modal.
For both options, a success notification will appear on the bottom left-corner of the screen.
.png)