Board's Chat feature is a Collaboration feature that allows users to have 1-1 chat threads as well as group chats with entire user groups. With the Chat feature, users can collaborate more efficiently by sharing files or by sharing links to specific Screens with custom filters applied.
Enabling the Chat for a user group allows its members to view and chat with only other members of the same group.
The feature has been designed to be consistent across multiple Platforms: this means that your chats and contact list will always be available, regardless of which Board platform you are currently logged into.
You can start chatting from anywhere in Board, at any time. If the recipients are logged out of Board, they will be able to read new messages as soon as they log in again.
By installing Board 14 from Board 12.0 (2021 Spring release) or older, the Chat feature will be updated to the newest version and all previous chat sessions will no longer be available. When you update from Board 12.1 (2021 Summer release) or newer, your chats will be preserved.
The Chat area can be reached by clicking on the Chat icon (  ) in the Top Menu. In the sliding right panel you will see all your existing chat sessions.
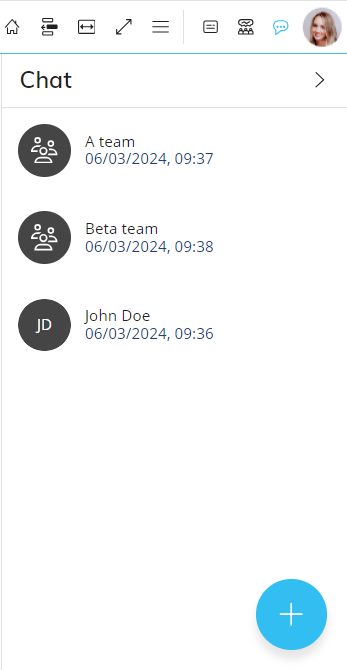
For 1-1 chats, a green badge on the user avatar indicates if that user is currently online.
Click on a chat session to see all sent messages or send a new one. For chat sessions with multiple users, click on the group name at the top to reveal the participant list.
To enable and configure the Chat feature, please refer to the chapter on Collaboration in the Subscription Hub reference manual.
How to start a chat
To start a new chat:
Open the Chat area in the sliding right panel.
Click on the blue "+" icon in the bottom right corner of the panel or the "START NEW CHAT" button if this is your first ever chat. The contact list appears. A tabbed menu on the top of the panel gives you access to:
The User list (default view).
The Group list. This area displays all User groups you can start a chat with. User groups are configured in the Subscription Hub.
Double-click a contact from the list or select a contact from the list and click "START CHATTING".
To start a group chat, select the members you want to invite and enter a name for the group at the bottom. To start a chat session with entire User groups, select one or more from the list. If you select the "All users" group, you cannot select any other group. If you select other User groups, you will need to enter a name for the group chat.
Type your message at the bottom of the Screen, then click on the arrow icon that appears alongside the text box to send it.
Send links to specific Screens with the sender's custom filters applied by clicking on the pin icon.
The recipient(s) will be able to restore the Screen with the same configuration as when it was shared, including:
- Selections
- Custom Layouts configured through the Layout Editor and the Quick Layout
- Drill configurations
- Pager synchronizations.
To send a file attachment, click on the paperclip icon.
File attachment guidelines:
- File size: max 1000 KB
- Supported formats: .jpg, .jpeg, .png, .gif, .doc, .rtf, .docx, .pdf, .pptx, .ppt, .txt, .xlsx, .xls, .csv, .zip, .odt, .ods, .odp
Shared links to Screens respect the user's authorization settings: if the user can't access a resource, an authorization error message is displayed on click.