This topic describes the Data Model snapshot section, how to create a Data Model snapshot, and its other features.
The Data Model snapshot page allows you to create and manage snapshots of desired Data Models. A Data Model snapshot captures the current state of a Data Model's structure (i.e. metadata). Snapshots can then be used to create a Data Model package in order to transport the structure of a Data Model to another one, either on the same Platform or on a different Platform.
To access the Data Model snapshot section, access the System Administration area of the desired Platform and click on the Data Model snapshot tile. You will be taken to the Data Model snapshot page.
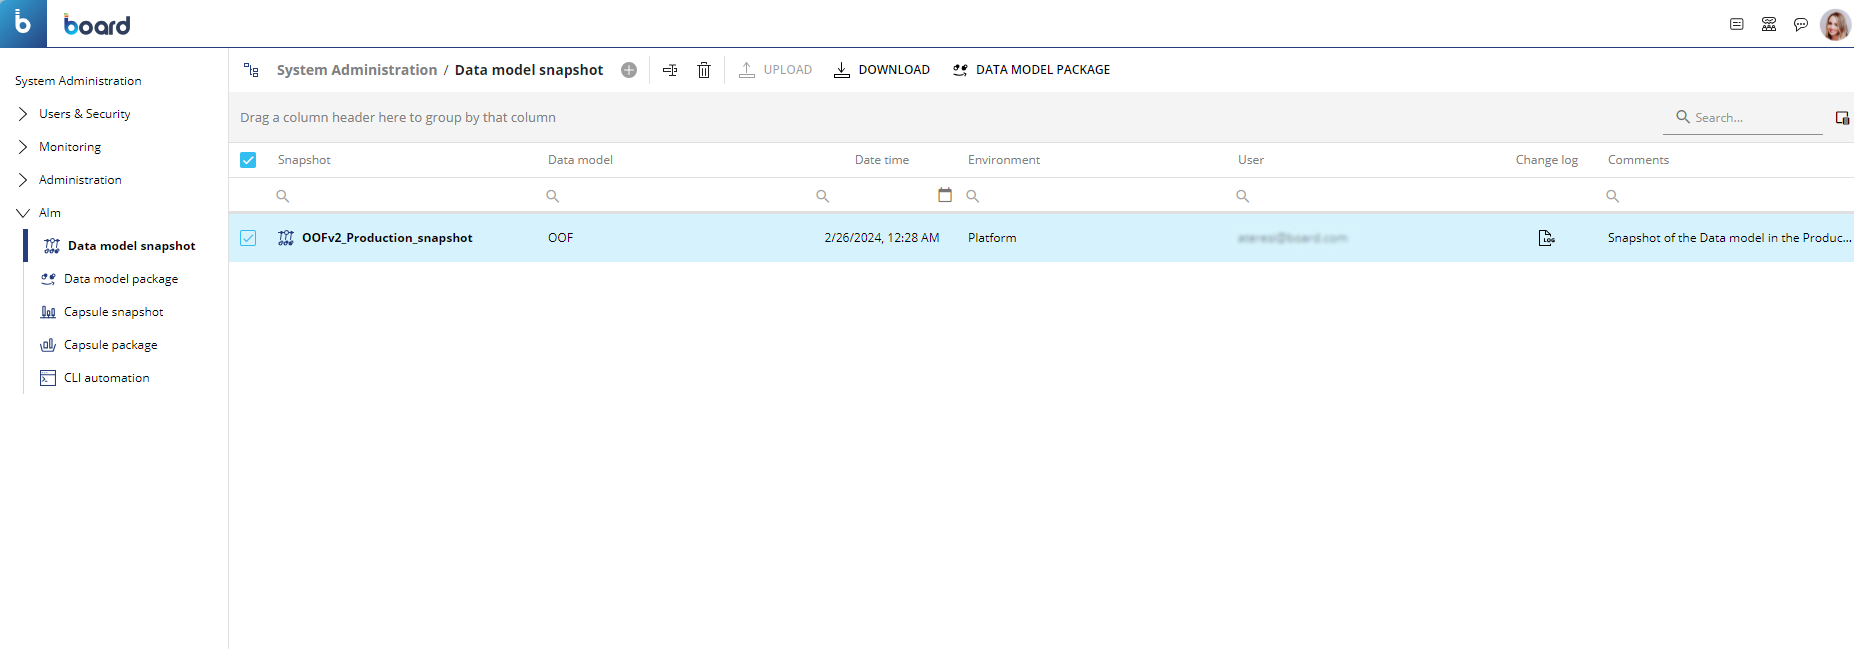
On the Data Model snapshot page, you can see all existing snapshots and their main information; the table is sortable and searchable using the interactive header fields. You can also show or hide columns to your liking, by clicking the Column chooser button in the upper right corner of the table.
The table contains the following information:
Snapshot. This column displays the name of each Data Model snapshot.
Data model. This column displays the name of the Data Model of which each snapshot was created.
Date time. This column displays the date and time each Data Model snapshot was created, in the following format: DD/MM/YY, HH:MM (i.e. 07/06/2023, 10:00).
Environment. This column displays the name of the environment where each Data Model snapshot was created (i.e. "Production" or "Development" etc.).
User. This column displays the Account name of the user that created each Data Model snapshot.
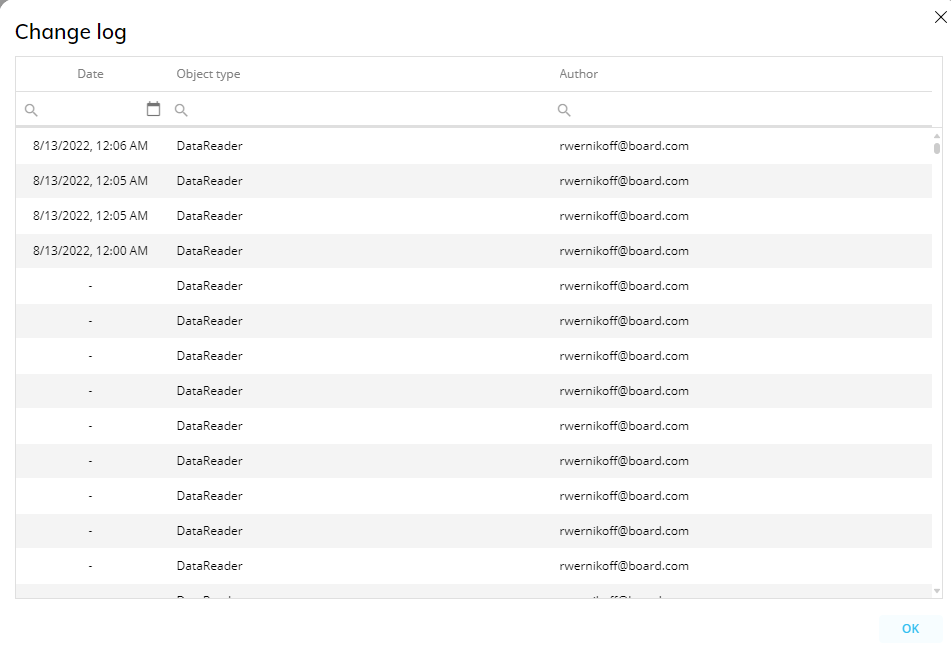
Change log. This column displays an icon that you can click to check all changes that have been made to a Data Model up to the time each Data Model snapshot was created. Click on the icon of the desired Data Model snapshot to open its "Change log" popup window which displays the following information about changes made to the Data Model:
Date. This column displays the date and time of each change that was made to the Data Model, in the following format: DD/MM/YY, HH:MM (i.e. 07/06/2023, 10:00).
Object type. This column displays the type of Data Model element that was modified in each change.
Author. This column displays the Account name of the user that made each change.
Comments. This column displays additional comments about each Data Model snapshot. You can click on the desired column cell to edit a comment.
Creating a Data Model snapshot
To create a Data Model snapshot, proceed as follows:
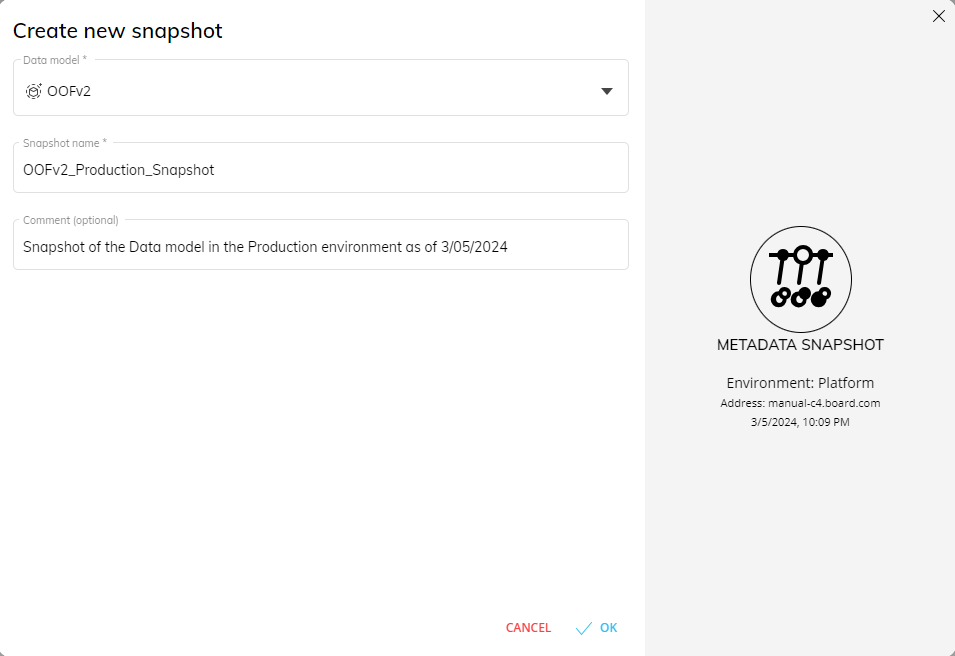
From the Data Model snapshot section of the desired Platform, click on the blue plus button (
 ) next to "Data model snapshot" to open the "Create new snapshot" configuration popup window.
From the "Data model" dropdown list, choose the Data Model in which you want to create a snapshot.
Enter the name of the Data Model snapshot in the "Snapshot name" field.
Enter your desired note or comments in the "Comment" field, if needed.
Click "OK" to save the snapshot.
The newly created snapshot only captures the structure (i.e. metadata) of a Data Model and not the actual data contained inside. For example, a snapshot includes Cubes and Entities, but excludes the values contained in Cubes and members contained in Entities.
If you are transporting the Data Model from a Development environment to a Production environment, it is highly recommended not to perform any modifications to the target Data Model in the Production environment after its snapshot has been created in order to avoid any inconsistencies between the snapshot of the target Data Model and the existing Data Model in the Production environment.
It is highly recommended to always have a "master" development snapshot during and after the deployment of a Board solution, that is used as a single source of truth.
Managing a Data Model snapshot
The Data Model snapshot page allows you to perform the following management tasks on existing Data Model snapshots:
Rename a Data Model snapshot
Remove a Data Model snapshot
Upload a Data Model snapshot to the Platform you are working on
Download a Data Model snapshot to your local machine
Create a Transporter package
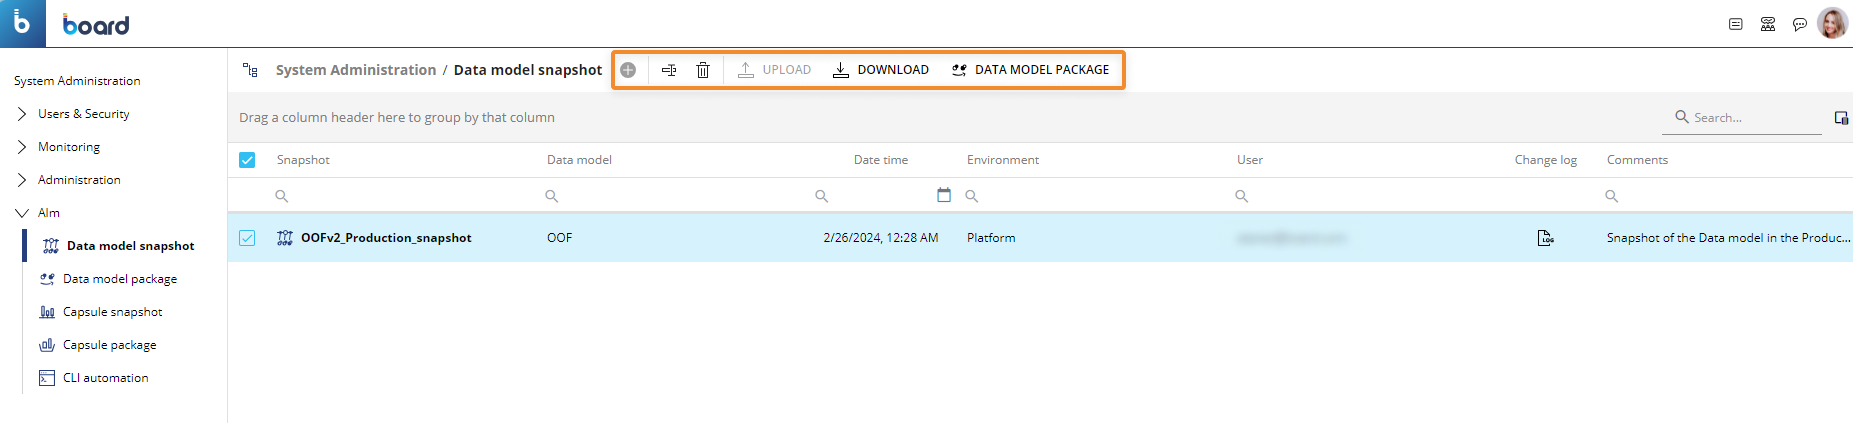
To rename a Data Model snapshot, select the desired one and click on the rename icon (  ). A popup window will appear where you can change the name and click "OK" to save the new name.
To delete one or more Data Model snapshots, select one or more and click on the trash icon. A popup window will ask you if you want to continue; click "YES" to confirm the deletion.
To upload Data Model snapshots, click on the "UPLOAD" button and choose the .trsp file containing the desired snapshots.
To download Data Model snapshots, select the one or more and then click on the "DOWNLOAD" button. A .trsp file containing the selected snapshots will be downloaded to your local machine.
To create a Data Model transporter package, select at least one snapshot and click on "DATA MODEL PACKAGE" to bring up the Data Model package configuration panel. See the Data Model package page for more information.