This article explains how to copy, paste, delete, and edit Tables in the Board M365 Excel Add-in. It clarifies the differences between Board-specific actions and standard Excel operations, helping ensure that Table configurations are managed correctly.
The Board Excel Add-in provides dedicated interface controls that allows users to copy, paste, edit, and delete Tables while preserving their full Board configuration. These actions retain the Table definition, including its connection to the underlying Data Source, Layout structure, and execution logic.
Copy and paste a Table
Copy a Table
To copy a Table, use one of the following methods:
Use the dedicated Copy Table action available in the Board ribbon, within Table Options.

Right-click anywhere in the Table and select Copy Board table in the right-click context menu.
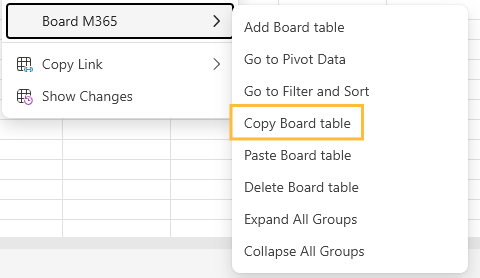
After copying the Table, a confirmation message appears: “Table copied successfully”.
Paste a Table
To paste the Table to a new location on the worksheet, select the target cell and use one of the following methods:
Click Paste Table in the Board ribbon.

Right-click the Table and select Paste Board table.
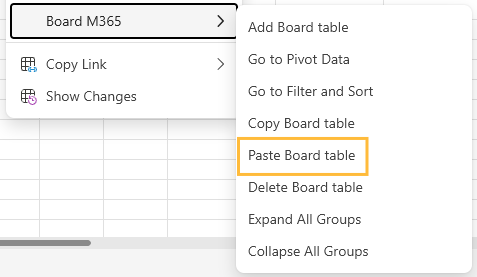
After pasting the Table, a confirmation message appears: “Table pasted successfully”.
Both methods provide the same behavior and duplicate the entire Table definition. This includes the Layout configuration (Entities, Axes, and Blocks), the connection to the underlying Dataset, and any associated execution logic. The copied Table remains connected to the Data Source and can be modified independently after it is created.
Standard Excel commands such as Ctrl+C and Ctrl+V are not supported with Boar Tables. They do not preserve Board Layouts, Table definitions, or metadata. As a result, these actions produce a static snapshot of the displayed data rather than a functional Board Table.
Copying and pasting Board Tables between different workbooks is not yet supported. When pasting a Table, ensure that sufficient empty space is available in the worksheet; otherwise, an error message displays telling you the range needed to paste. Read about Overlapping Tables for more information.
Delete a Table
To delete a Table, use one of the following methods:
Select a cell within the Table and use the dedicated Delete Table control available in the Board ribbon, within Table Options.

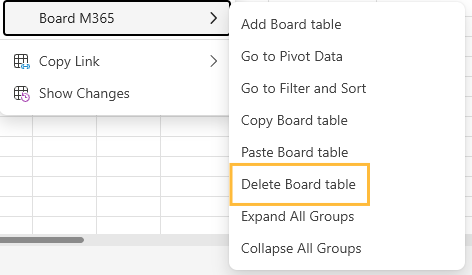
Select a cell within the Table and right-click the Table and select Delete Board table.
Use the delete icon for the appropriate Table in the All Tables view of the Task pane. Read how to view, navigate, and delete Tables from the Task pane.
The following warning message appears. Click Yes, delete to confirm the deletion or Cancel to return to the worksheet.
.png)
All methods ensure that the Table definition and all related Board metadata are removed correctly. After deletion, the Table is permanently removed from the workbook and can no longer be refreshed or edited unless it is recreated.
If you use standard Excel delete or clear commands, only the visible cell values may be removed. Board-specific configuration and metadata might not be fully cleared, which can lead to inconsistent behavior. For this reason, it is recommended to always use the Board controls when deleting a Table.
Edit a Table
Users can edit a Board Table to modify its configuration and update how data is retrieved and displayed.
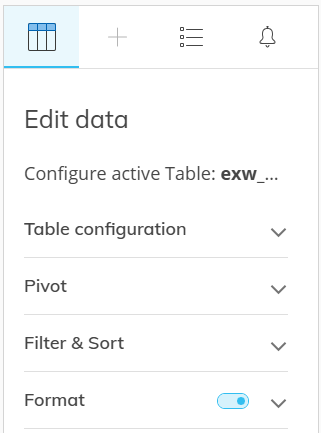
To edit a Table, select any cell within the Table. When a Table cell is selected, the Edit data pane opens automatically in the Task pane. This tab allows users to review and modify the Table definition, including:
Table configuration. Edit the Data Source.
Pivot. Edit the way data is displayed by reconfiguring the data.
Filter & Sort. Edit the filter and sort rules.
Format. Edit the Table formatting.
Changes made in the Edit data pane update the Table definition stored in the workbook. After re-executing the Table, the updated configuration is applied and the Table view and/or data, depending on the type of edit, is refreshed accordingly.