This article explains the features that help Administrators manage collaboration and access in the Presentations area of System Administration.
Top menu bar
The top menu bar in the Presentations grid includes the following options:
Delete. Deletes the selected Presentation. This action is also available from the context menu in the Presentations grid and when hovering over a Presentation’s name.
.png)
Rename. Renames the selected Presentation. This action is also available from the context menu in the Presentations grid.
Open. Opens the selected Presentation. This action is also available from the context menu in the Presentations grid.
Slide list. Opens a list of all Slides in the selected Presentation.
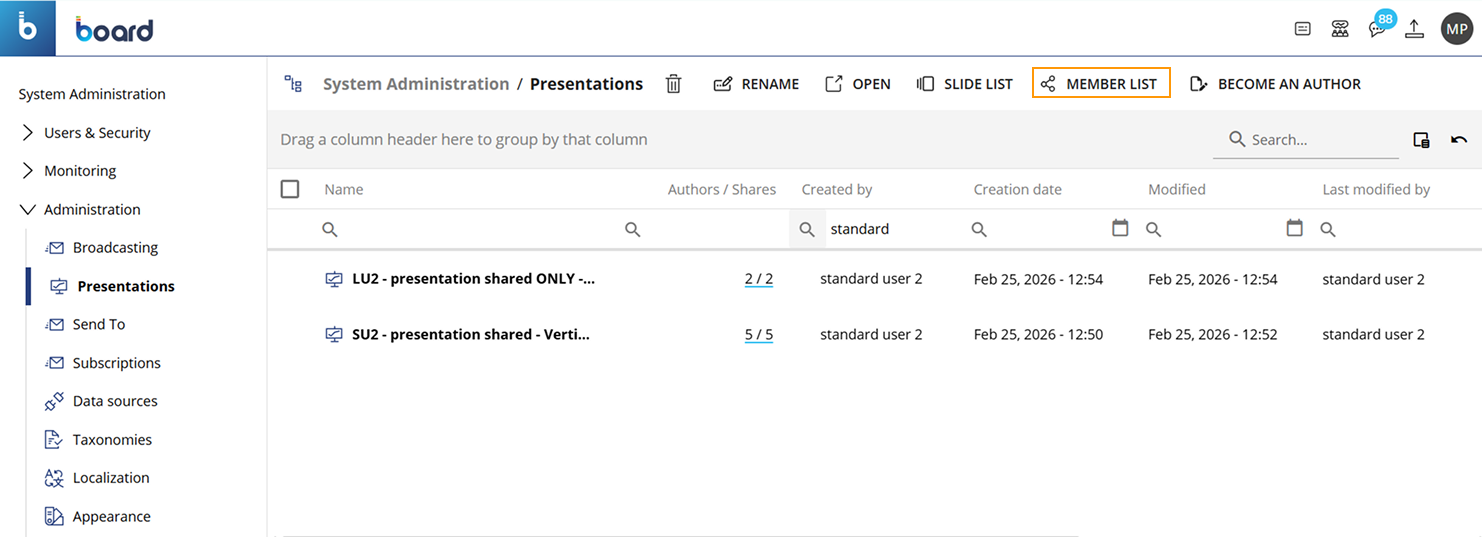
Member list. Opens the list of all users associated with the selected Presentation. The list includes details such as each user’s last access date and last edit date. The list also shows whether a user is an author of the Presentation. A context menu is available in the Member list grid, providing quick access to actions such as Email, Chat, and Add/Remove author’s access.
The Member list option shares some behaviors with standard table grids, which allow users to reorder columns and perform searches.
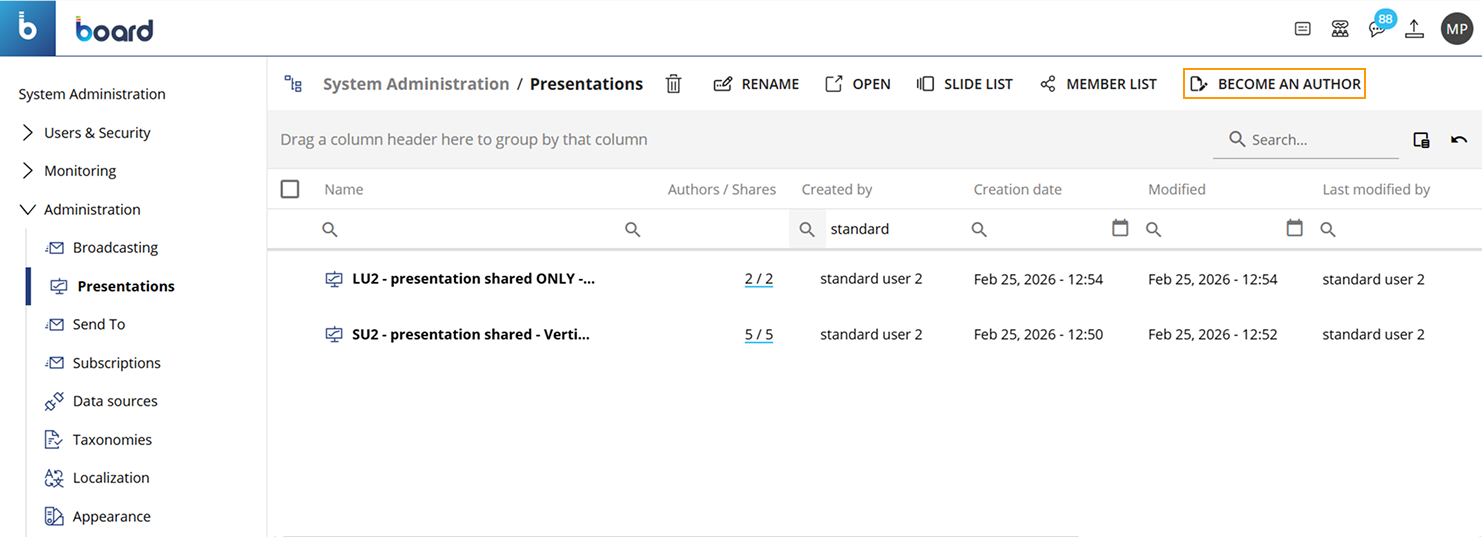
Become an author. Gives the Administrator author permissions for the selected Presentation. This action is also available from the context menu in the Presentations grid.
.png)
The Presentations grid and the Member list grid include context menus. These context menus provide access to the same main actions that are available from the toolbar. The following images show the context menus available in the Presentations grid and the Member list grid.
.png)
.png)
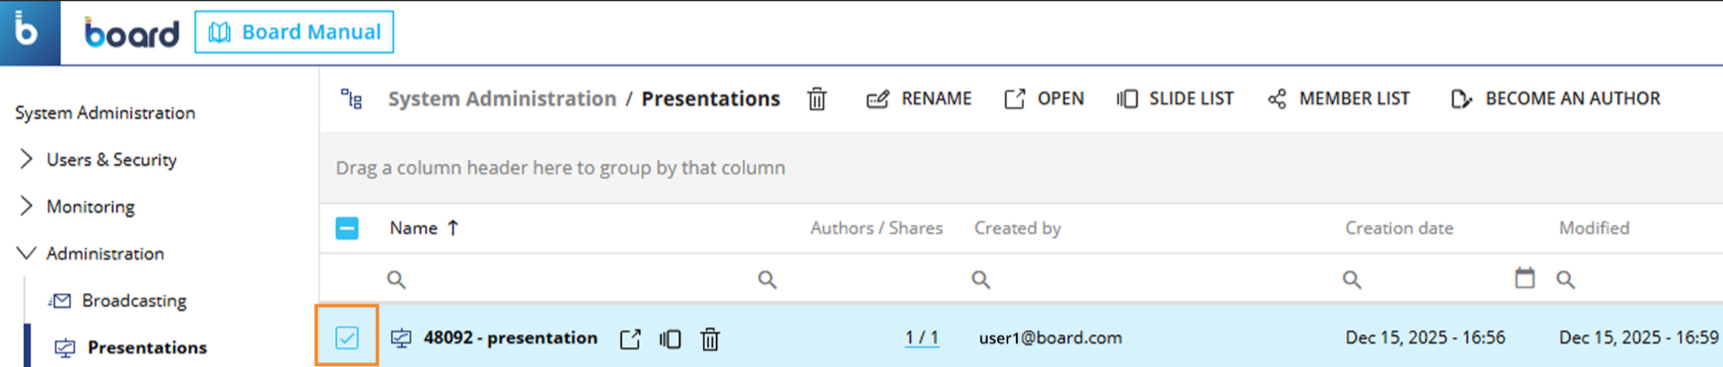
The Presentations grid also shows the total number of Presentations and the number of selected Presentations. This behavior is consistent with other grids in Board, such as the grids in the Send To and Subscriptions features.
.png)
Slide list
The Slide list shows the Slides in the selected Presentation.
A user cannot view the Slides if they do not have view or edit access to the Presentation. For more information about Slides, see Create a Slide.
How to open the Slide list
You can open the Slide list in one of these ways:
Select "Slide list" in the top menu bar of the Presentations grid.
Hover over a Presentation name, then select the "Slide list" icon
.png) .
..png)
Right-click the selected Presentation, then select "Slide list" from the context menu.
.png)
The Slide list opens in a modal window. The modal window shows information about each Slide, such as the associated custom Object or custom filter, the Slide position, and the Slide order in the Presentation.
The Slide list also includes navigation buttons that let you open a selected Slide directly.
The Slide list supports standard table grid behavior, such as column management, column ordering, and search.
.png)
Manage the Slide list
How to open the associated Screen Capsule
Hover over a Screen in the Slide list and select the icon ![]() that appears on the right to open the associated Screen Capsule in a new browser tab.
that appears on the right to open the associated Screen Capsule in a new browser tab.
.png)
How to add the "Last modified by" column
You can click on the Column chooser icon .png) on the right to add the Last modified by column, which is hidden by default. This column displays the name of the user who most recently edited the Slide list.
on the right to add the Last modified by column, which is hidden by default. This column displays the name of the user who most recently edited the Slide list.
.png)
Member list
The Member list shows all users associated with the selected Presentation.
How to open the Member list
To open the Member list, follow these steps:
In the Presentations area, select the checkbox next to the Presentation whose members you want to view.
Open the Member list in one of the following ways:
Select "Member list" in the top menu bar of the Presentations grid.
Right-click the selected Presentation and select "Member list" from the context menu.
.png)
The Member list opens and shows all members of the selected Presentation.
.png)
Member list actions
Chat, Email, and Delete
The Chat, Email, and Delete icons are available in the Member list in the following places:
In the top menu bar of the Member list.
.png)
.png)
When you hover over an author’s email address in the Member list.
.png)
When you right-click an author’s email address in the Member list.
.png)
Chat
The feature allows the Administrator to communicate with users in the member list of a Presentation by creating either a single chat or a group chat. The chat panel opens on the right side of the window and remains visible while the Presentation is open.
Chat availability depends on the Chat settings and User groups configured in Board.
How to use the Chat feature
To access and use the Chat feature from the Member list, follow these steps:
In the Presentations area, select the checkbox next to the Presentation that you want to manage.
Select "Member list" to open the Member list window.
.png)
In the Member list window, select the "Chat" icon. You can access the Chat icon in these three ways:
From the top menu bar.
Hovering over an author’s email address.
Right-clicking an author’s email address.
The Chat, Email, and Delete icons are available in the three places, as seen in Chat, Email, and Delete.
After selecting "Chat", a chat panel opens on the right side of the window. Choose one of these options:
If the Presentation has only one participant with author permissions, select the "+" icon to start a chat with another user. A user selection panel opens and shows all users that you can chat with.
.png)
If the Presentation has more than one participant with author permissions, select the pencil icon to edit the users selected for the chat. A user selection panel opens and shows all users that you can chat with.
.png)
In the user selection panel, select one or more users. The list that opens shows the users you can chat with in Board. The users in the list are not limited to the members of the selected Presentation.
Chat availability depends on the Chat settings and User groups configured in Board.
Check the user icon to see if a user is available. A green circle around the user icon means that the user is currently available in the Board Platform. If there is no green circle, the user is not currently available.
When you have selected one or more users to chat, select one of the following options:
Discard. Cancels your selection.
Start chatting. Starts the chat with the selected user or users.
Type your message in the box at the bottom of the chat panel.
.png)
You can start a one-on-one chat with one user or a group chat with more than one user.
The feature enables Administrators to send an email to one or more users included in the member list of a Presentation.
How to use the Email feature
To access and use the Email feature from the Member list grid, follow these steps:
In the Presentations area, select the checkbox next to the Presentation you want to send in an email.
Select "Member list" to open the Member list window.
In the Member list window, select the "Email" icon. You can access the Email icon in three ways:
From the top menu bar. To use the Email icon in the top menu bar, first select the checkbox next to the user you want to email. Then select the "Email" icon.
Hovering over an author’s email address. To email one author, hover over the author’s email address and select the Email icon. The author is already selected, so you do not need to select the checkbox.
.png)
Right-clicking an author’s email address. To email one author, right-click the author’s email address and select "Email" from the context menu. The author is already selected, so you do not need to select the checkbox.
After selecting the Email icon, the system opens the user's default email and automatically pre-fills key fields:
Recipients. The email addresses of the selected users.
Subject. The Presentation’s name.
Body. A message containing a direct link to the Presentation.
Delete
The feature allows an Administrator to remove a selected user from the Presentation’s member list, thereby revoking that user’s access to the Presentation.
Do not confuse "Delete" in the Member list with "Delete" in the Presentations interface.
"Delete" in the Member list interface removes a user from the selected Presentation’s member list. This removes the user’s access to the Presentation, but it does not delete the Presentation.
To delete the selected Presentation, use "Delete" in the Presentation’s interface.
How to use the Delete feature
To access and use the Delete feature from the Member list grid, follow these steps:
In the Presentations area, select the checkbox next to the Presentation you want to manage.
Select "Member list" to open the Member list window.
In the Member list window, select the "Delete" icon. You can access the Delete icon in three ways:
From the top menu bar. To use the Delete icon in the top menu bar, first select the checkbox next to the user you want to email. Then select the Delete icon.
Hovering over an author’s email address. To delete one author, hover over the author’s email address and select the Delete icon. The author is already selected, so you do not need to select the checkbox.
.png)
Right-clicking an author’s email address. To delete one author, right-click the author’s email address and select "Delete" from the context menu. The author is already selected, so you do not need to select the checkbox.
Presentations must have a user with author permissions
In a Presentation, at least one user must have author permissions. This rule applies to both user removal and author permission management: it is not possible to remove all users from a Presentation or revoke author access from the last remaining author.
Become an author
The Become an author feature allows an Administrator to take ownership of a Presentation by assigning author permissions to themselves. This action enables the Administrator to directly manage and edit the Presentation content, rather than only administering access or settings.
How to use Become an author
To use the Become an author feature, follow these steps:
In the Presentations area, select the checkbox next to the Presentation that you want to become an author of.
Select "Become an author" in one of the following ways:
Select "Become an author" in the top menu bar of the Presentations grid.
Right-click the selected Presentation and select "Become an author" from the context menu.
.png)
Wait for the confirmation message. The message "Successfully became author of selected presentations" appears when the action is complete.
You can now modify the selected Presentation. Board adds author permissions to your Administrator user. These author permissions are added to your existing administrative rights.
A Presentation must always have at least one author. The Become an author action helps keep author-level access available when a Presentation needs maintenance, updates, or reassignment, and no active author is available.
Author access management
Use Add author access and Remove author access to manage who can edit a Presentation.
These actions are available from the top bar of the Member list. They are also available from the context menu when you right-click a user in the Member List.
These actions are available only for users who already belong to the Presentation member list. You can grant author access to a user in the member list, or remove author access from a user who already has author permissions.
How to use Add author access and Remove author access
Use Add author access and Remove author access to manage who can edit a Presentation.
These actions are available only for users who already belong to the Presentation member list. You can grant author access to a user in the member list, or remove author access from a user who already has author permissions.
A Presentation must always have at least one author. You cannot remove author access from the last remaining author.
Manage author access
Open the Presentations area.
Select the checkbox next to the Presentation that you want to manage.
Select "Member list". The Member list window opens.
Choose one of these options:
Select the "Add author access" or "Remove author access" icon in the Member list window.
.png)
Right-click a user name in the Member list window, then select the available action.
The available action depends on the user’s current access:
Add author access. Available when the user is in the member list but does not have author access.
.png)
Remove author access. Available when the user already has author access.
.png)
Add author access
Select "Add author access" to give author permissions to a user who is already in the Presentation member list.
This action is not available when the user is not in the member list.
Remove author access
Select "Remove Author Access" to remove author permissions from a user.
When you remove author access, the user remains in the Presentation member list. You can grant author access to the user again later.
You cannot remove author access from the Presentation creator. You also cannot remove author access from the last remaining author.
Removing author access is not the same as deleting a user from the member list.
When you remove author access, the user remains in the member list without author permissions.
When you delete a user from the member list, the user is permanently removed from the Presentation member list.