You can create 6 Objects in Board PowerPoint Add-in, which are divided into 2 sections below:
Create Objects other than the Data View:
Charts
Cockpit
BubbleChart
Heatmap
Treemap
Create Objects in PowerPoint Add-in (other than a Data View)
To create an Object other than a Data View in Board PowerPoint Add-in, you can follow the Create an Object with Board Word Add-in directions and follow the Board Office Add-in Layout guide.
Create a Data View in PowerPoint Add-in
Creating a Data View Object in Board PowerPoint Add-in differs from that of Word and Excel Add-in in the following ways:
The Component Designer window opens when you click on the "Dataview" button (like the other Objects in Word Add-in). Then you can access the Layout Editor by right clicking in the design area.
The Drill down configuration and interaction occurs within this Component Designer window either after the initial Layout creation or after closing the Component Designer window, selecting the Object and clicking on "Edit" in the Board menu at the top of the application.
To configure a Layout in Board PowerPoint Add-in, follow the Board Office Add-in Layout guide.
Drill Down in the PowerPoint Add-in
The PowerPoint Add-in Drill Down is only available for a Data View. It has similar functions and follows the same rules, restrictions, and logic as the Board Platform Drill Down on a Data View, but looks different. The topics covered are the following:
Read about creating a Drill Down in a Data View in the Board Platform for more information.
The Drill Down configuration window
The Drill Down configuration window follows the same logic as the Board Platform Drill Down window, but looks different.
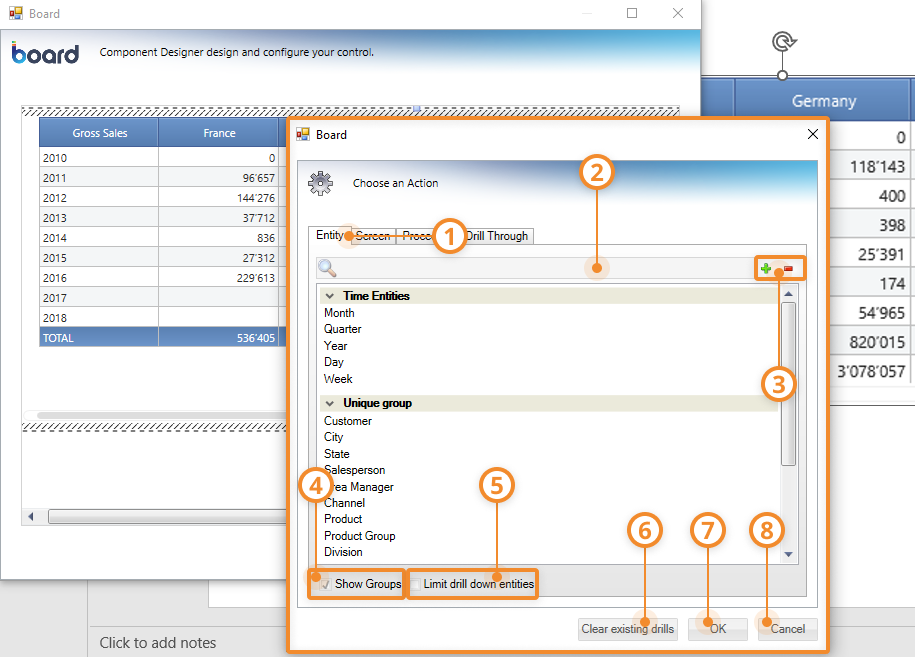
When you open the Drill Down configuration window, as explained below, you will see as follows:
Entity tab. A list of Entities to choose from to perform the drill.
A search bar. Search for a specific Entity.
Plus/minus view icons. Expand or collapse the Entity Groups. Plus expands, while minus collapses. These icons are only available when "Show Groups" is selected, as shown in the image below.

Show Groups checkbox. When selected, Entities are grouped, which can be collapsed or expanded for viewing purposes.
Limit drill down entities. Enable this button to limit the Entity possibilities to continue drill-down paths on. Click "OK" to apply the limited Entities. Enable this option only after you have selected the initial Entity you want to create a drill-down configuration on.
Clear existing drills. Clears the existing drill configurations.
OK. Applies the Entity drill.
Cancel. Closes the Drill Down configuration window without applying a drill.
Create a Drill Down on a Data View in PowerPoint Add-in
To create a Drill Down:
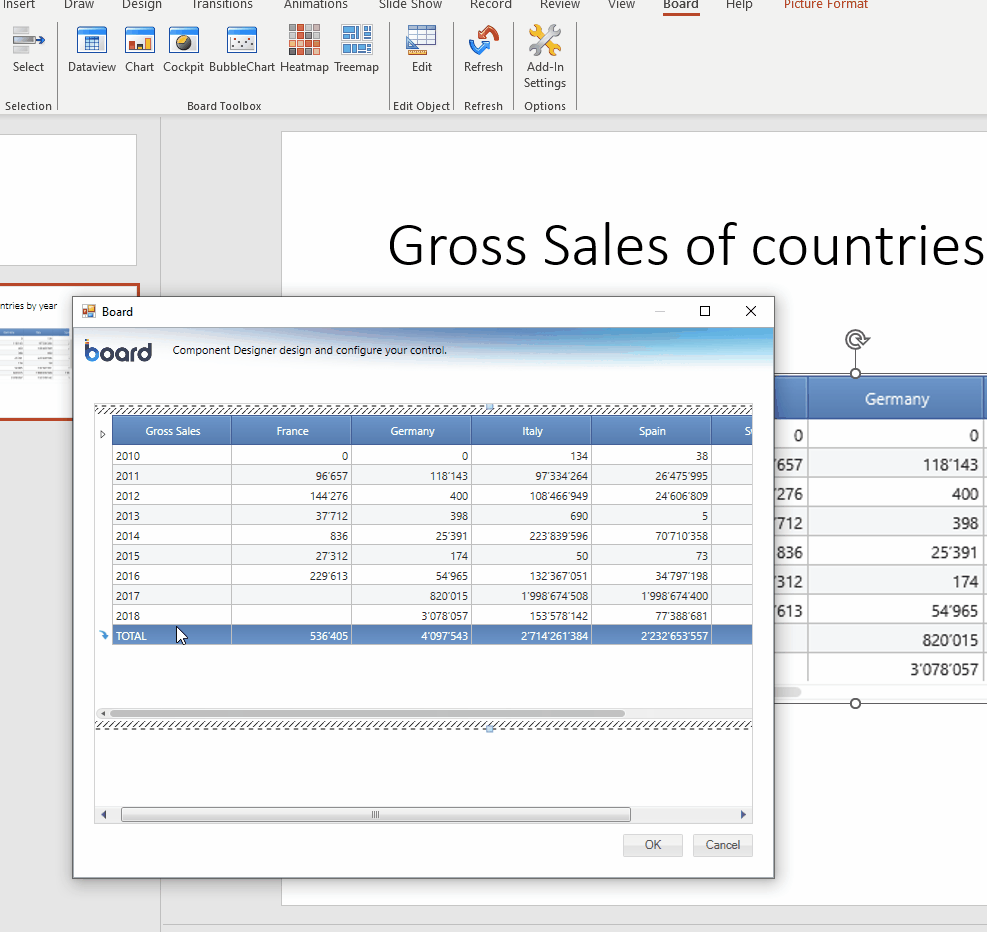
Click on the Data View Object and click on the Edit button in the Board menu at the top of the document to enter the Component Designer window.
Hover over the row of the member set By Column that you want to configure the Drill Down on and a blue arrow appears to the left of the member set By Column.
Click on the blue arrow and the Drill Down configuration window opens.
Select an Entity to drill down on from the Drill Down configuration window and click "OK", which will perform the drill on the member by column you chose to configure the drill on and a popup window will appear with the relevant drill results in a similar Data View table.
You can drill down further on the results of a Drill Down, similar to the function in the Board Platform, by following the same process described above.
Interacting with a Drill Down
Interacting with the Drill Down is similar to the Drill Down in the Board Platform with some differences described below:
Apply the same drill configuration to other members. Click on the blue arrow that appears to the left of the member by column to apply the configured Drill and view the results in a popup window.
Create a new drill configuration. To create a new Drill configuration, right click the blue arrow.
Removing a Drill Down
To remove existing drill-down configurations, open the Drill Down configuration window and click on "Clear existing drills". A dialog popup window that tells you the Drills have been cleared opens. Click "OK" to continue. Then, you must click "Cancel" on the remaining Drill Down configuration window.