This topic describes the Broadcasting section, the information it provides, and its features.
The Broadcasting section allows you to create and configure Broadcast actions that automatically send emails to a specified list of recipients on a scheduled basis. In addition, you can attach Board Presentations to the emails in one of the following formats: PDF, Word, MS Excel, and PowerPoint.
To access the Broadcasting section, access the System Administration space of the desired Platform and click on the Broadcasting tile to open the Broadcasting page.
The user must have an appropriate Board license to view and access the Broadcasting features. If you need to add this license or learn more about it, please contact your Board Customer Success Manager or Key Account Manager.
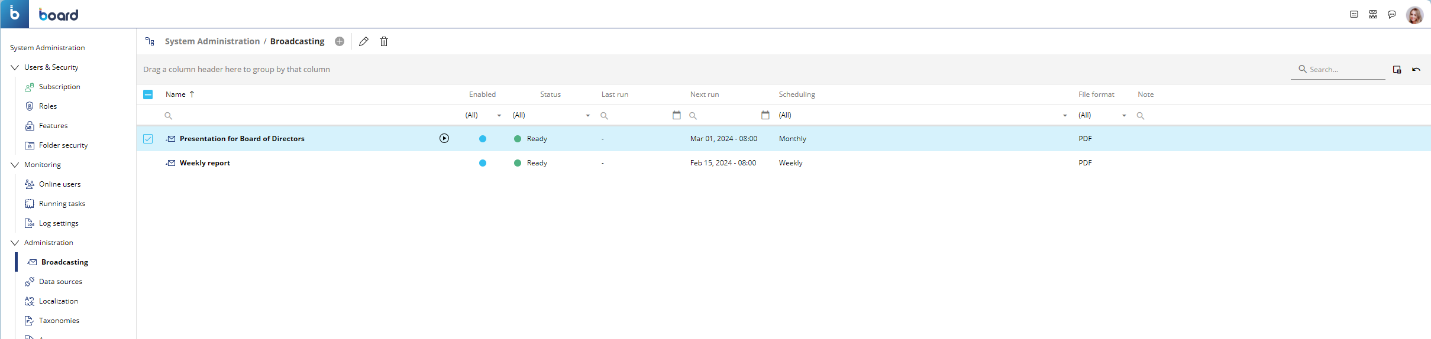
In the Broadcasting section, you can see all existing Broadcast actions and their main information: the table is sortable and searchable using the interactive header fields. You can also show or hide columns to your liking by clicking the Column chooser button in the upper right corner of the table.
The table contains the following information:
Name. This column displays the name of each Broadcast action.
Run. The "Run" button
 appears to the right of the name when you hover over the Broadcast action and allows you to immediately execute the Broadcast action by clicking it.
Created. This column displays the date and time of the creation of each Broadcast action, in the following format: Month Day, Year - HH:MM (i.e. Apr 26, 2023 - 10:00).
Enabled. This column displays a radio button that when filled blue demonstrates that the Broadcast action is enabled. When the radio button is not filled blue, the Broadcast is disabled. Broadcasts created are automatically enabled by default. To enable or disable a Broadcast, click on the radio button or click on the Broadcast and set the "Enabled" toggle.
Status. This column displays a radio button that when filled green accompanying the status "Ready" indicates that the automatic execution of a Broadcast action is enabled. If the column is blank, the automatic execution of a Broadcast action is disabled. The Broadcast action status is "Ready" and are automatically executed only if the "Enabled" toggle is activated.
Last run. This column displays the date and time of the last time each Broadcast action was executed, in the following format: Month Day, Year - HH:MM (i.e. Apr 28, 2027 - 12:00).
Next run. This column displays the date and time of the next time each Broadcast action will be executed, in the following format: Month Day, Year - HH:MM (i.e. Apr 29, 2027 - 10:00).
Scheduling. This column displays how often each Broadcast action will be executed. For example, if a column field displays "Weekly", it means that the Broadcast action will be executed every week on the configured days and time.
File format. This column displays the type of format that each Presentation will be exported to and sent to recipients as an attachment to the email.
Note. This column displays an additional note that can be added manually when editing a Broadcast action in the "Additional note" text field from the configuration panel.
The Broadcasting section is very similar to the Send To feature of the Presentations area, with the following key differences:
Not only Board users can receive a Broadcast. The recipients of a Presentation sent using a Broadcast action can be Board users, manually entered email addresses, or recipients configured through a Layout. The recipients of a Presentation sent using the "Send To" feature, on the other hand, can be only Board users.
Substitution Formulas. You can enter Substitution fFormulas in the email body of a Broadcast action, while the "Send To" feature does not support them.
Only users that have access to the System Administration area can access the Broadcasting section. The "Send To" feature, on the other hand, is available to all Board users as long as the "Deny Subscribe and Send To" feature is disabled in the associated Application Profile.
Creating a Broadcast action
To create a Broadcast action:
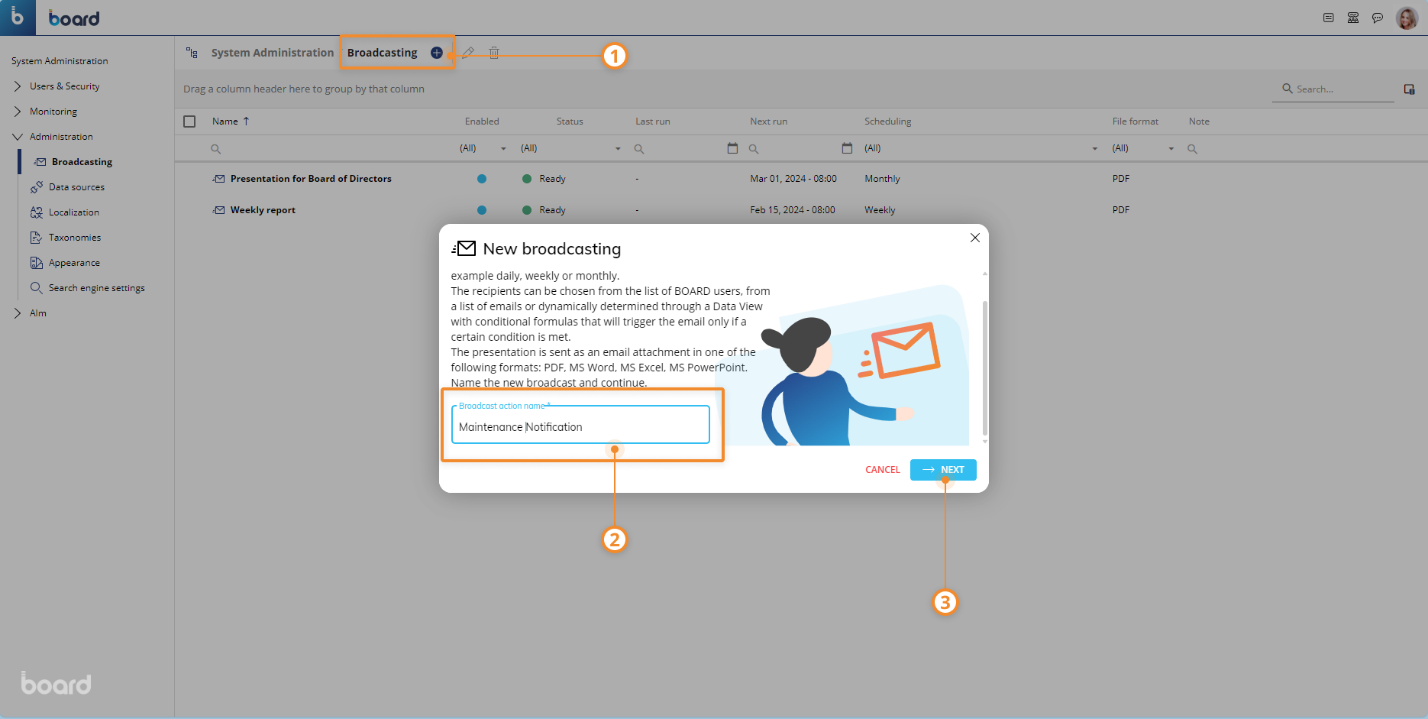
From the Broadcasting section of the desired Platform, click on the blue plus button
 next to "Broadcasting" in the upper left corner to open the Broadcast action configuration wizard
Enter the name of the Broadcast action in the "Broadcast action name" field and then click on the "Next" button to go to the next step.
Click on "Next" to proceed to the "Who", "What", and "When" sections.
Select recipients. Here you must configure the recipient list. You can click on the dropdown list above to choose one of the following recipient list configurations:
From the address book. This option allows you to send a Presentation to a list of Board users that have an email address associated with their Board account.
Click on the checkbox to the left of each desired Board user to include them in the recipient list.
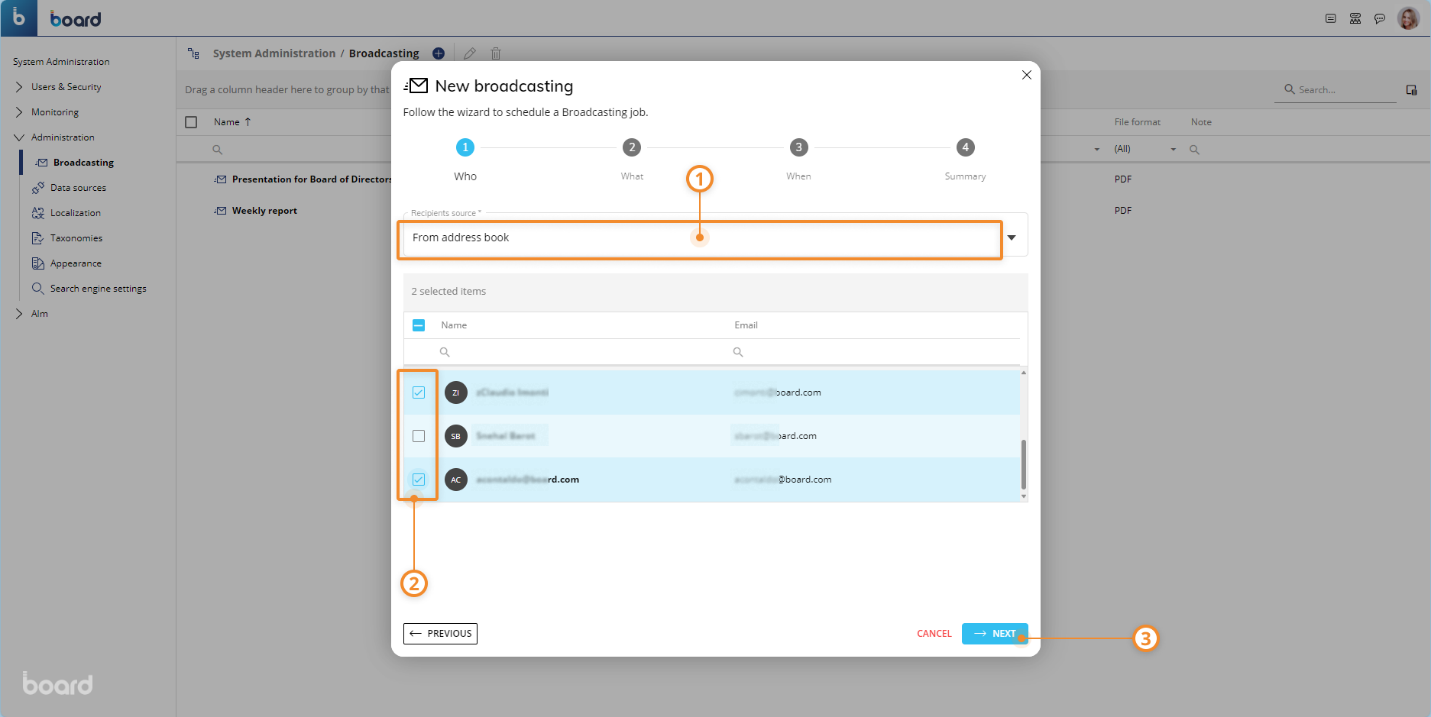
The list displays only Board users who have a valid email address associated with their account.
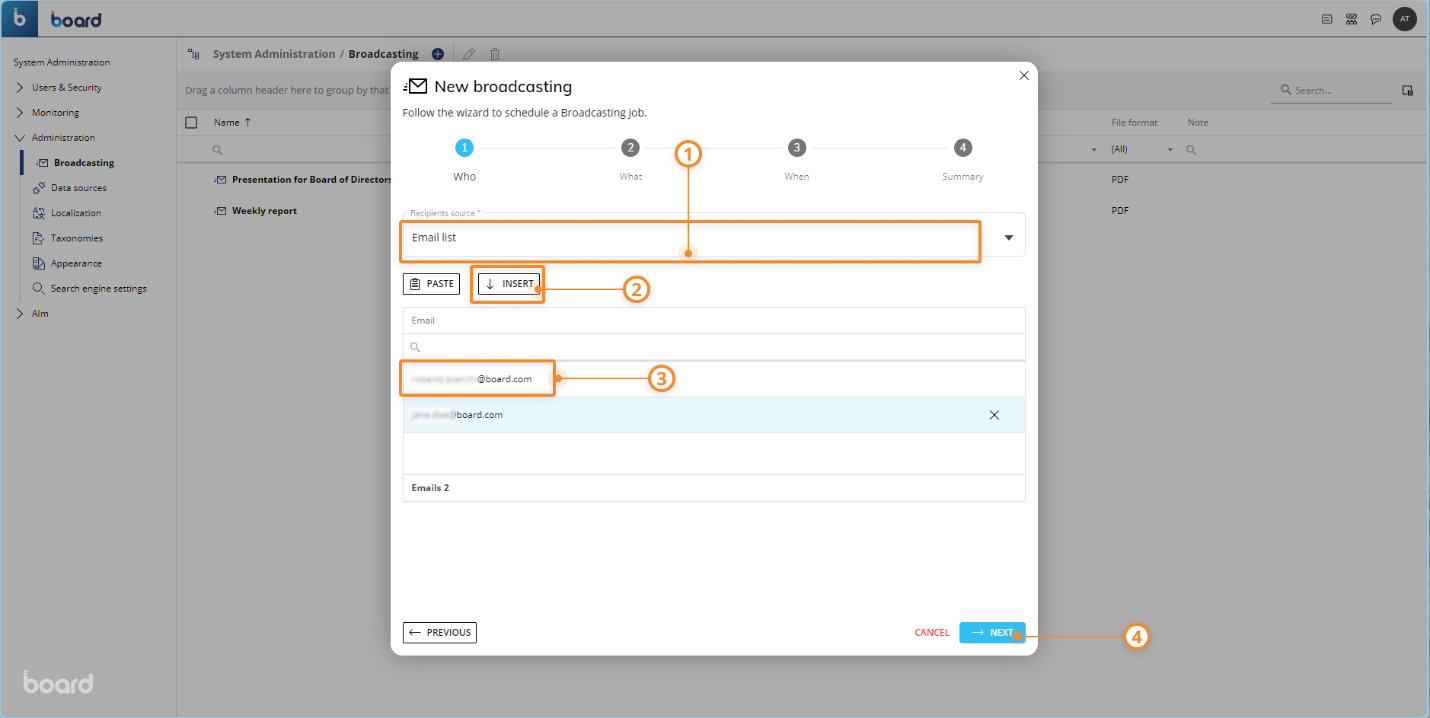
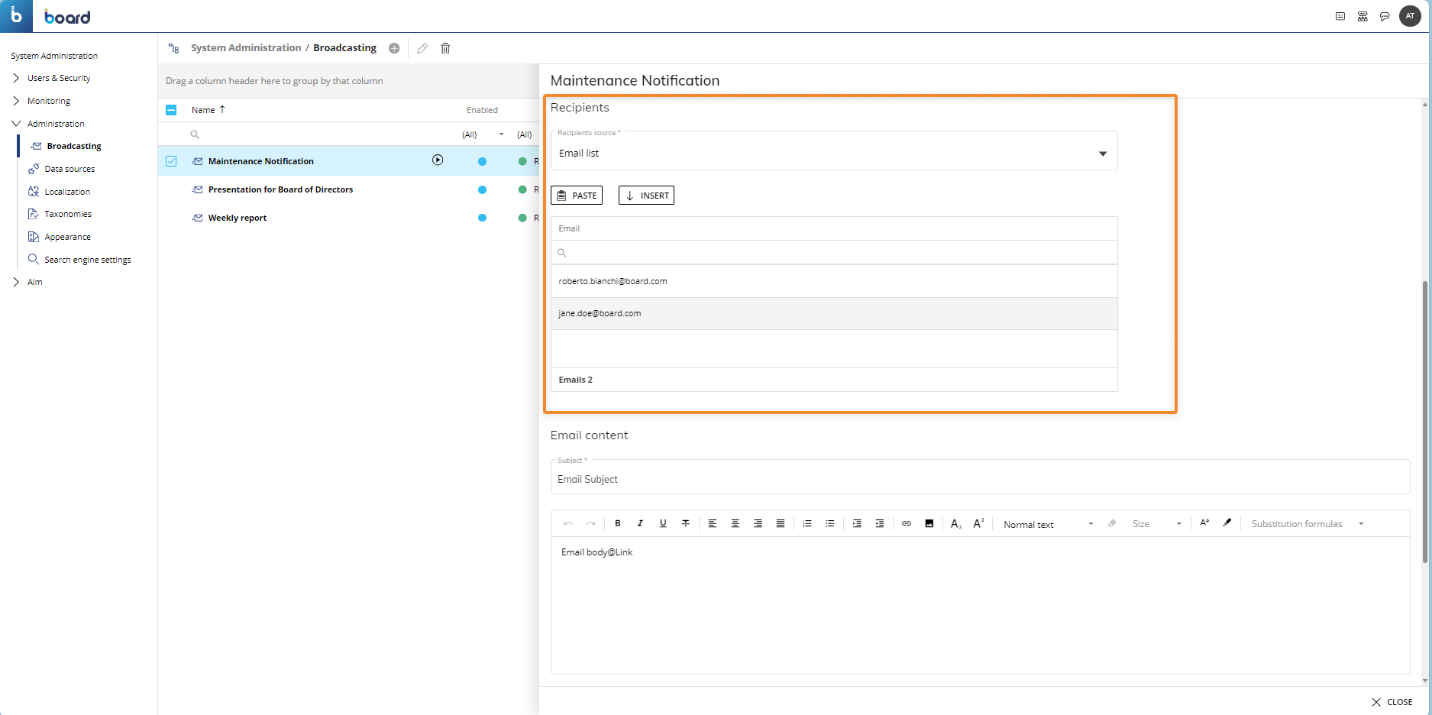
Email list. This option allows you to send a Presentation to a list of manually entered email addresses.
To add an email, click the "INSERT" button and enter an email address in the text field that opens in the list area and hit "Enter" on your keyboard. Follow the previous steps to add as many emails as you want and then click "NEXT".
You can also copy one or more email addresses to the clipboard, click somewhere on the recipient list, and then press the "PASTE" button above the list.To remove an email address from the recipient list, hover over it and click the "X" icon at the end of the row
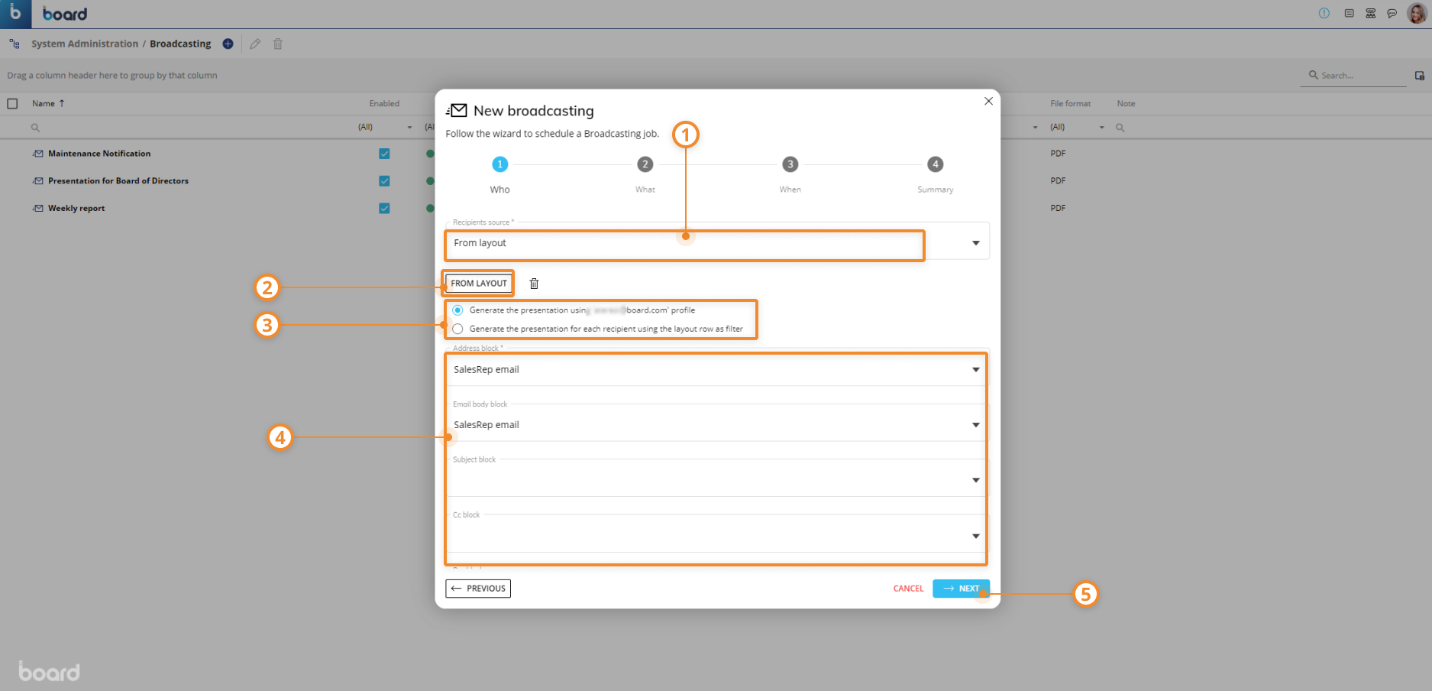
From Layout. This option allows you to configure a Board Layout to extract all information needed to compose the email message: email addresses, message bodies, and email subjects will be retrieved from the Data Blocks configured in the associated Layout. To configure this option, proceed as follows:
Enable either the "Generate the presentation using 'Administrator' profile" option to send the same Presentation to all recipients or the ”Generate the presentation for each recipient using the Layout row as filter” option and insert the desired Entity in the row axis of the Layout you will configure to filter the Presentation: the data shown in the attached Presentation will be related to each member of the Entity (as if using a Pager for each Slide of the Presentation). Therefore, each recipient will receive a Presentation with data only related to the members of the Entity set By Row that are in the active selection. See the Broadcasting Action group page for more information.
Click on the "FROM LAYOUT" button to open the Layout editor where you can configure the Layout with the Data Blocks that contain the email addresses of the recipients and, if needed, the message bodies and email subjects.
After the Layout is configured, five dropdown menus will appear below the "FROM LAYOUT" button. They are needed to configure the following options:
Address block. Here you must choose the Data Block that contains the email addresses of the recipients.
(Optional) Email body block. Here you can choose the Data Block that contains the email body messages for each recipient.
(Optional) Subject block. Here you can choose the Data Block that contains the email subject for each recipient.
(Optional) Cc block. Here you can choose the Data Block that contains the email addresses of recipients you want to send a copy of the email (CC, “carbon copy”) to, apart from the recipients identified through the "Address block" field.
(Optional) Bcc block. Here you can choose the Data Block of the configured Layout that contains the email addresses of recipients you want to send a "hidden" copy of the email (BCC, “blind carbon copy”) to without allowing other recipients to see that someone else has been sent a copy of the email.
When done, click on the "NEXT" button to go to the next step.
Configure the email content. Here you must configure the following content of the email:
Presentation. Choose the desired Presentation from the "Presentation" dropdown list.
File format. Choose one of the following formats for the attached Presentation: PDF, Word, Excel, and PowerPoint.
Subject. Enter the subject of the email in the "Subject" field. This field will be disabled if you've already configured a Layout with a Data Block containing the subject of each email.
(Optional) Message body. Enter the body of the email in the "Message body" field. This field will be disabled if you've already configured a Layout with a Data Block containing the message body of each email.
When done, click on the "NEXT" button to go to the next step.
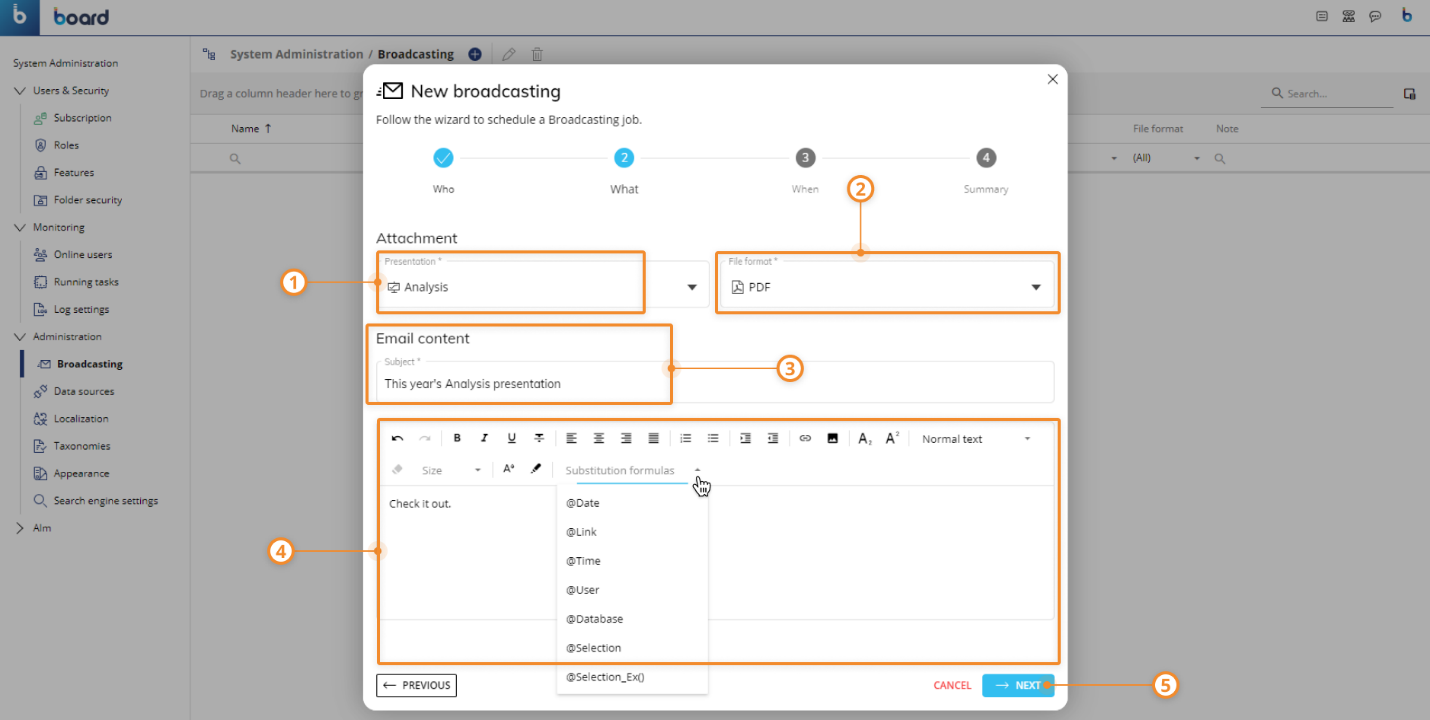
The “Subject” and "Message body" fields support Substitution Formulas and Metadata variables.
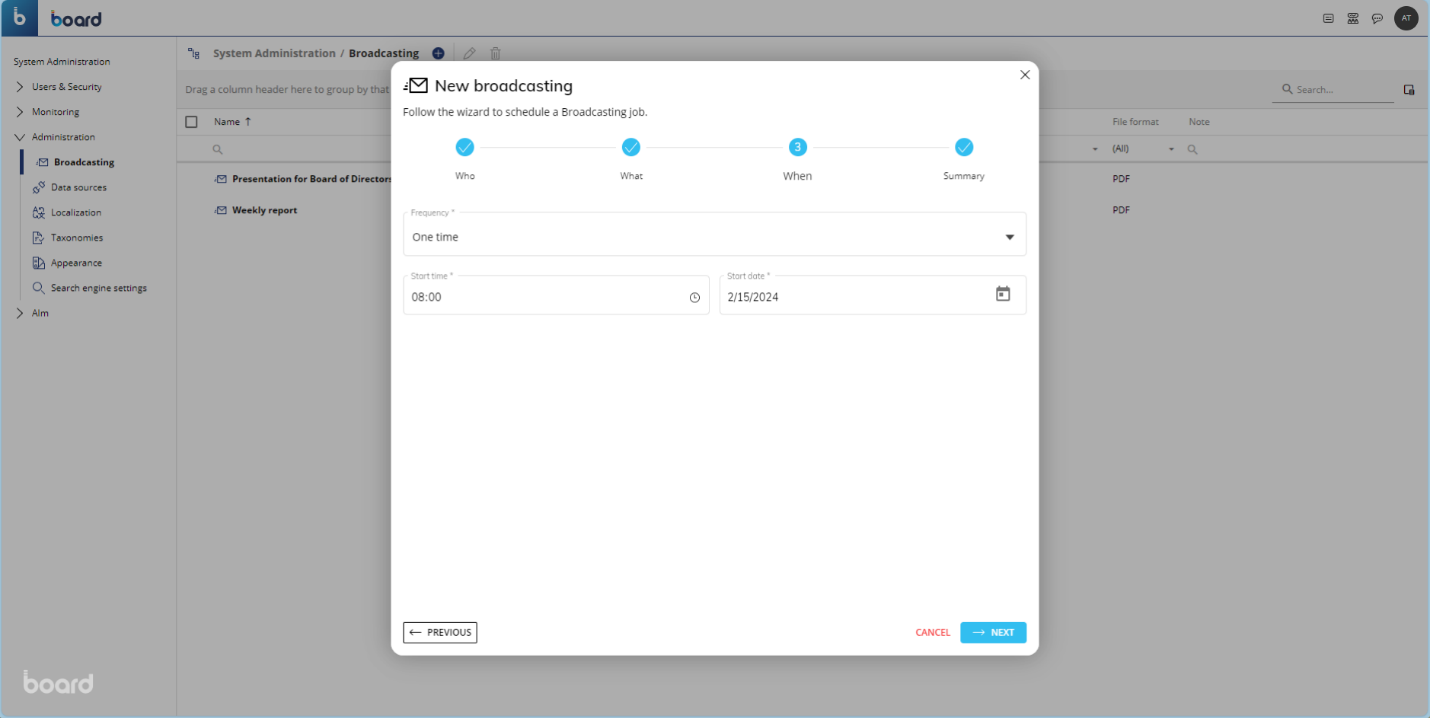
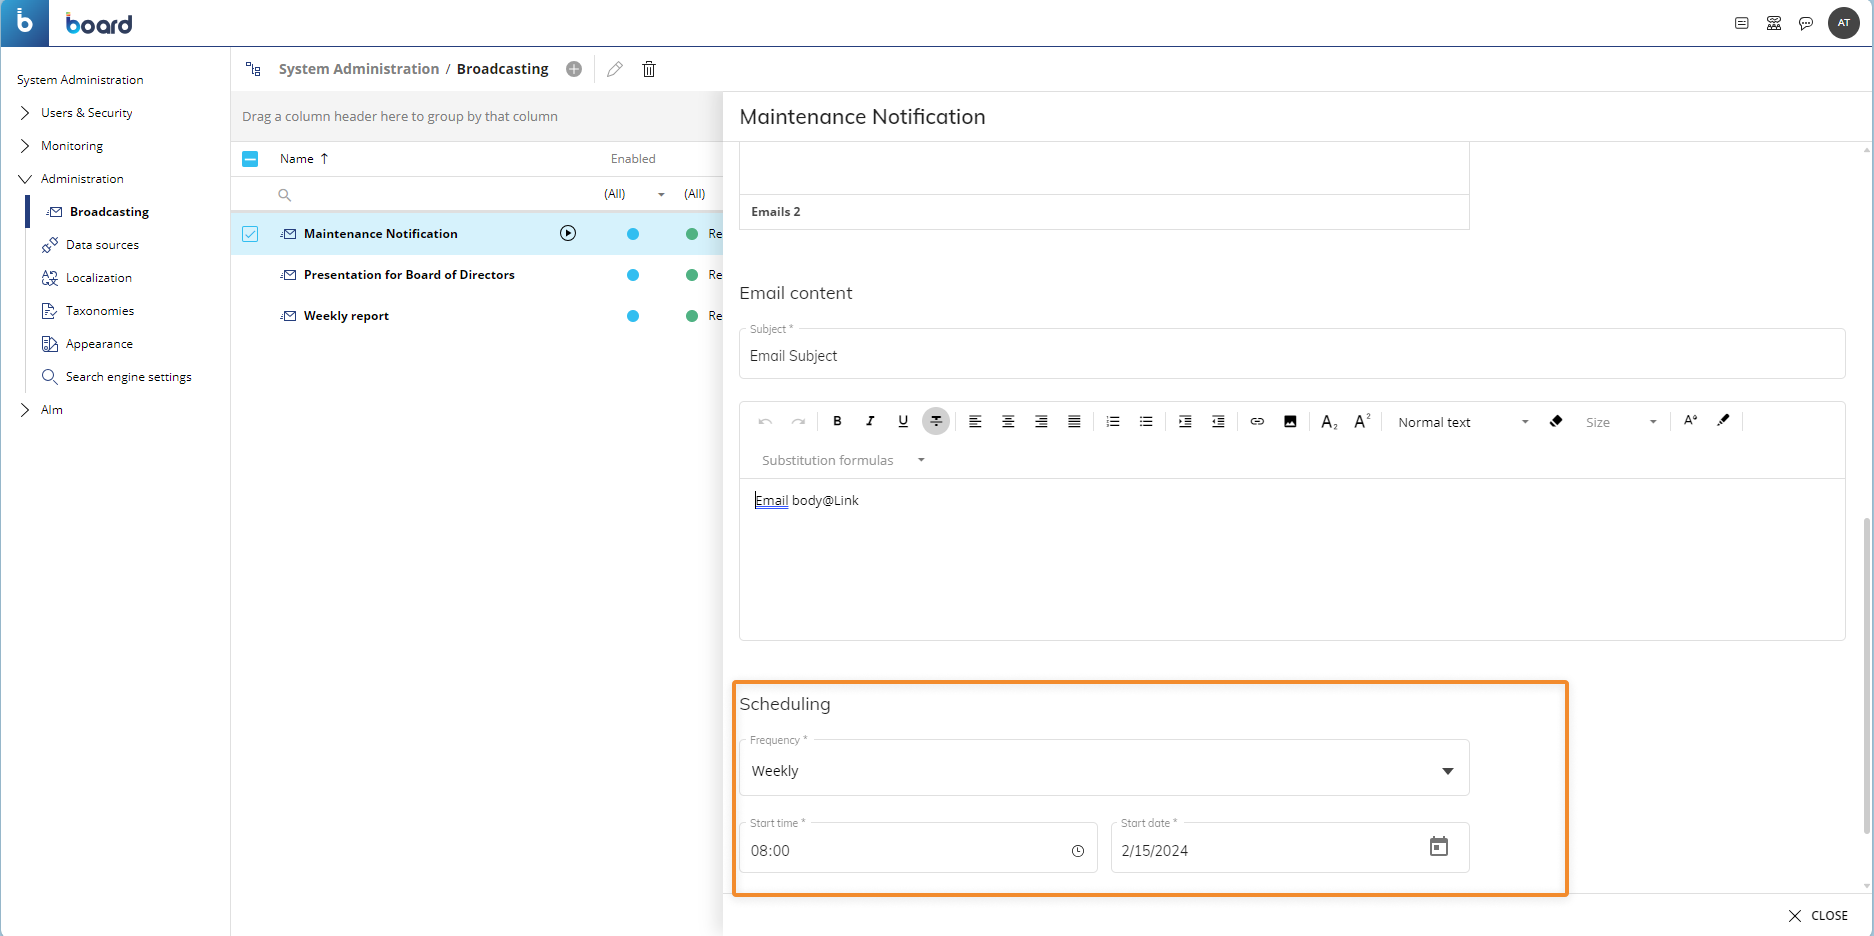
Configure the sending frequency. Here you can configure how often the Broadcast action will be executed automatically. The sending frequency options are as follows:
One time. This option allows you to automatically execute the Broadcast action only once, at a set time starting from when the Broadcast action configuration is finished. You can select a start date in which to trigger the Broadcast.
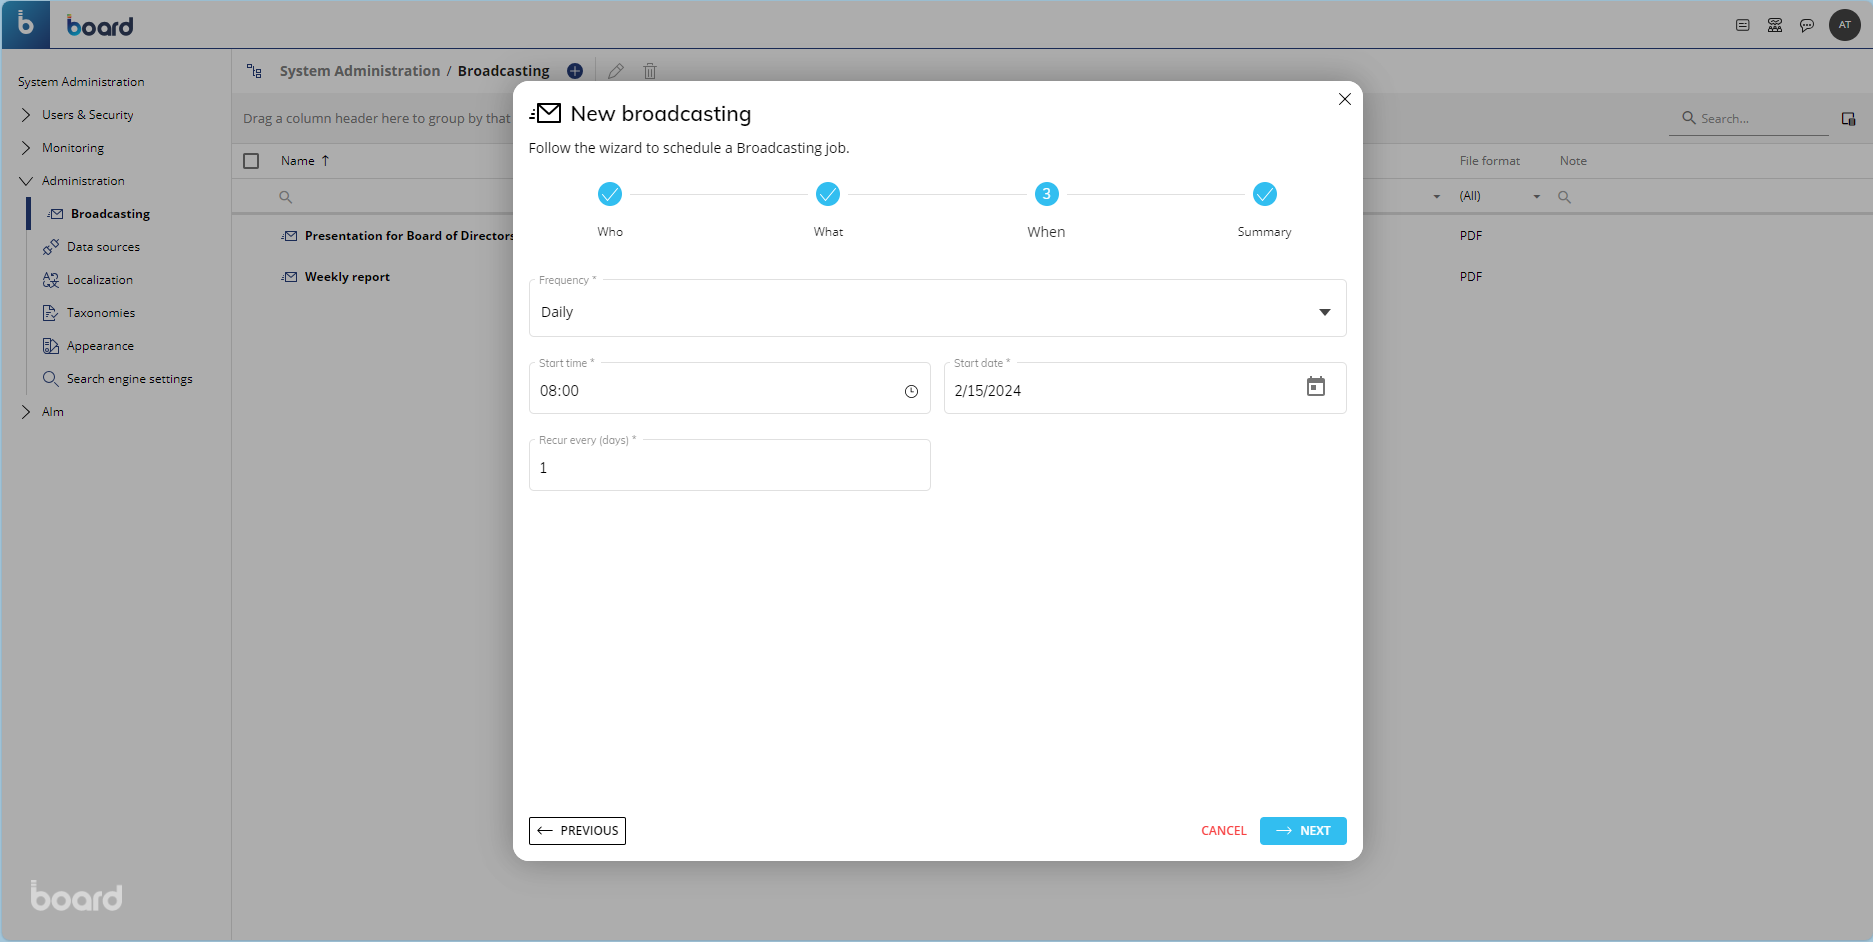
Daily. This option allows the Broadcast action to run automatically every day at a predetermined time. Enter a number in the "Recur every (days)" field to configure how often you want to execute the Broadcast action. For example, if you want to execute the Broadcast every day, you can enter "1" in the field. Otherwise, you can enter "2" if you want to execute the Broadcast action every other day, or "3" if you want to execute it every three days, etc. You can select a start date in which to trigger the Broadcast.
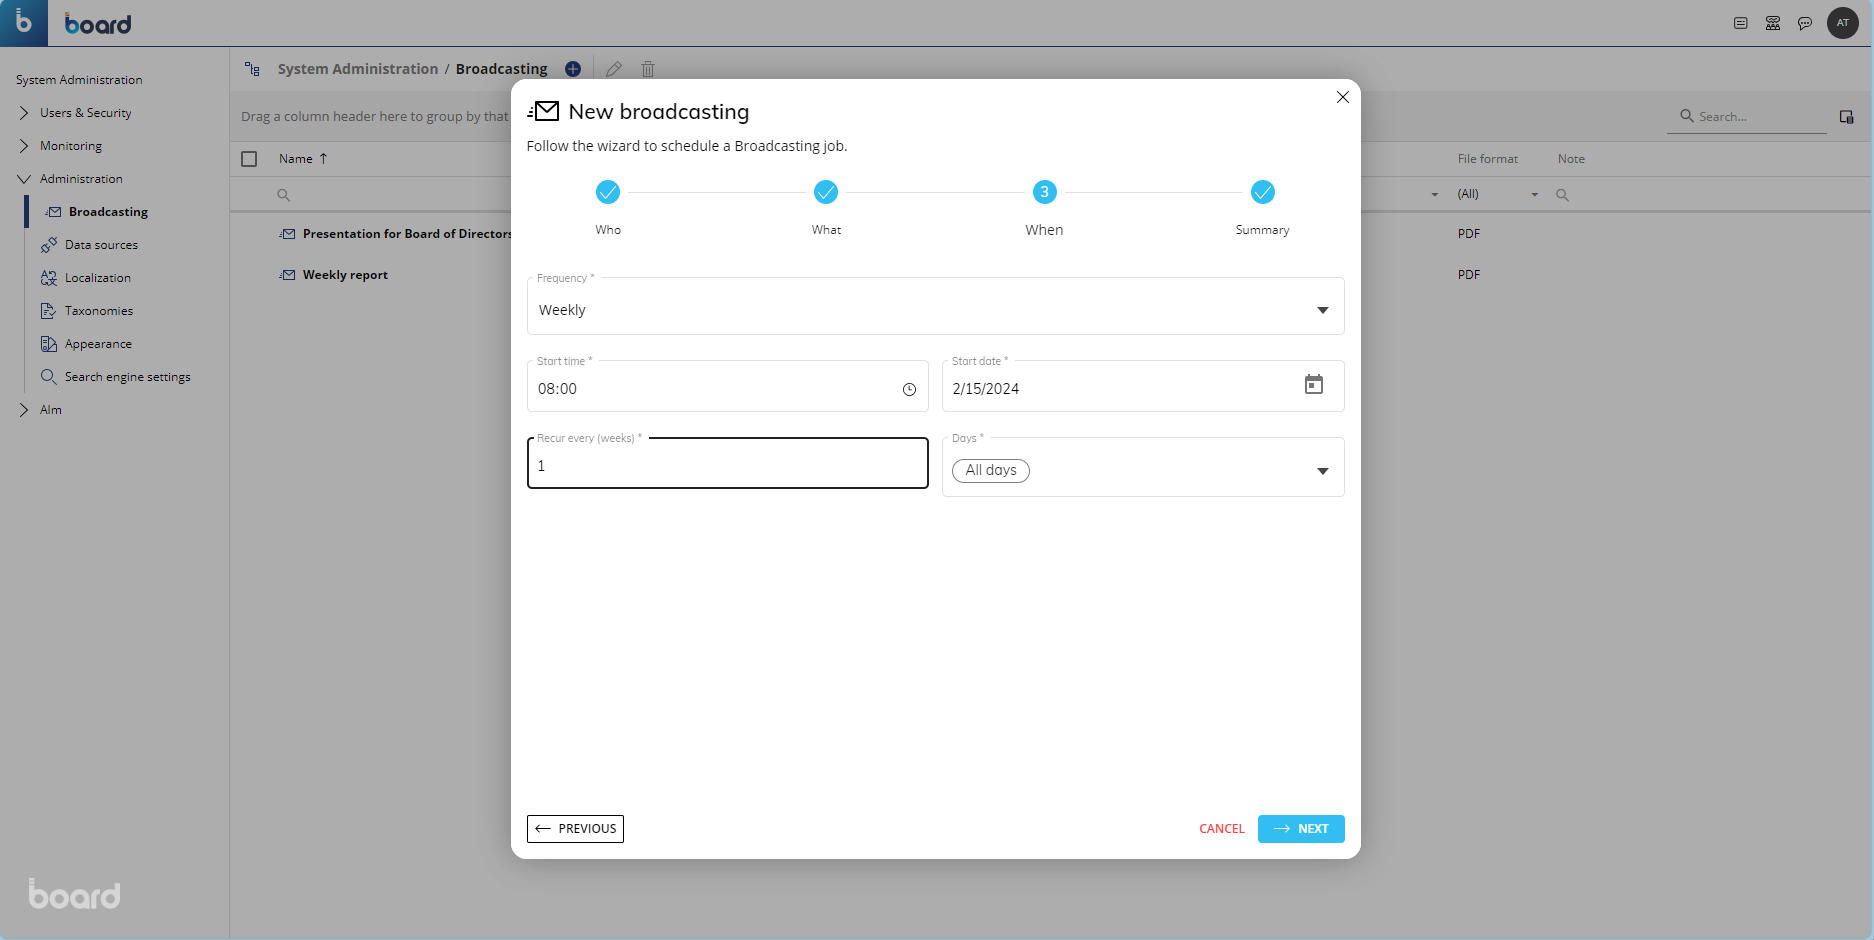
Weekly. This option allows the Broadcast action to run automatically every week at a predetermined time. Enter a number in the "Recur every (weeks)" field to configure how often you want to execute the Broadcast action (i.e. every week or every two weeks etc.) and, in the "Days" dropdown list, choose the days of the week when you want the Broadcast action to run automatically. You can select a start date in which to trigger the Broadcast.
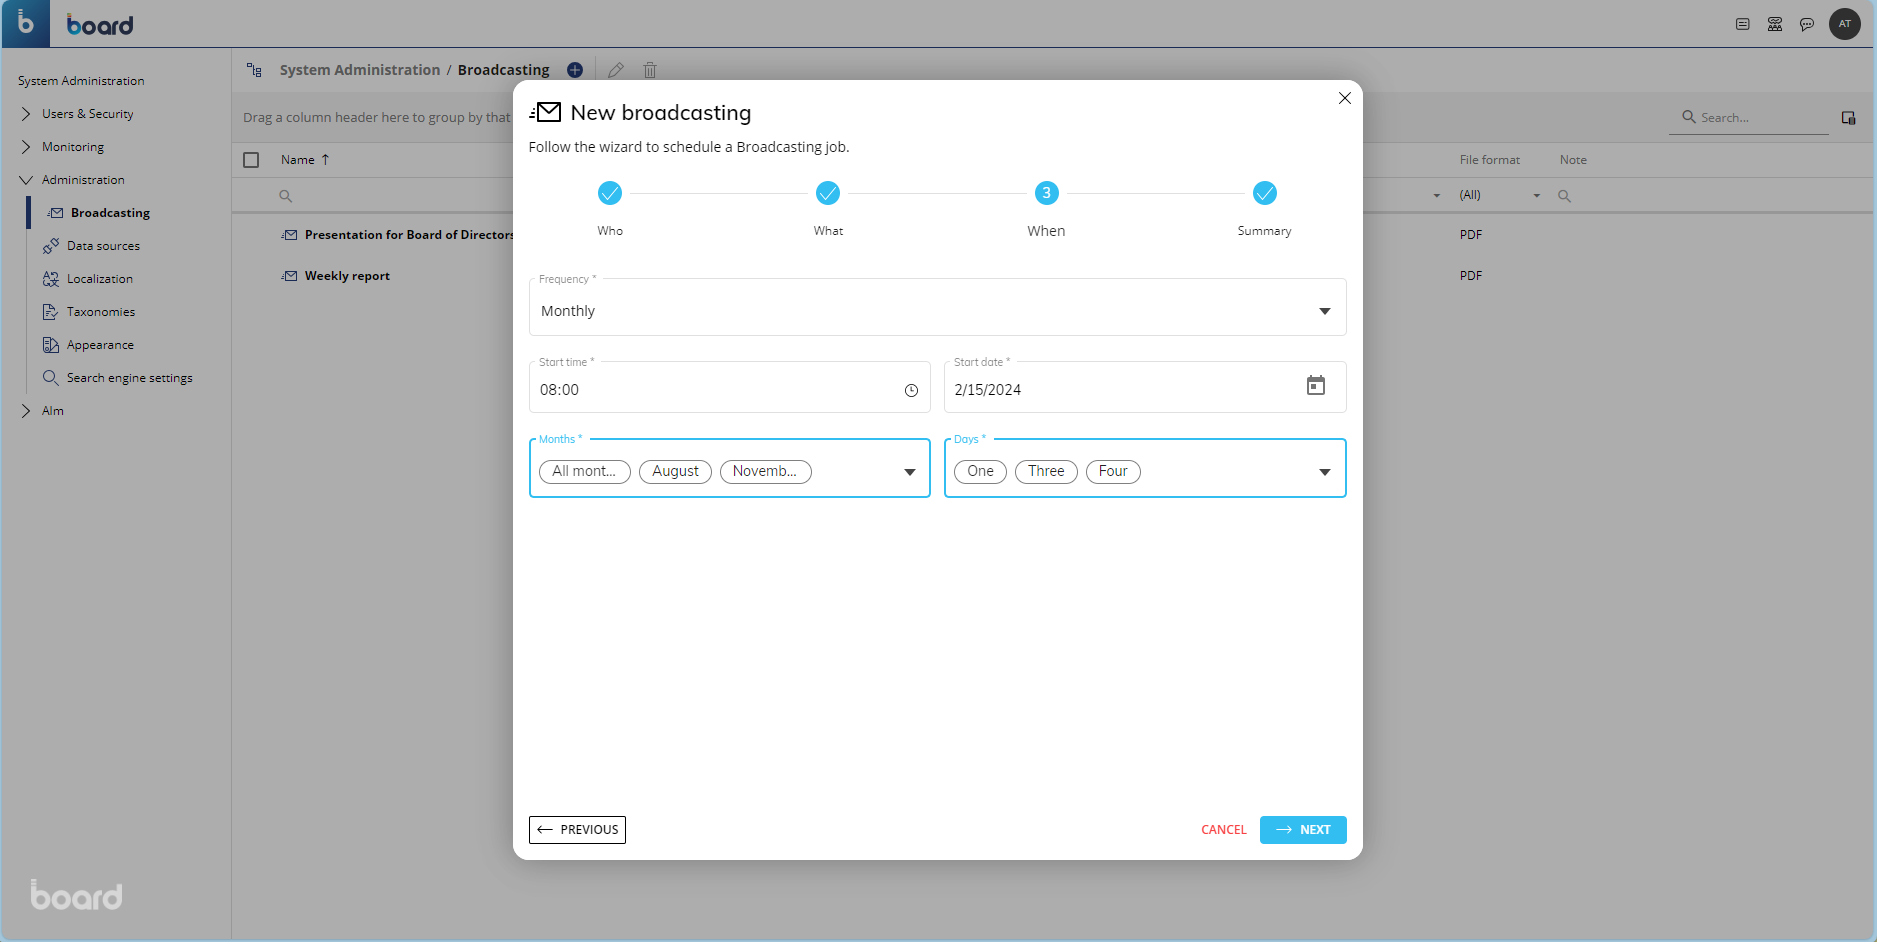
Monthly. This option allows the Broadcast action to run automatically every month at a predetermined time. You can select "All months" to execute the Broadcast action every month or choose the desired specific months. In the "Days" field, you can choose the specific days of the month when you want the Broadcast action to run automatically. You can select a start date in which to trigger the Broadcast.
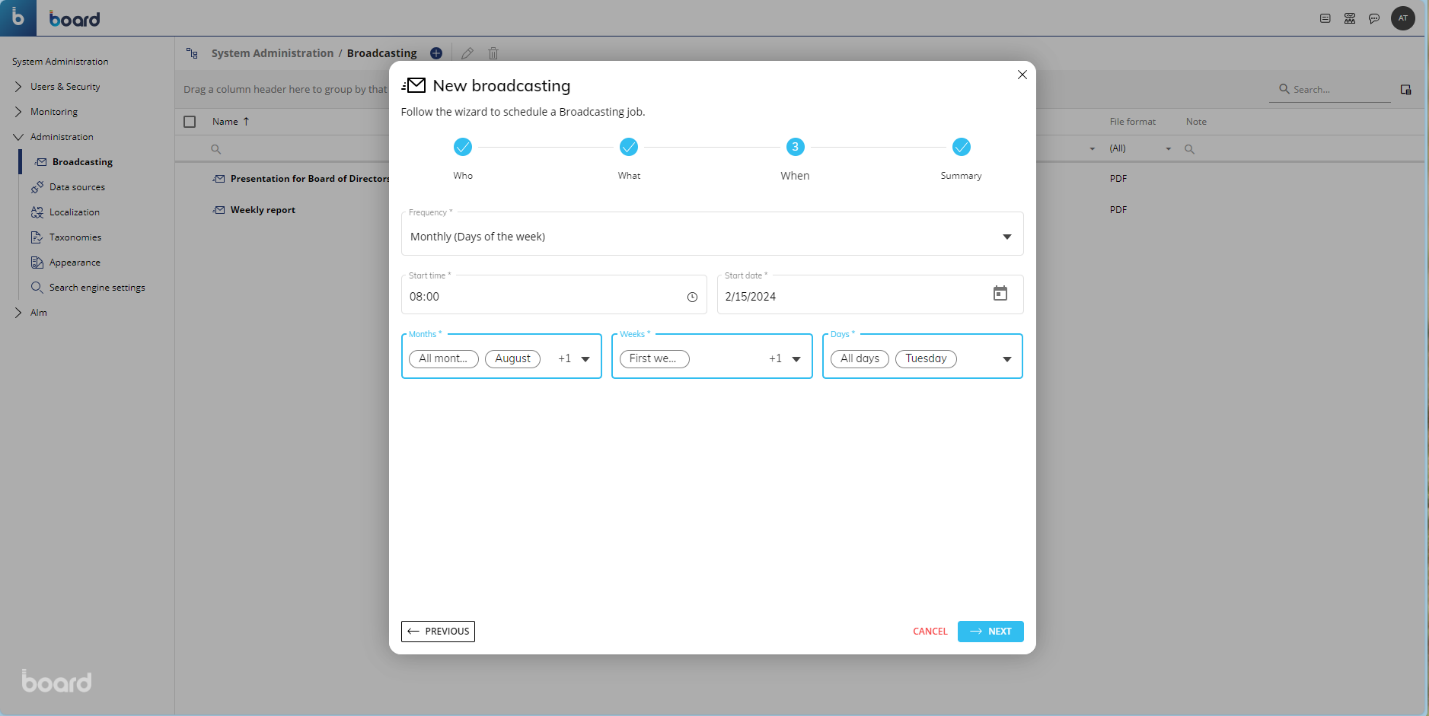
Monthly (Days of the week). This option is the same as the "Monthly" option above, with the exception that it allows you to configure the specific weeks and weekdays of the month when you want the Broadcast action to run automatically.
Save the new Broadcast action. In this final step, you can view a summary of all the configurations of the Broadcast action and click on "SAVE" to save it.
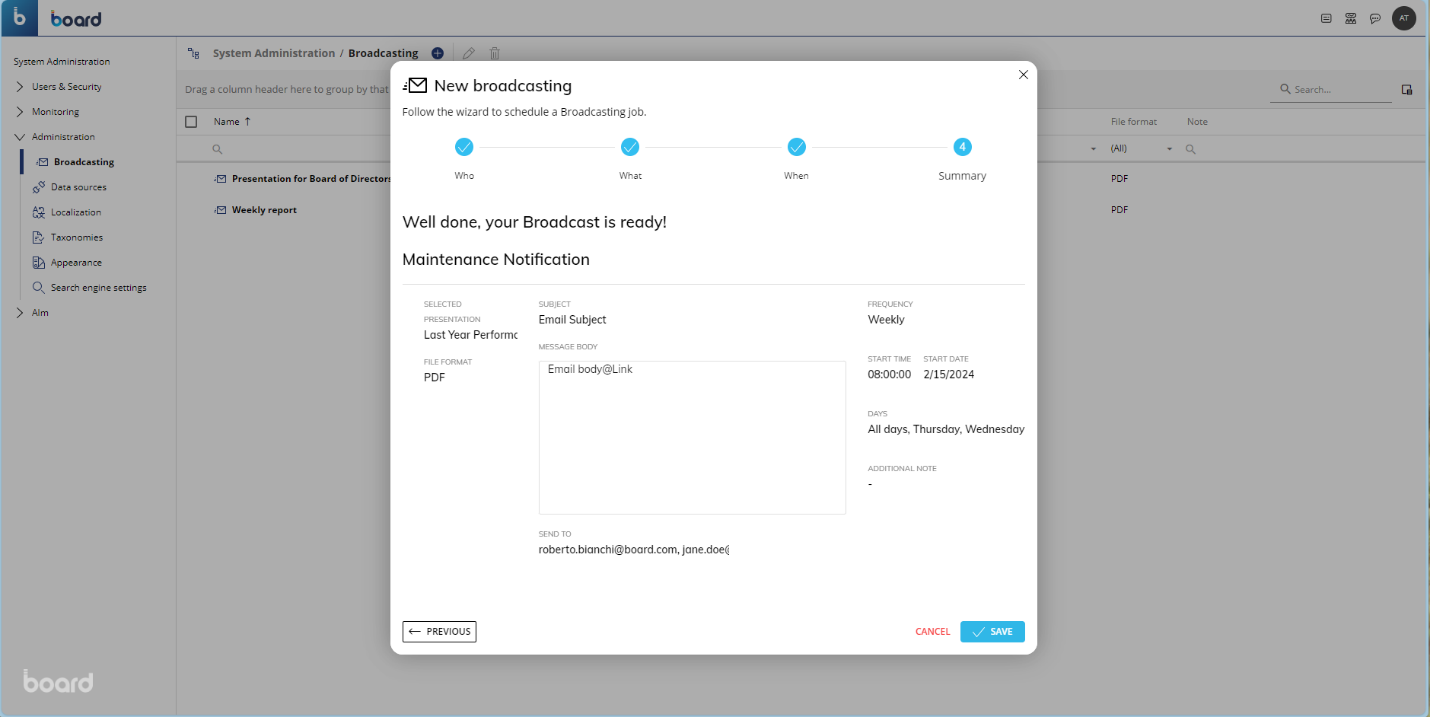
You can click on the "Who", "What", and "When" labels above if you want to go back to any of the sections to edit it.
Managing a Broadcast action
To edit a Broadcast action, select it to open the configuration panel and change the desired options as explained in the previous paragraph. The options are separated into the 5 sections:
Name & Note. At the very top, you can edit the name of the selected Broadcast action and add or edit the additional note.
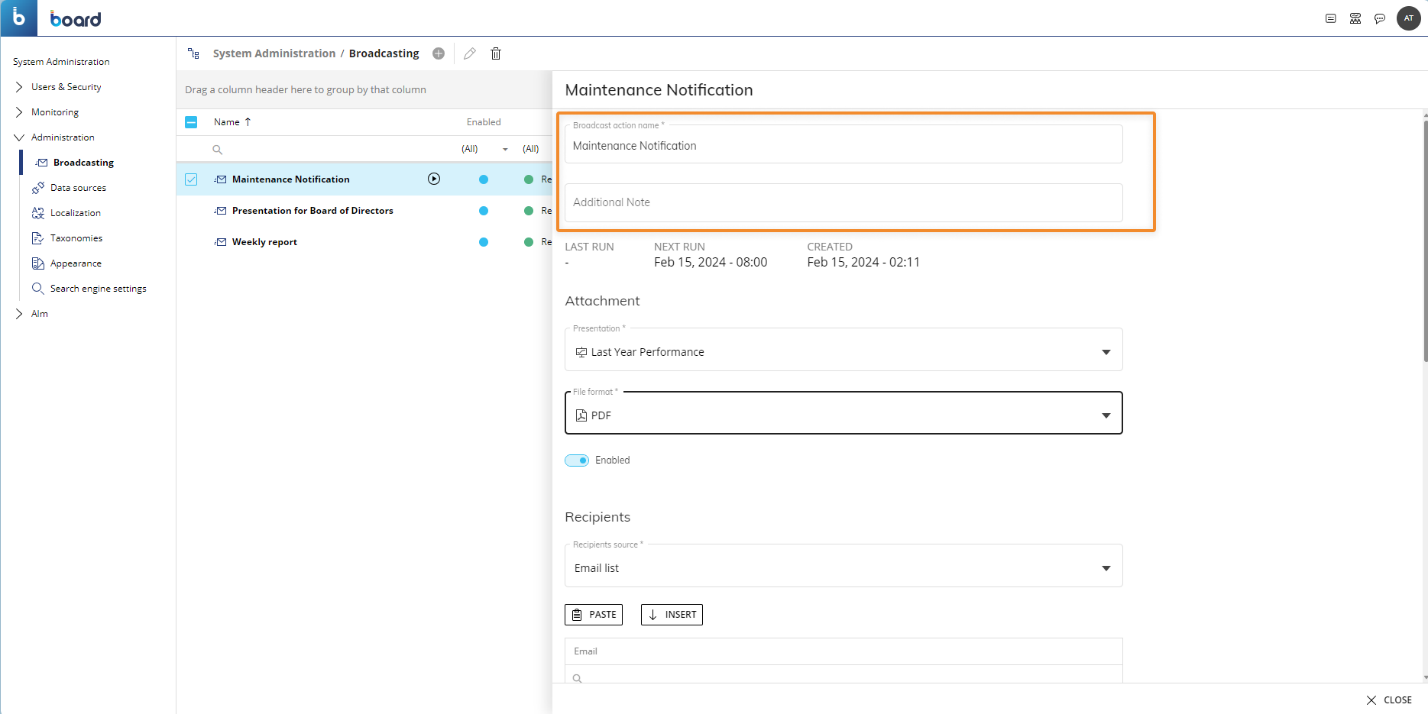
Attachment. Here, you can change the attached Presentation and its file format. You can also find the "Enabled" toggle.
If you want to send the email without a Presentation, you can select the "No attachment" option from the "Presentation" dropdown list.
Recipients. Here, you can edit the recipient list, the recipient source, and you can configure or edit a configured Layout.
Email content. Here, you can edit the email subject and message body.
Scheduling. Here, you can edit the sending frequency options of the selected Broadcast action.
Edit or delete multiple Broadcast actions
To edit one or more Broadcast actions, select one or more and click on the pencil icon above the table or right click and select "Edit". When editing more than one Broadcast action, you may only change the attached Presentation and its file format.
To delete one or more Broadcast actions, select one or more and click on the trash icon above the table.